VMware View Client allows you to access a desktop remotely as a virtual desktop. This job aid will instruct you on how to download and install the View Client and navigate the VMware View. The steps may vary depending on your operating system.
The following topics are provided:
| Table of Contents |
|---|
| Note |
|---|
| The operating system used in this job aid is Windows 7 with Internet Explorer 8 as the browser. If you use a different operating system, some of the steps may vary. |
Install View Client
Navigate to this website and download the appropriate client for your operating system as prompted.
...
Run the file that is downloaded.
Note title NOTE A User Account Control dialog box may open, asking if you want to allow the changes to be made to your computer. If this occurs, click Yes.
The VMware Horizon Client Setup Install Wizard will open and bring up the VMware end-user license agreement dialog box.
Select Agree & Install. See Figure 1..png?version=1&modificationDate=1531243244487&cacheVersion=1&api=v2)
Figure 1: VMware Horizon Client Installation Wizard dialog box- When the install completes, you will see a Success! box. Select Finish. See Figure 2.
.png?version=1&modificationDate=1531243268830&cacheVersion=1&api=v2)
Figure 2: Success! dialog box - Another box will pop up, asking you to restart your computer. Select Restart Now. See Figure 3.
.png?version=1&modificationDate=1531243290670&cacheVersion=1&api=v2)
Figure 3: Required restart box
Access VMware View
- Double-click VMware Horizon Client on your desktop.
- The VMWare Horizon Client Add Server box will open. Click + New Server. See Figure 4.
.png?version=1&modificationDate=1531243348720&cacheVersion=1&api=v2)
Figure 4: VMWare Client Add Server box. - The VMWare Server Name box will open. Enter view.health.usf.edu in the field for Connection Server name. See Figure 5.

Figure 5: VMWare Server Name box. - The VMWare Login box will open. Select HSCNET as the domain from the drop-down list. Enter your Health Forest (NetID username and password) credentials, then click Login. See Figure 6.
.png?version=1&modificationDate=1531243373467&cacheVersion=1&api=v2)
Figure 6: VMWare Client Login box.
- A dialog box will open, listing all the VMware Client Views you have access to. See Figure 7.
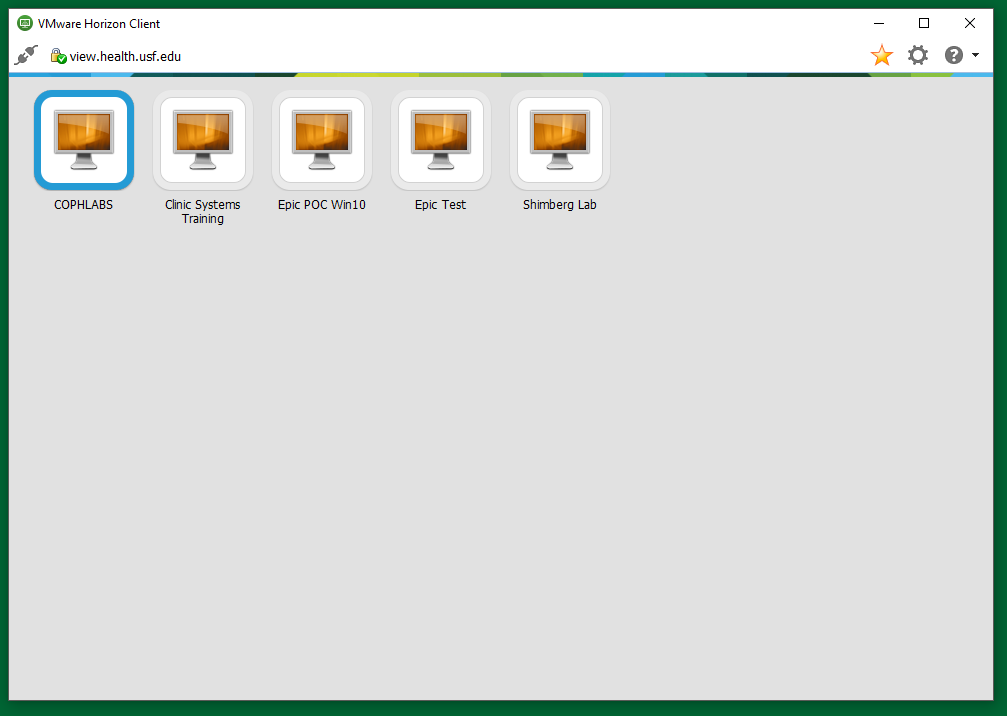
Figure 7: VMware Client View selection list. Click image to enlarge. Double-Click the VMware View you want to open to connect.
Warning PLEASE NOTE: Users utilizing PCIS Prenatal or PCIS My Care Team will no longer see a separate PCIS Icon in the selected view. You will now access the PCIS icon directly via the Clinical Desktop View.
- The VMware View you selected will launch, initialize, and open. See Figure 8.
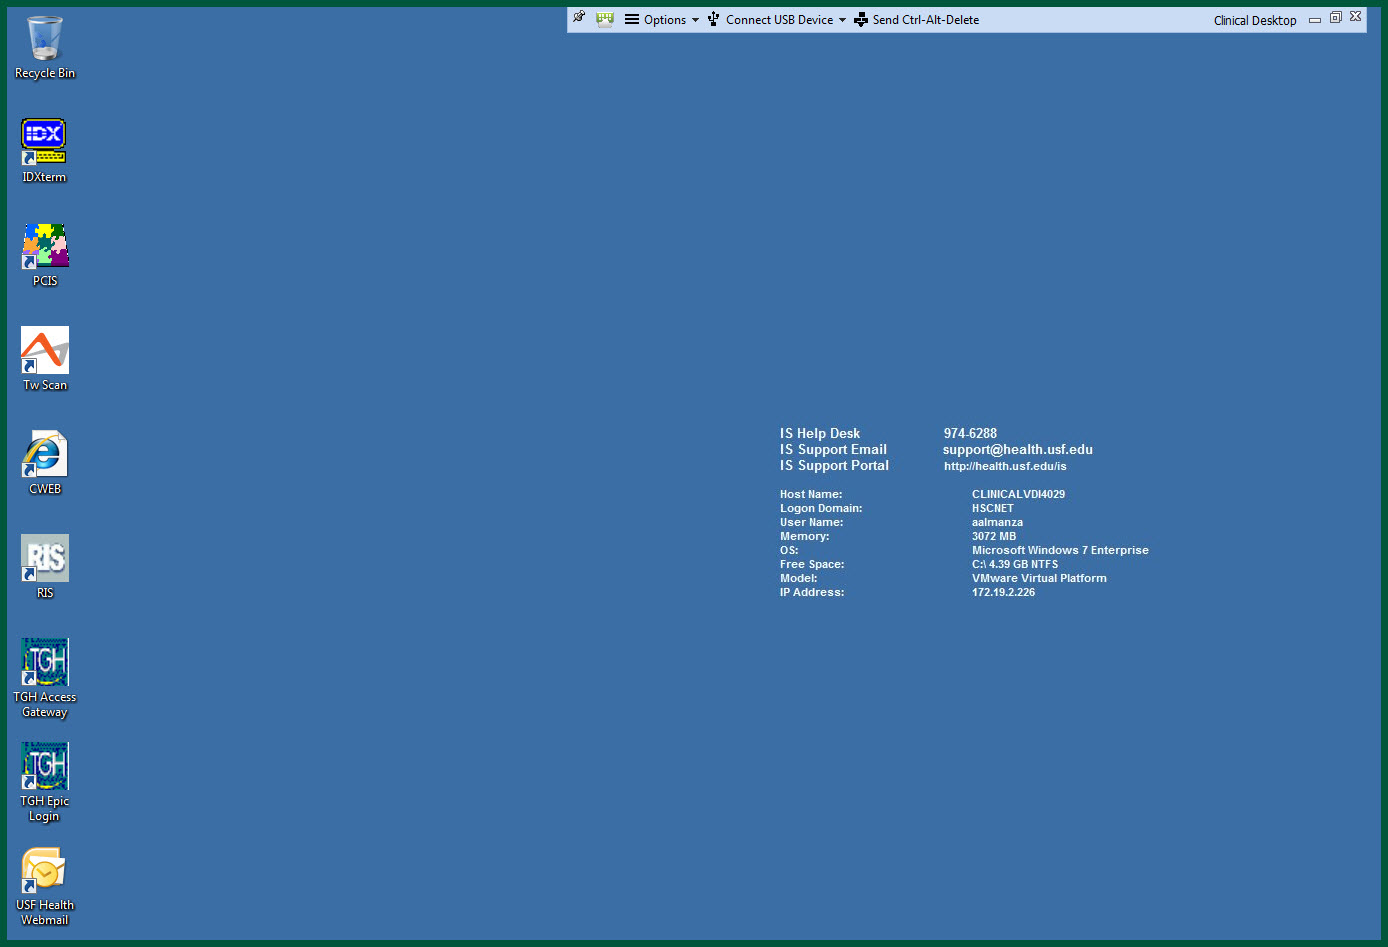
Figure 8: VMware Desktop View. Click image to enlarge.
| Tip |
|---|
| When saving in the VMware View, always save to your network drive. If you save the item to the desktop, it can only be accessed from that VMware View. |
Monitor Settings
- To extend the display to a dual monitor, select the icon that is highlighted in the figure below..
- In the display drop-down menu select All Monitors.
- To display to a single monitor, in the display drop-down menu select Fullscreen. See Figure 9.
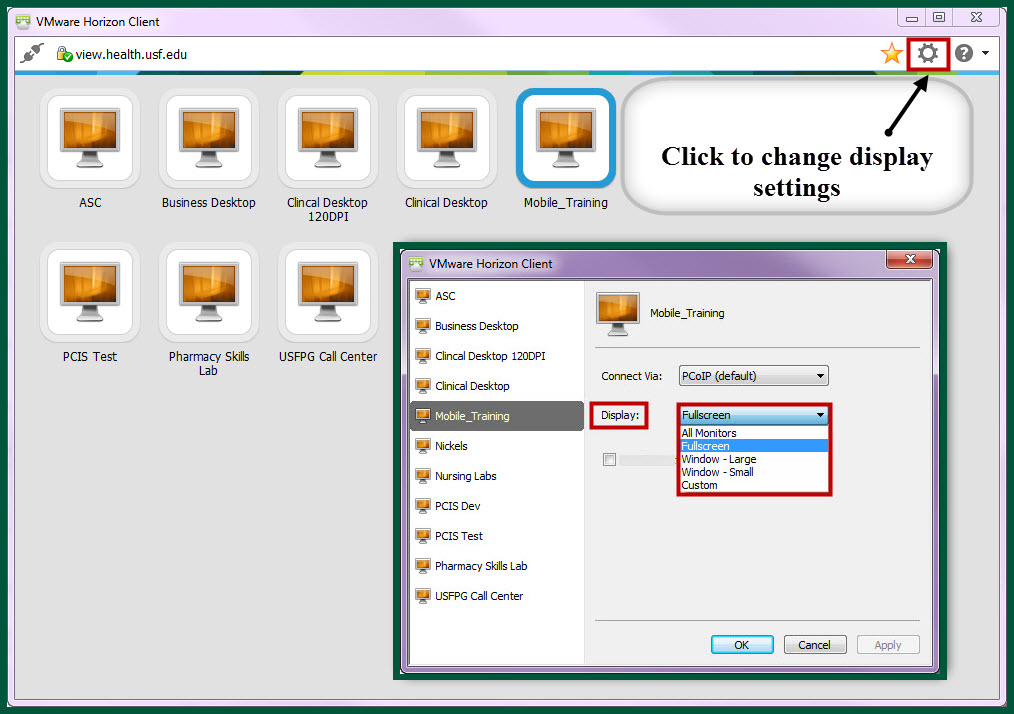
Figure 9: VMware Monitor Settings. Click image to enlarge.
Table 1 - Features available in the VMWare View Toolbar
Toolbar Options | Description |
Auto Hide | The PushPin in the toolbar represents the Auto Hide. This will allow you to hide the toolbar. |
Options | Find Details, Support and Help Information about VMware. |
Connect USB Device | Automatically or manually connect USB devices. |
Minimize ( _ ) | Minimize the VMware View desktop. |
Box ( ) | Re-size the VMware View screen. |
Exit ( X ) | Close the VMware view. This will log you out of the client. |
Table 1: VMware View toolbar.