Versions Compared

Key

  • This line was added.
  • This line was removed.
  • Formatting was changed.

Overview 

Palo Alto GlobalProtect is USF's virtual private network that is used for secure connections to on-campus resources. This guide will get you started on installing and launching Palo Alto GlobalProtect.

Note

To run GlobalProtect app 5.0, Windows endpoints require Visual C++ Redistributables 12.0.3 for Visual Studio 2013. If you have not already installed any redistributable packages on your endpoint, the GlobalProtect app installs Visual C++ Redistributables 12.0.3 automatically. If you have already installed Visual C++ Redistributables 12.0.2 or an earlier release, you must either uninstall the existing redistributable packages from your endpoint or upgrade to Visual C++ Redistributables 12.0.3 prior to installing the GlobalProtect app.

Anchor
Top
Top

Info
iconfalse
titleTable of Contents

Table of Contents
minLevel2


Installing Palo Alto GlobalProtect to your computer

  1. Click https://vpn.usf.edu
  2. Enter
your
  1. your NetID
and
  1.  and Password
  2. Click Log In
    The download page should appear (pictured below)
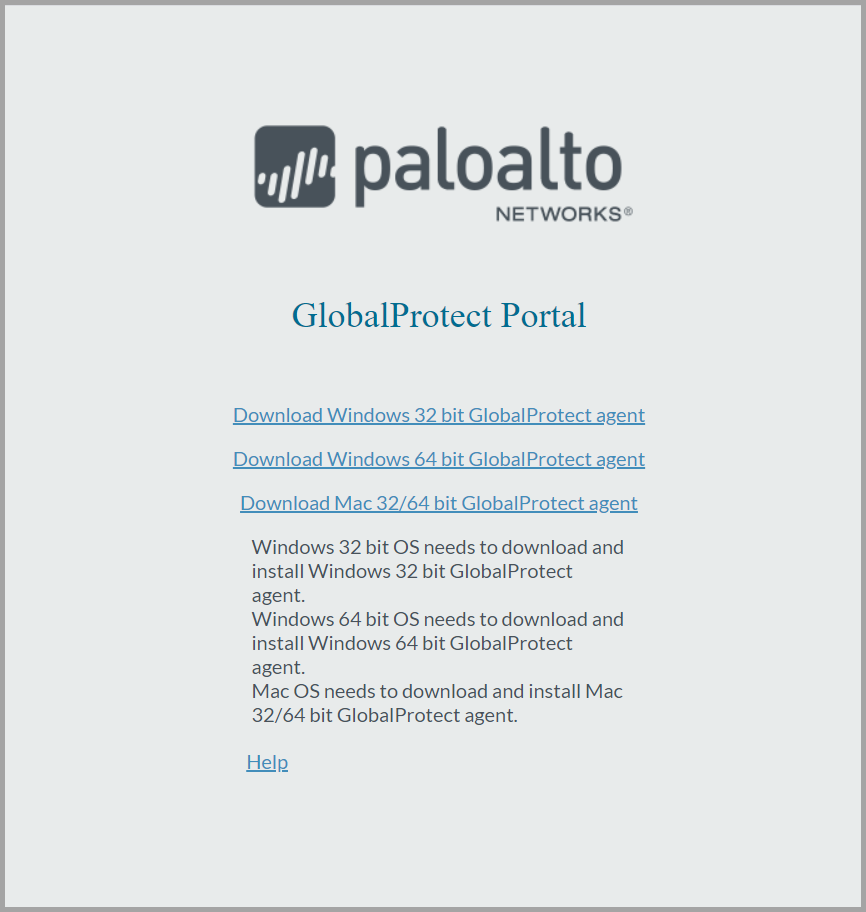
Image Removed
  1. Image Added
    (Click image to enlarge)

    Note

    If your system administrator has enabled GlobalProtect Clientless VPN access, the applications page opens after you log in to the portal (instead of the app download page). Select GlobalProtect Agent to open the download page.


  2. Select a download package compatible with

your computer
  1. your computer's operating system. 

    Note
    If you are not sure whether the operating system is 32-bit or 64-bit, ask your system administrator before you proceed. 


  2. Open the downloaded file
  3. Click Next in the GlobalProtect Setup Wizard
Click Next
  1. Click Next to accept the default installation folder (C:\Program Files\Palo
Alto Networks
  1. Alto Networks\GlobalProtect), or
click Browse
  1. click Browse to select a new location.
Click
  1. Click Next
to
  1.  to confirm installation
Close
  1. Close the wizard after installation is complete

Back to top

Launching Palo Alto GlobalProtect

  1. Click on
the
  1. the carrot
in
  1.  in the taskbar (pictured below)
Image Removed
  1. Image Added
    (Click image to enlarge)
  2. Click
the
  1. the globe
icon
  1.  icon (pictured above)
    The Palo Alto GlobalProtect status panel
will open
  1. will open
  2. Type vpn.usf.edu (pictured below)
Image Removed
  1. Image Added
    (Click image to enlarge)
  2. Click the Connect button
  3. Enter your
NetID and Password
  1.  NetID and Password (pictured below)
Image Removed
  1. Image Added
    (Click image to enlarge)
  2. Click the Sign In button

Back to top

AnchorTopTop Info
iconfalse
titleTable of Contents
Table of ContentsminLevel2