Structuring your user guideUsing headings- Highlight text you want to apply the heading to
- Click the paragraph drop down (see image below)
 - Choose your heading (paragraph, Heading 1, Heading 3)
| Info |
|---|
| title | Heading Best Practices |
|---|
| - Paragraph: Used for all instructional tasks and for tips, notes, and warnings
- Heading 1: Used for major categories/headings in your user guide (i.e. 'Scheduling a meeting')
- Heading 3: Used for subcategories or subheadings in your user guide (i.e. 'Scheduling a one time meeting' or 'Scheduling a recurring meeting')
|
Creating links to the Top of Page Anchor
- Type 'Back to top' at the end of each section
- Highlight the Back to top text
- Click the Insert Link button (see image below)
- Click Advanced from the menu on the left
- Type #Top
- Click Insert
| Info |
|---|
| title | Section Best Practices |
|---|
| - Back to top should appear at the end of each section (Heading 1 and Heading 3) so users have easy access to the TOC.
- Check that your return to top links are working by using preview mode (see Final Check)
|
Writing step-by-step instructions- Click the Numbered List button (see image below)
- Write instructions
- Bold and capitalize the Name of buttons and other options that the user is instructed to click/select
| Info |
|---|
| title | Writing Instructions Best Practices |
|---|
| - Instructions throughout the user guide must start with a verb and be concise and succinct
- Draw attention to buttons or clickables by using directionals (i.e. upper left, lower right, etc.) or pictures
- Images should appear under the step that refers to the and "(see image below)" should be written in instructions
|
Adding a tips, notes, or warnings macro- Click on the Plus Sign drop down (see image below)
- Click the Other Macros option
- Type tip, note, or warnings into the search bar
- Select the macro from the results
- Type the title of the tip, warning, or note
- Click Insert
- Type information within the tip, warning, or note space
Editing a tips, notes, or warnings macro- Click the icon beside the title of the tip, note, or warning
- Click the Edit button
- Slick the Save button when done
Removing a tips, notes, or warnings macro- Click the icon beside the title of the tip, note, or warning
- Click the Remove button
| Info |
|---|
| title | Tips, Notes, and Warnings Best Practices |
|---|
| - Tips: Use this macro for helpful troubleshooting tips
- Notes: Use this macro for reminders of important information that users often overlook
- Warnings: Use this macro to warn users of actions that can lead to poor results
|
Using pictures in a user guideInserting pictures- Click the Insert Files button (see image below)
- Click the Upload Files button
- Upload your .png or .jpg
- Click the Insert button
- Click the Border button
| Info |
|---|
| - Be consistent with how you draw attention to things in a picture. If you use red rectangles (recommended), use them throughout your pictures
- Do not include more than 2 callouts in a picture. This can cause confusion with your end user, and they won't know which action to perform first
|
Sizing images in Confluence- Click the image
- Do one of the following:
- Adjust the pixel width in the text box to the left
- Click on one of the sizing buttons located between the text box and the original button
| Info |
|---|
| - Size images so that they don't take up the whole page but users can also see what you are referring to without squinting
- Images should be sized no larger than 600px
|
Adding alt text to pictures- Click on the image
- Click the Properties button
- Click on Titles located on the left hand of the pop up/modal
- Fill out Titles and Alt Text with a short description
- Click the Save button
| Info |
|---|
| title | Images Best Practices |
|---|
| - Draw attention to the button or clickable by framing it with a red box (refer to the images in this Style Guide)
|
Finishing your user guideMaking your Table of Contents- Place your cursor next to your first Heading 1 title
- Click on the Plus Sign drop down (see image below)
- Click the Other Macros option
- Click on the Anchor macro
- Type the name of your anchor (i.e. Topic1)
- Repeat steps 1-5 for the remainder of your Heading 1 and Heading 3 titles
- Type your Heading 1 and Heading 3 titles in the Table of Contents space
- Highlight the first title
- Click the Insert Link button (see image below)
- Click Advanced from the menu on the left
- Type # and the name of the anchor you made for that title (i.e. #Topic1)
- Click Insert
- Repeat steps 7-12 for the remainder of your titles
| Info |
|---|
| title | Anchor Best Practices |
|---|
| - Anchor names should be short and unique from one another
- Anchor names must be typed the same way they appear on the anchor when creating links
|
|


 Connect Tableau to Power BI Datasets - Visual BI Solutions
 How to Use Power BI Datasets in Tableau | Senturus
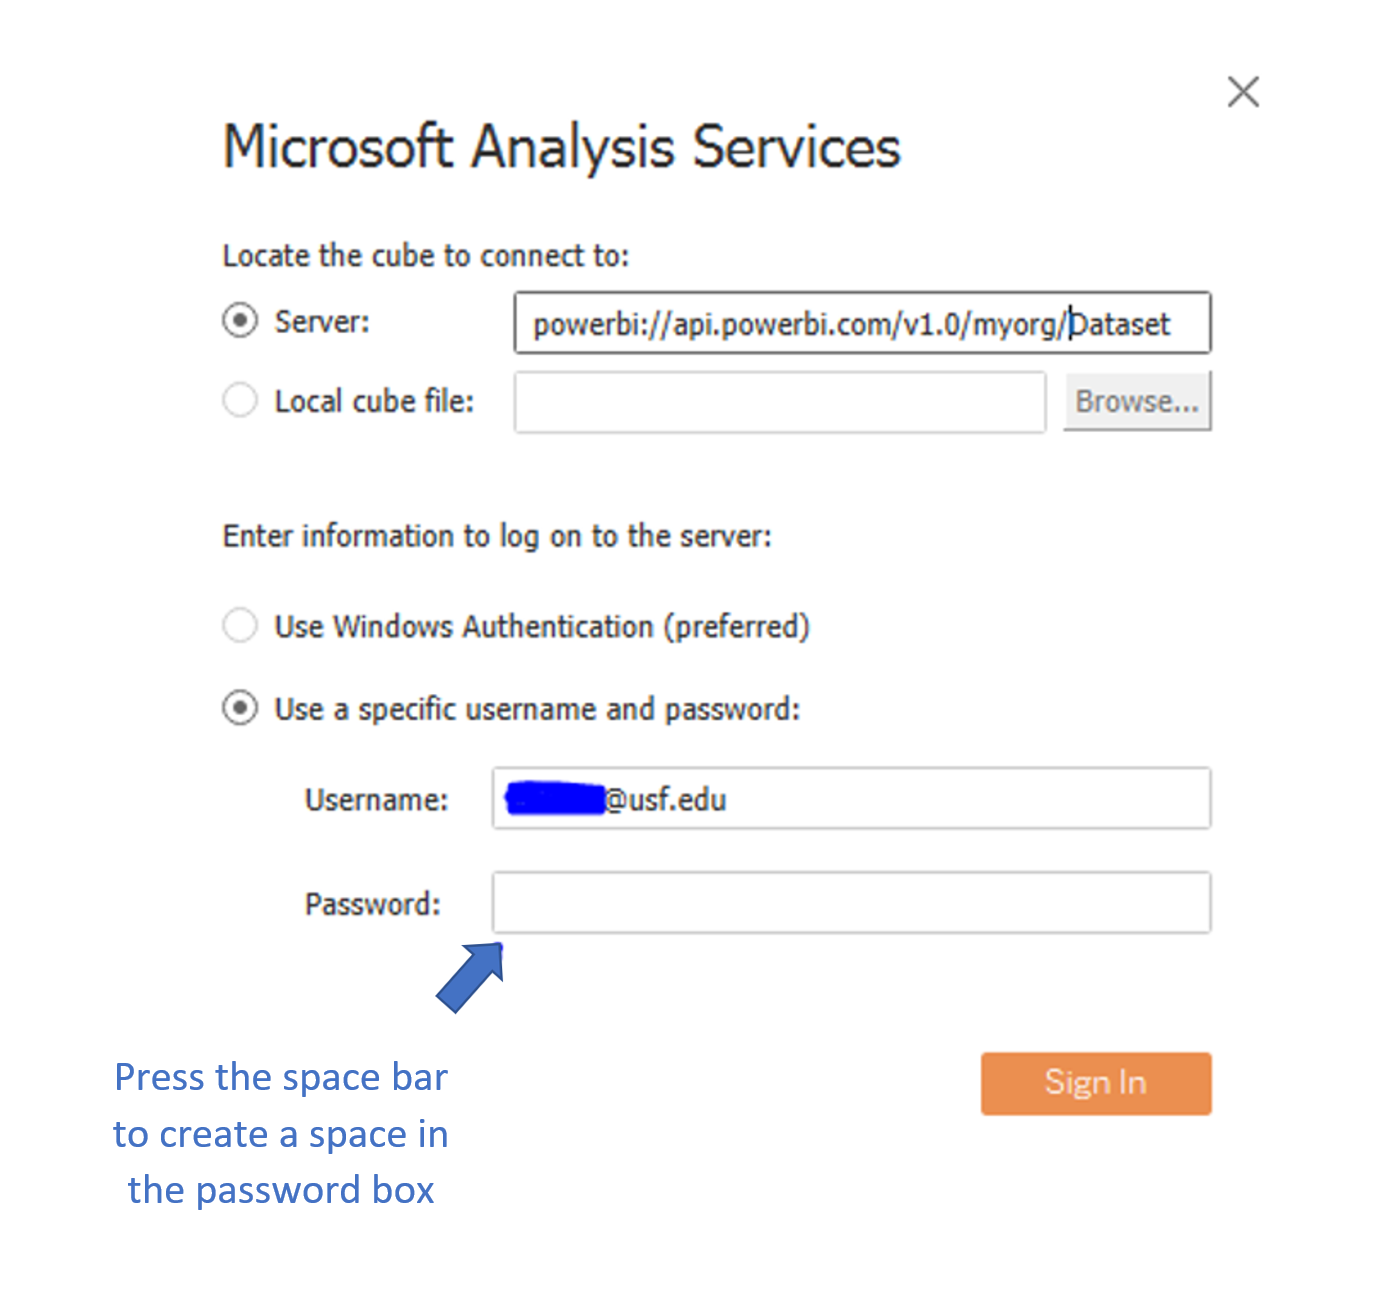
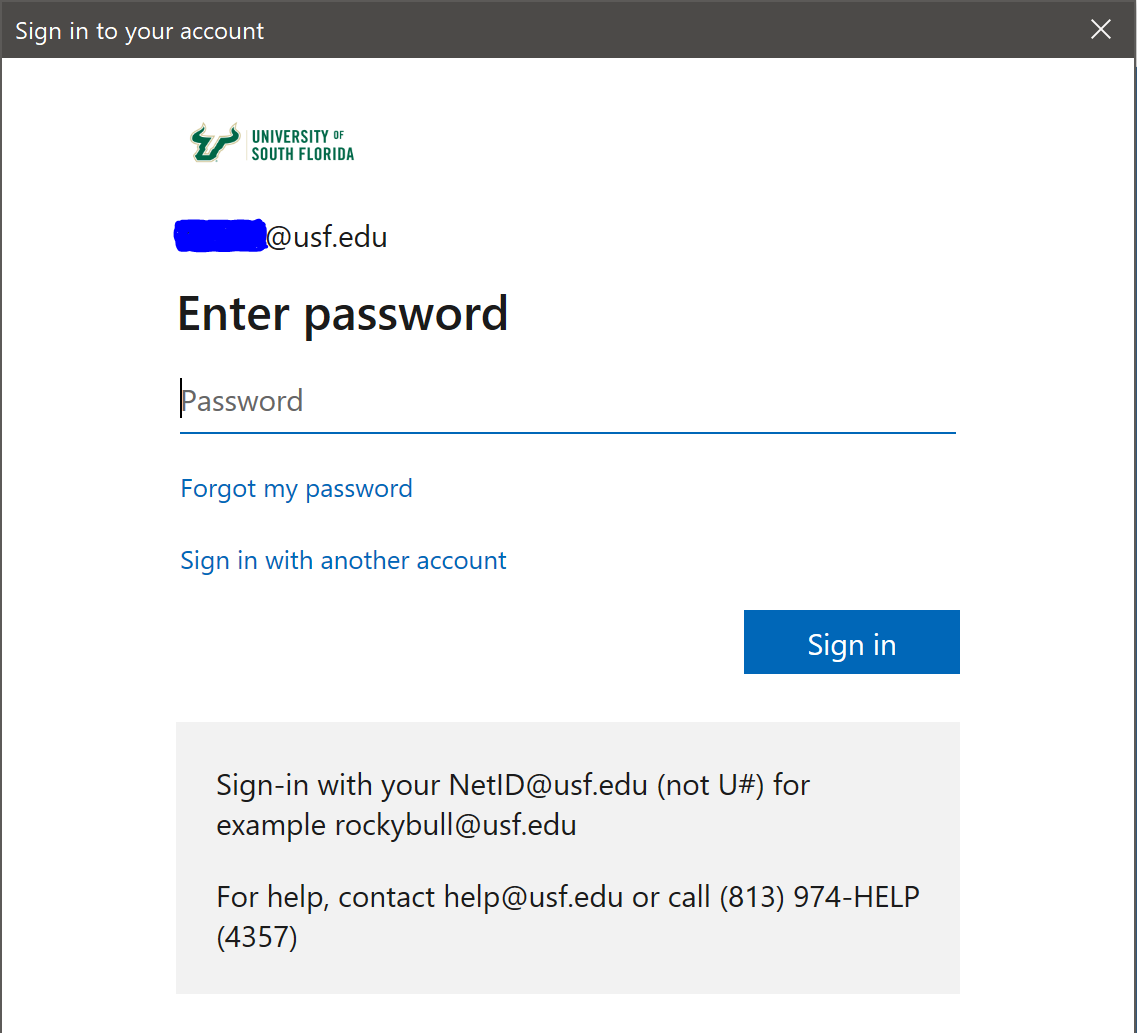
 Microsoft Analysis Services