| Anchor | ||||
|---|---|---|---|---|
|
With the December 2019 version of Microsoft’s Power BI, data models prepared in Power BI Desktop and published to Power BI service can now be consumed by Tableau. This document explains how users can connect to the Power BI shared dataset in the Power BI service using Tableau.
| Info | ||||
|---|---|---|---|---|
| ||||
| Anchor | ||||
|---|---|---|---|---|
|
To connect to a Power BI shared dataset from Tableau Desktop, use the Microsoft Analysis Services server connector.

| Info |
|---|
| Note: Microsoft Analysis Services connector is not available for Tableau Public. |
| Info |
|---|
| Note: IT Analytics supports only Microsoft Power BI and Microsoft Excel as reporting and visualization tools when accessing Power BI shared datasets. IT Analytics cannot be held responsible for functionality or capability limitations of Tableau that come with using Power BI datasets in Tableau. Use of Tableau with Power BI shared datasets for data analysis and reporting is at the sole discretion of its users. |
| Info |
|---|
| Note: Use Power BI datasets in Tableau for Internal/Departmental use only - Not for sharing the datasets, reports or dashboards across other departments at USF. USF does not have an Enterprise Tableau license and it is the department's responsibility to fund the required licenses. Please use Microsoft Power BI (Enterprise licensed tool) for sharing across other departments at USF. |
| Anchor | ||||
|---|---|---|---|---|
|
To connect using the Microsoft Analysis Services server connector follow the steps below:
The server link needs to be requested from the Analytics team. Please put in a ticket (through email or a Jira Service Desk ticket) to request the server link and add service team as Analytics
From the connect tab, select more in the ‘To A Server’ and click on the ‘Microsoft Analysis Services’ option
Paste the server link provided by Analytics team in the server name
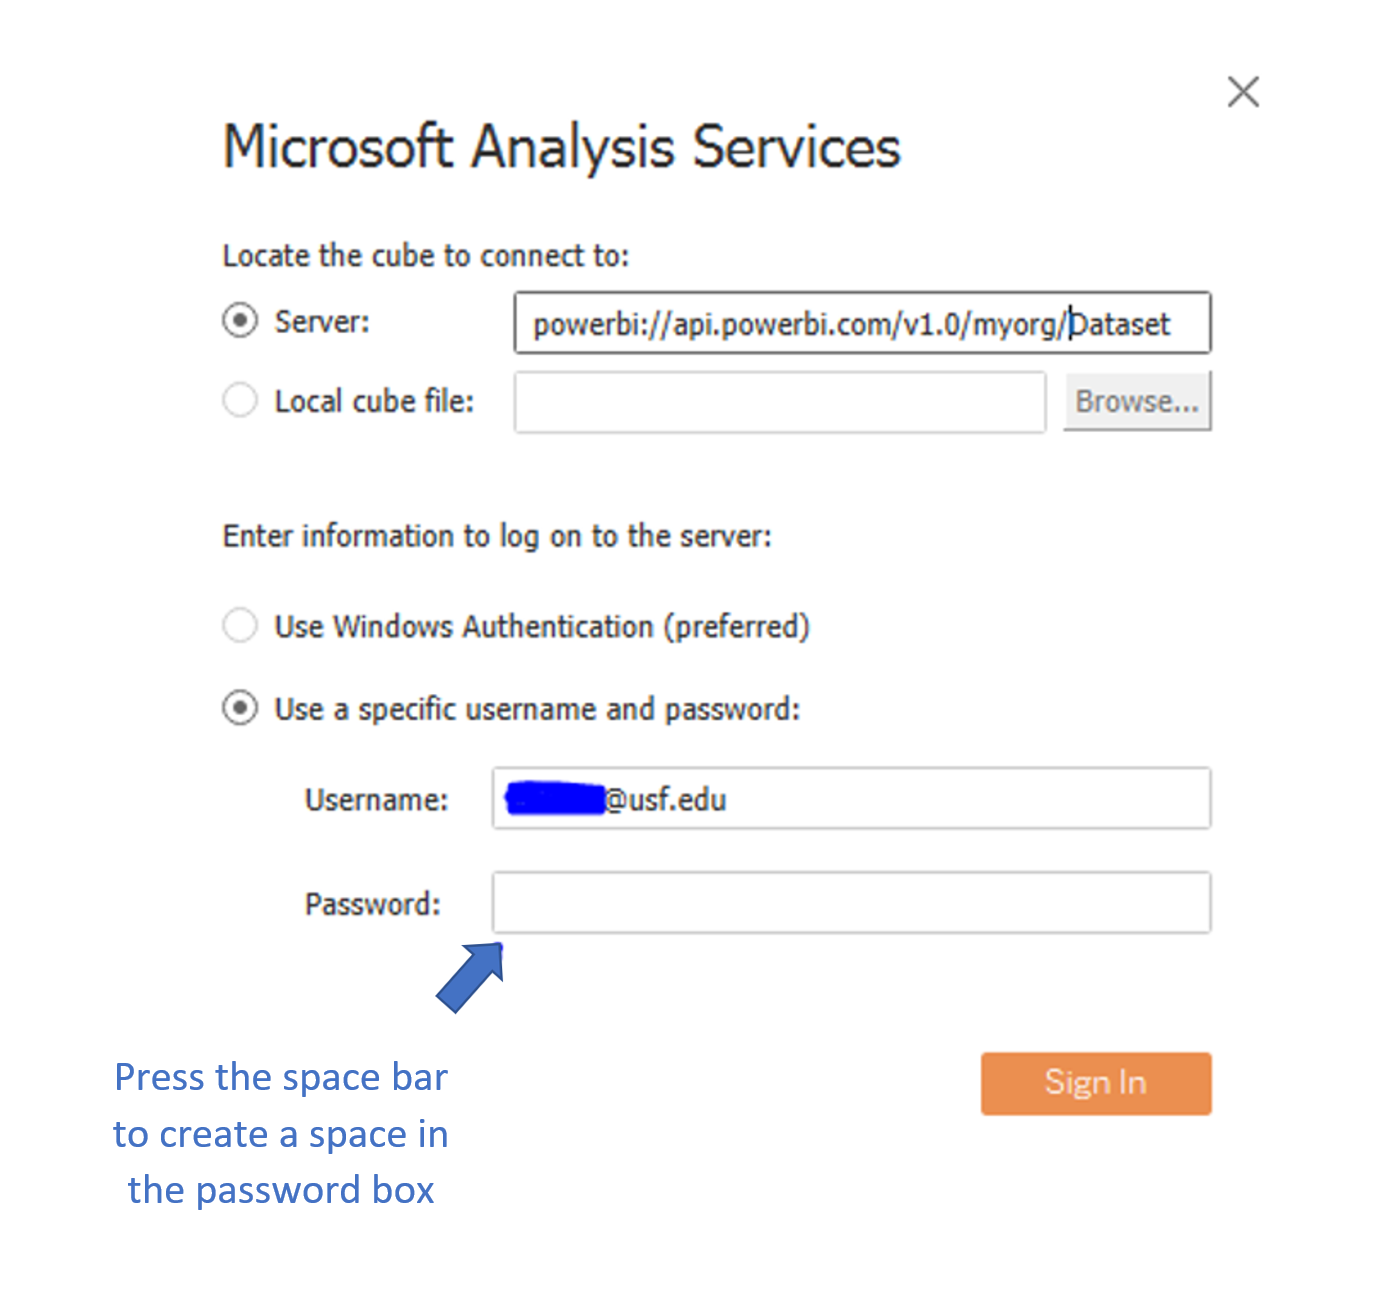
Choose the “use specific username and password option”
for username - type in your @usf.edu email address
for password - type in a space
click sign in
| Info |
|---|
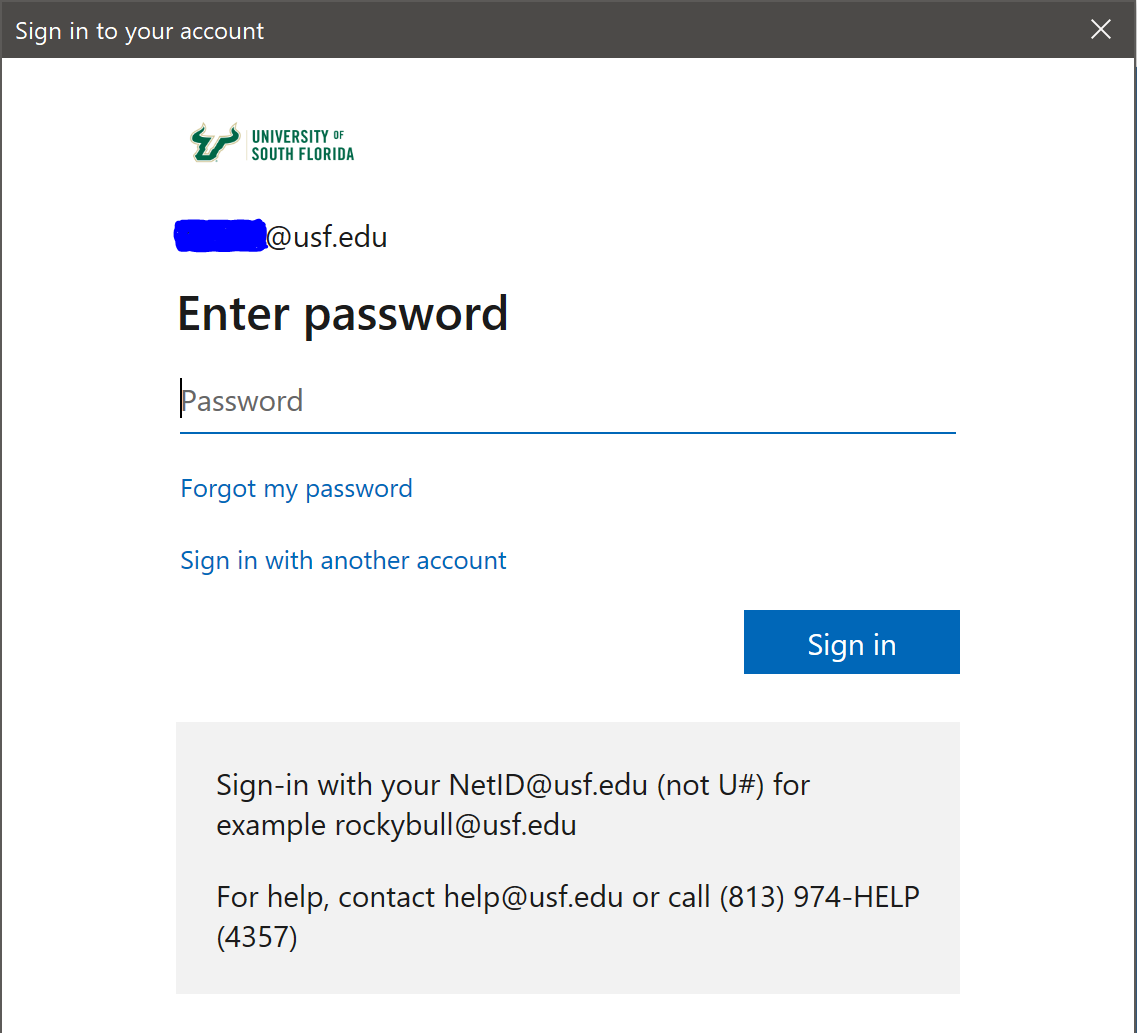
Note: After entering space as the password in the connector sign in screen, you will be prompted to sign in again using the USF single sign-on screen. |
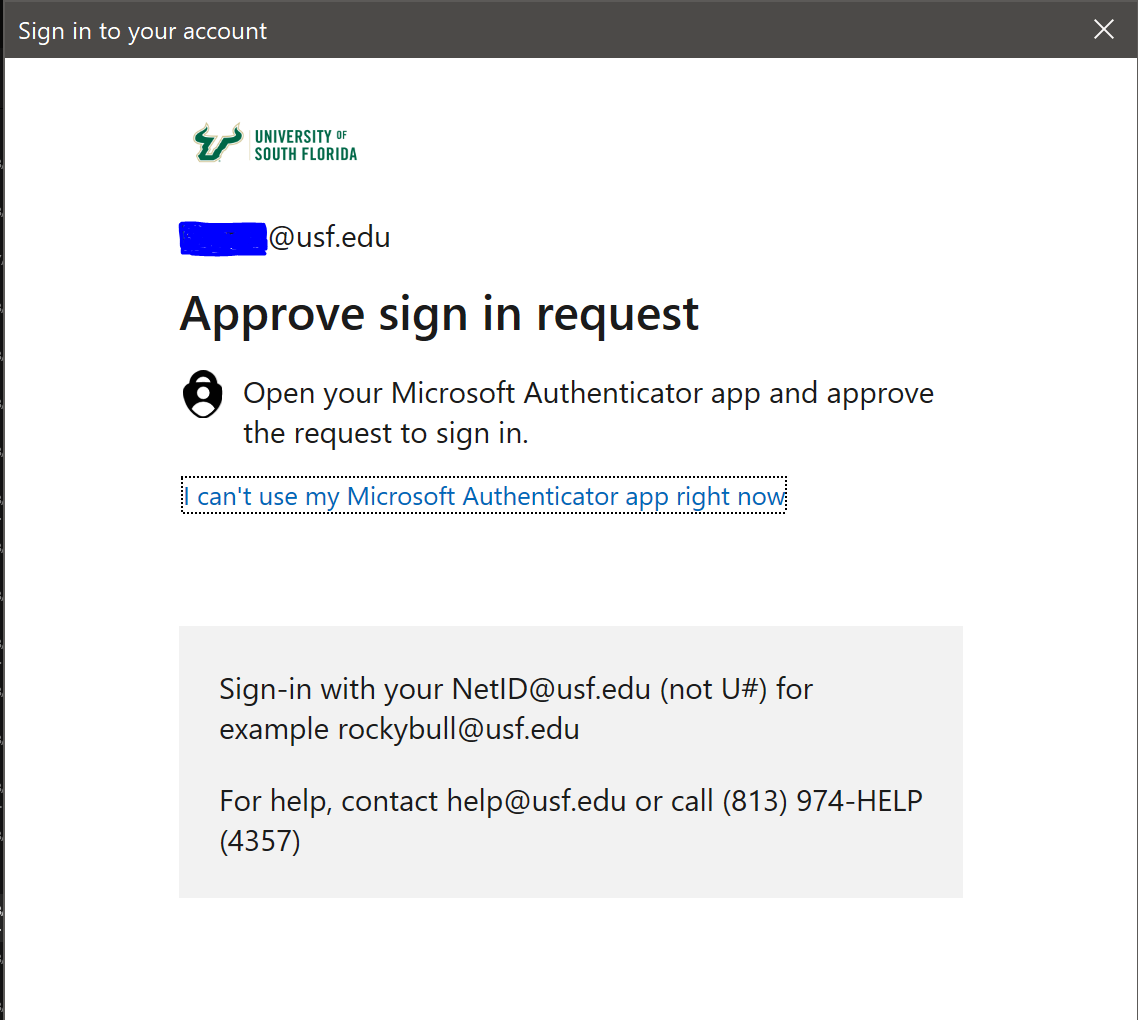
5. Sign in using the USF single sign-on screen and Multifactor Authentication (MFA)
6. Select the Database and the Cube (Model)

7. Click on the ‘Go to Worksheet' to go the reporting canvas where Dimensions and Measures of the model can be used to create required reports
| Info |
|---|
For limitations to connecting Power BI dataset with Tableau, please refer to the following blog post: |

| Anchor | ||||
|---|---|---|---|---|
|
![]() How to Use Power BI Datasets in Tableau | Senturus
How to Use Power BI Datasets in Tableau | Senturus
| title | Click here to view the Style Guide |
|---|
Structuring your user guide
Using headings
- Highlight text you want to apply the heading to
- Click the paragraph drop down (see image below)
- Choose your heading (paragraph, Heading 1, Heading 3)
| Info | ||
|---|---|---|
| ||
|
| title | Section Best Practices |
|---|
Formatting user guide instructions
Writing step-by-step instructions
| Info | ||
|---|---|---|
| ||
|
Adding a tips, notes, or warnings macro
- Click on the Plus Sign drop down (see image below)
- Click the Other Macros option
- Type tip, note, or warnings into the search bar
- Select the macro from the results
- Type the title of the tip, warning, or note
- Click Insert
- Type information within the tip, warning, or note space
Editing a tips, notes, or warnings macro
- Click the icon beside the title of the tip, note, or warning
- Click the Edit button
- Slick the Save button when done
Removing a tips, notes, or warnings macro
- Click the icon beside the title of the tip, note, or warning
- Click the Remove button
| Info | ||
|---|---|---|
| ||
|
Using pictures in a user guide
Inserting pictures
- Click the Insert Files button (see image below)
- Click the Upload Files button
- Upload your .png or .jpg
- Click the Insert button
- Click the Border button
| Info | ||
|---|---|---|
| ||
|
Sizing images in Confluence
- Click the image
- Do one of the following:
- Adjust the pixel width in the text box to the left
- Click on one of the sizing buttons located between the text box and the original button
| Info | ||
|---|---|---|
| ||
|
Adding alt text to pictures
- Click on the image
- Click the Properties button
- Click on Titles located on the left hand of the pop up/modal
- Fill out Titles and Alt Text with a short description
- Click the Save button
| Info | ||
|---|---|---|
| ||
|
Finishing your user guide
Making your Table of Contents
- Place your cursor next to your first Heading 1 title
- Click on the Plus Sign drop down (see image below)
- Click the Other Macros option
- Click on the Anchor macro
- Type the name of your anchor (i.e. Topic1)
- Repeat steps 1-5 for the remainder of your Heading 1 and Heading 3 titles
- Type your Heading 1 and Heading 3 titles in the Table of Contents space
- Highlight the first title
- Click the Insert Link button (see image below)
- Click Advanced from the menu on the left
- Type # and the name of the anchor you made for that title (i.e. #Topic1)
- Click Insert
- Repeat steps 7-12 for the remainder of your titles
| title | Anchor Best Practices |
|---|