View Horizon Client allows you to access a USF Health desktop remotely as a virtual desktop. This job aid will instruct you on how to download and install the
Horizon Client and navigate the VMware
Desktops. The steps may vary depending on your operating system.
| Note |
|---|
The operating system used in this job aid is Windows 7 with Internet Explorer 8 as the browser. If you use a different operating system, some of the steps may vary.
|
Install View Client
Click At this time, the USF approved version of VMWare Horizon is 5.5.2.
VMWare is scheduled to be decommissioned on October 31st, 2022.
| Info |
|---|
| icon | false |
|---|
| title | Table of Contents |
|---|
|
|
- and select Install VMWare Horizon Client.
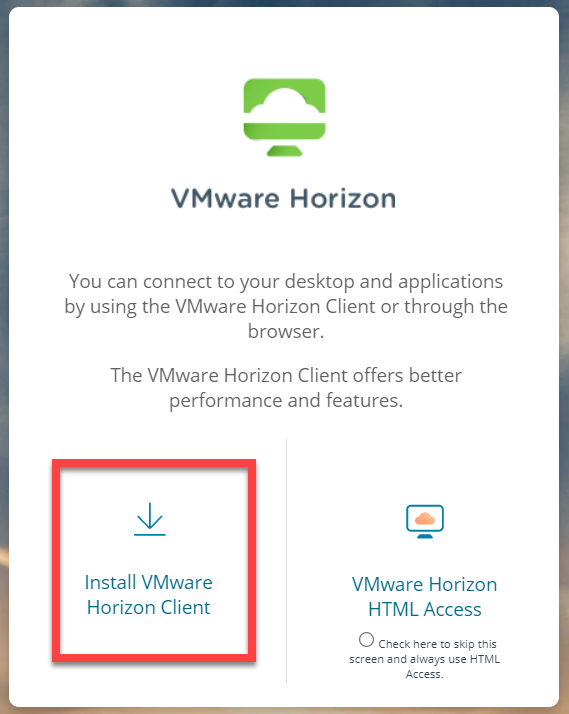 Image Added Image Added
At the top left dropdown, select Horizon 7 (5.0).
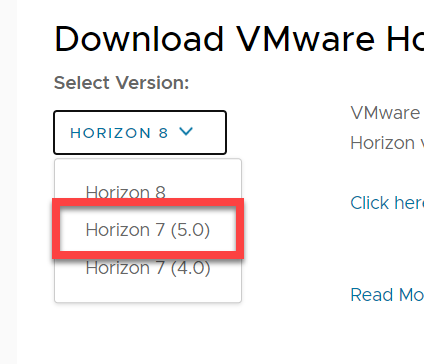 Image Added Image Added
Find the VMWare that is for your Operating System and select Go to Downloads to the right.
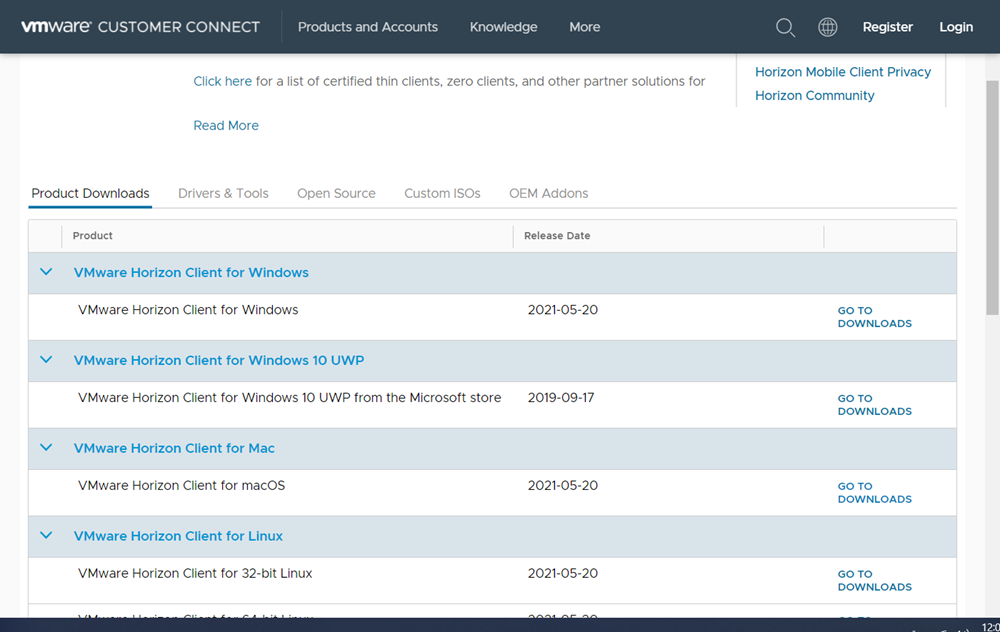 Image Added Image Added
| Info |
|---|
| title | If you do not know which operating system you are running, click on the options below for instructions on how to find out. |
|---|
|
| Expand |
|---|
| title | Windows 10 click here. |
|---|
|
|
|
Click the Start button located at at the left of the toolbar |
|
|
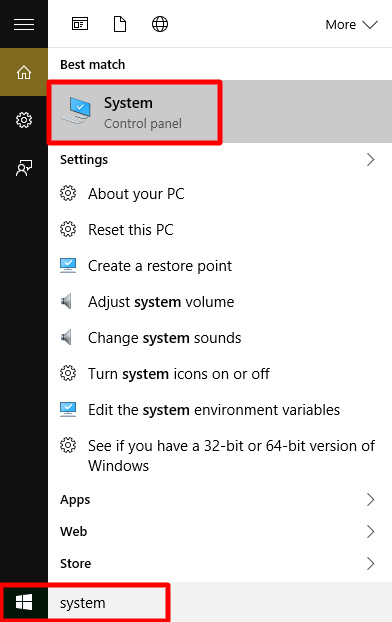 Image RemovedThe System information screen will open and will identify the edition of your Windows operating system and system type (32-bit or 64-bit).
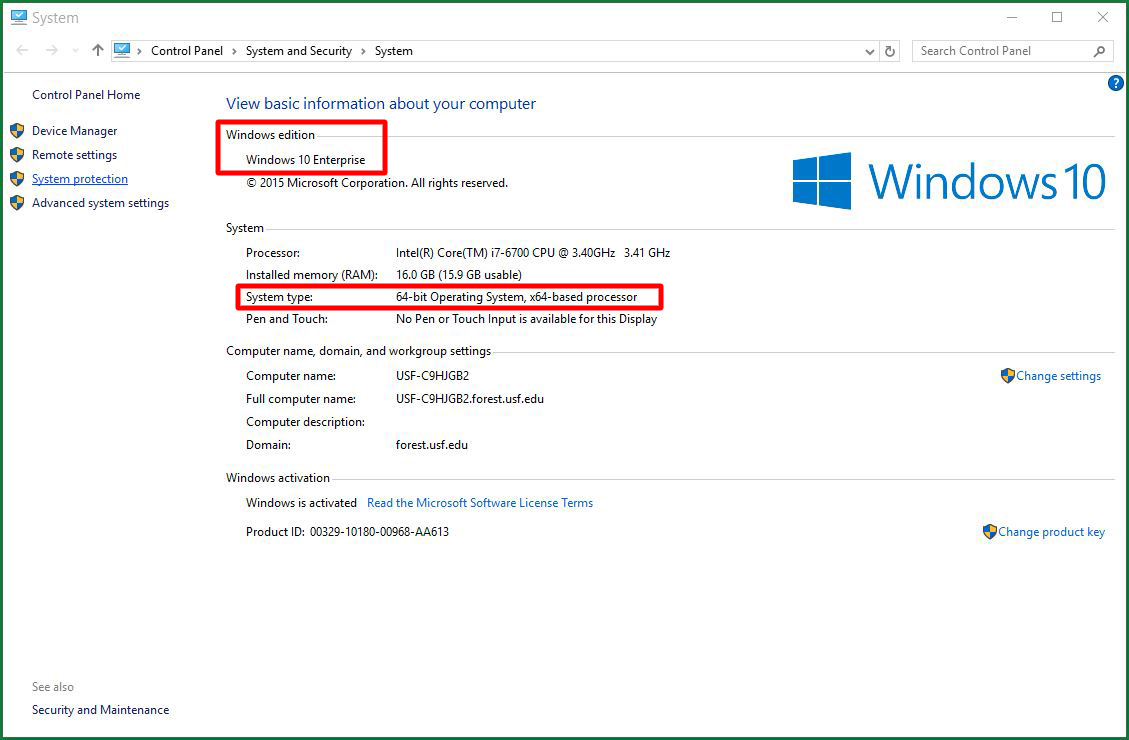 Image Removed
and select Settings.  Image Added Image Added
Select System. 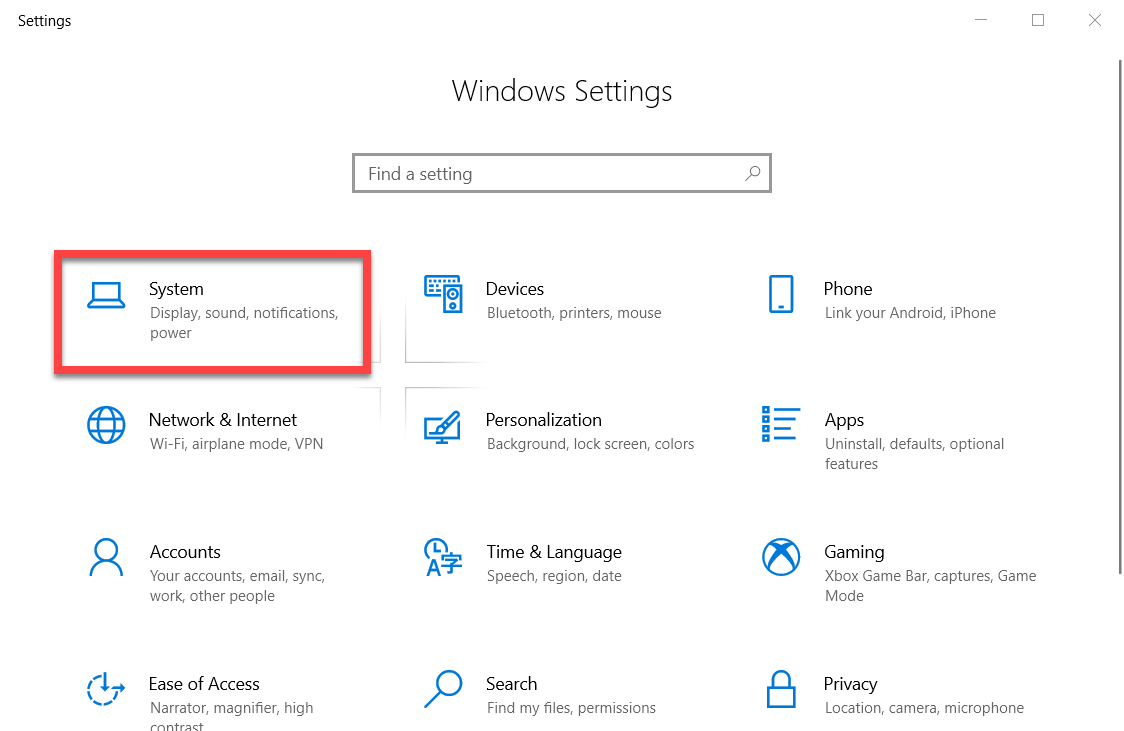 Image Added Image Added
In the left column, scroll down and select About. 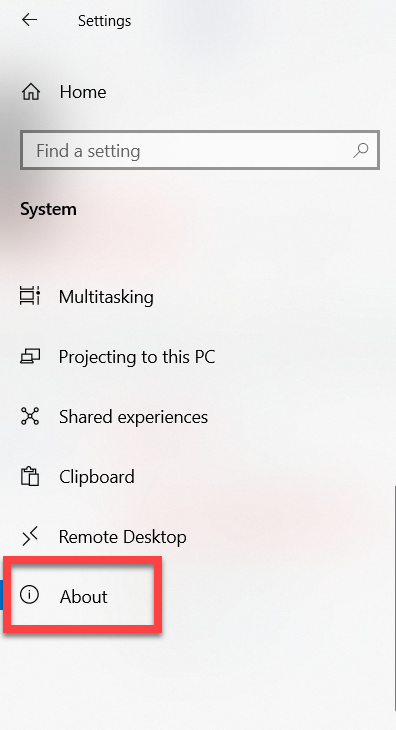 Image Added Image Added
In the right of the window, scroll down and locate Windows specifications. Here it will list what Windows version you are currently running. 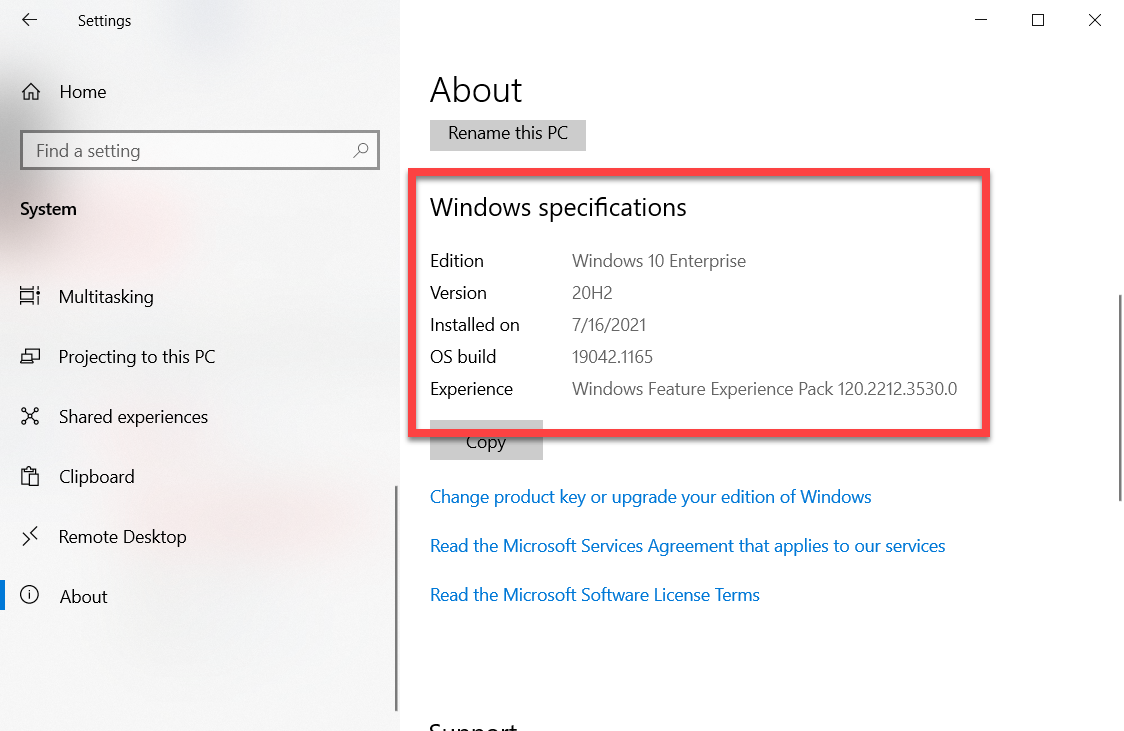 Image Added Image Added
Back to top |
| Expand |
|---|
| title | Windows 8 click here. |
|---|
| Click on the Windows icon on the left of the toolbar or hit the Windows Key on the keyboard. From the Start menu click on the search icon that looks like a magnifying glass.
|
|
|
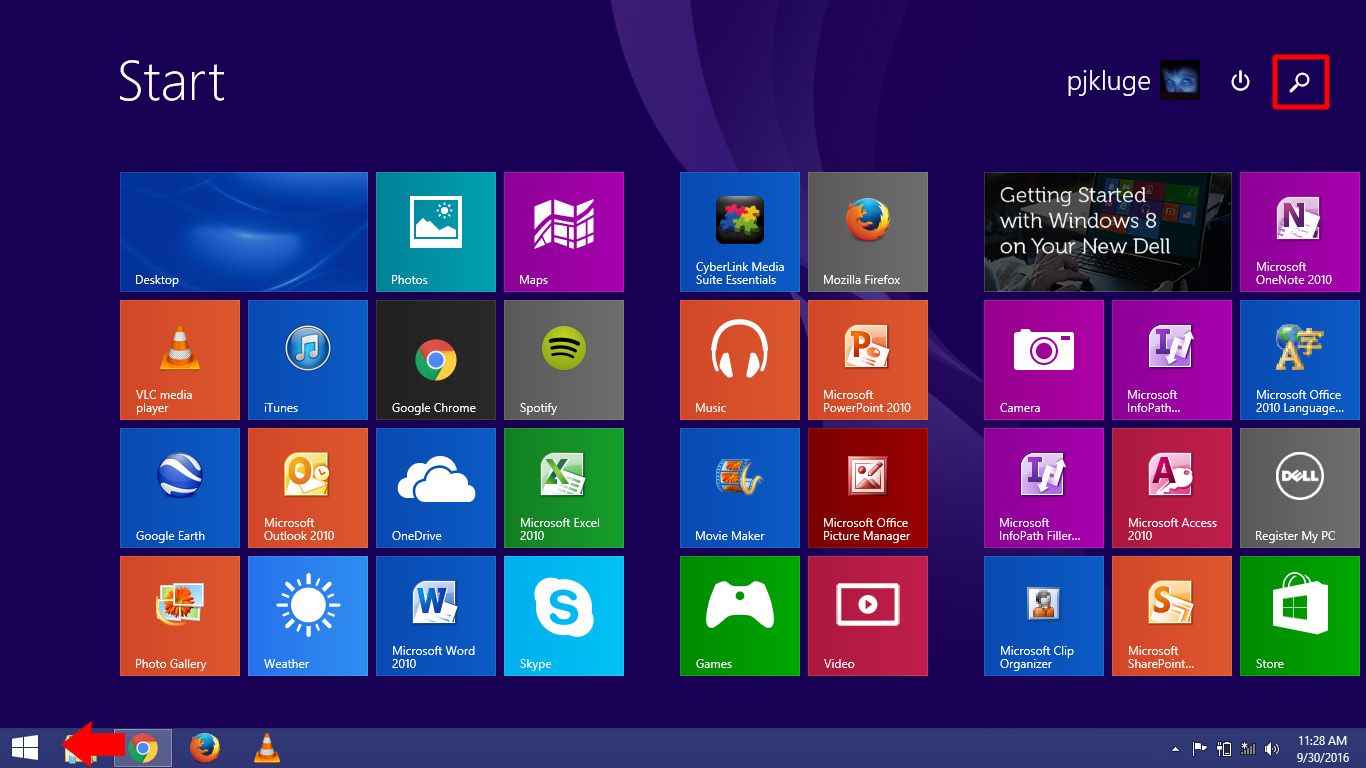 Image Removed
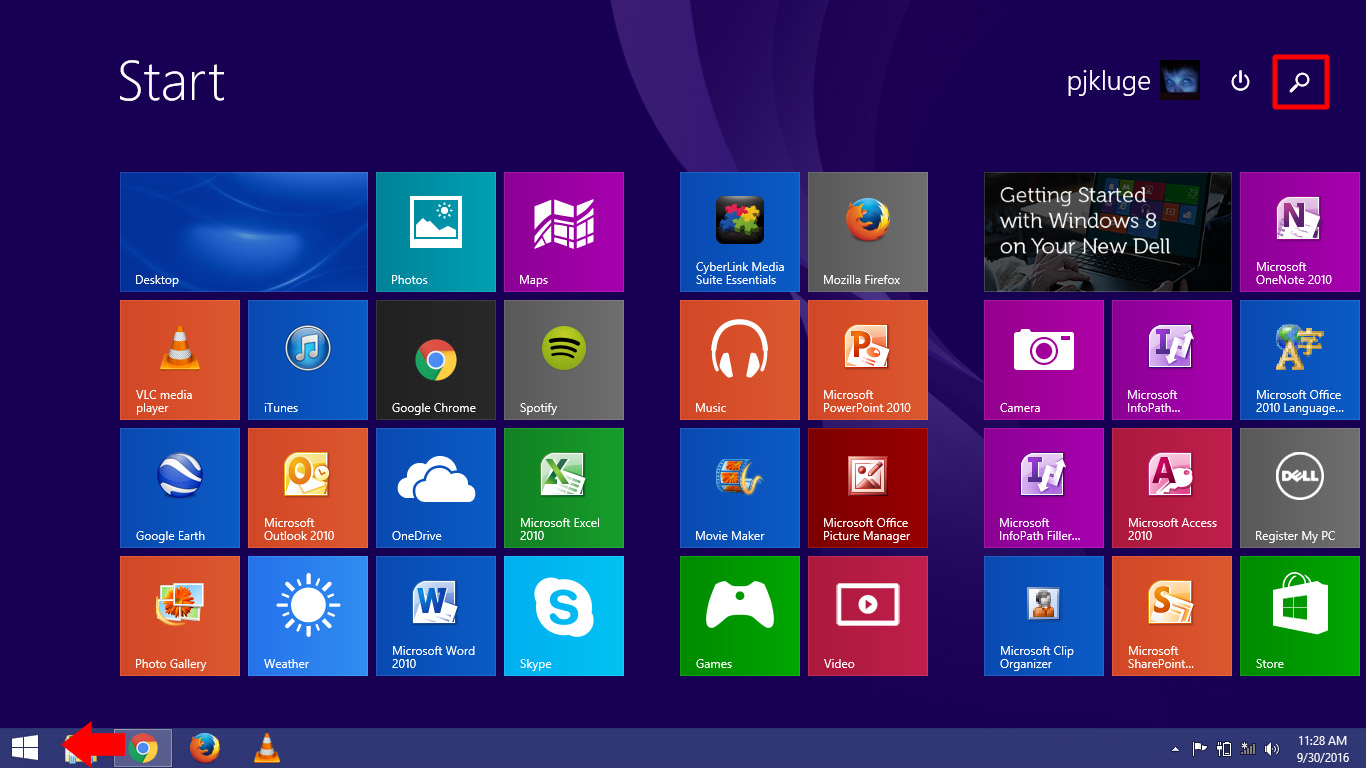 Image Added Image Added
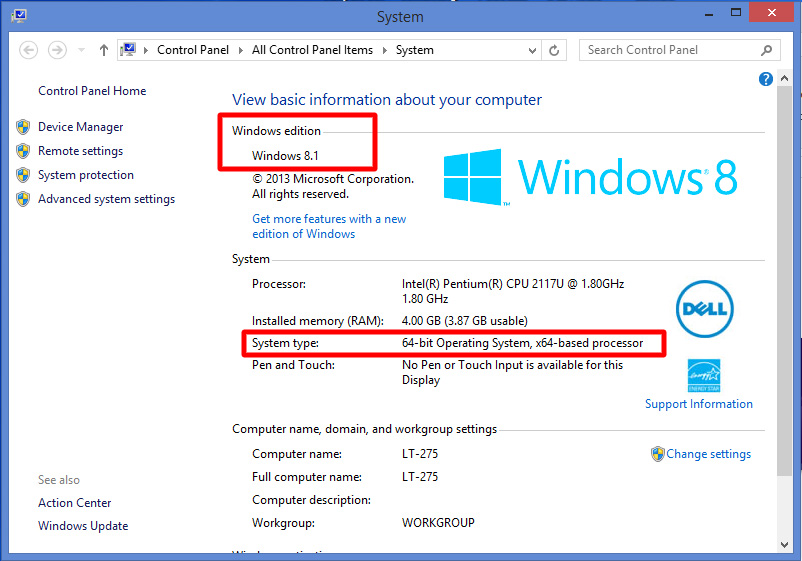
Type System in the search field in the dialog box that opens. Select the item listed as System as shown in the diagram.
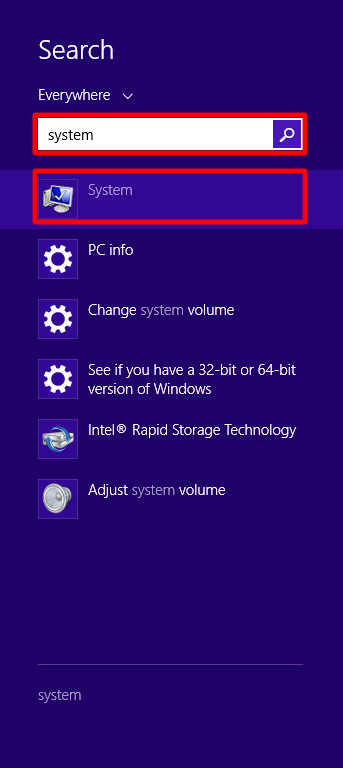 Image Modified Image Modified
The System information screen will open and will identify the edition of your Windows operating system and system type (32-bit or 64-bit).
|
|
|
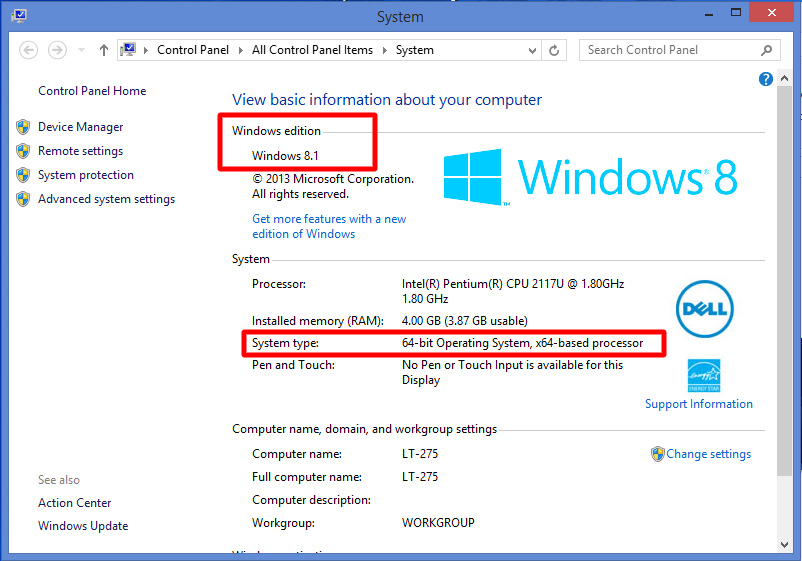 Image Removed
| Expand |
|---|
| title | Windows 7 click here. |
|---|
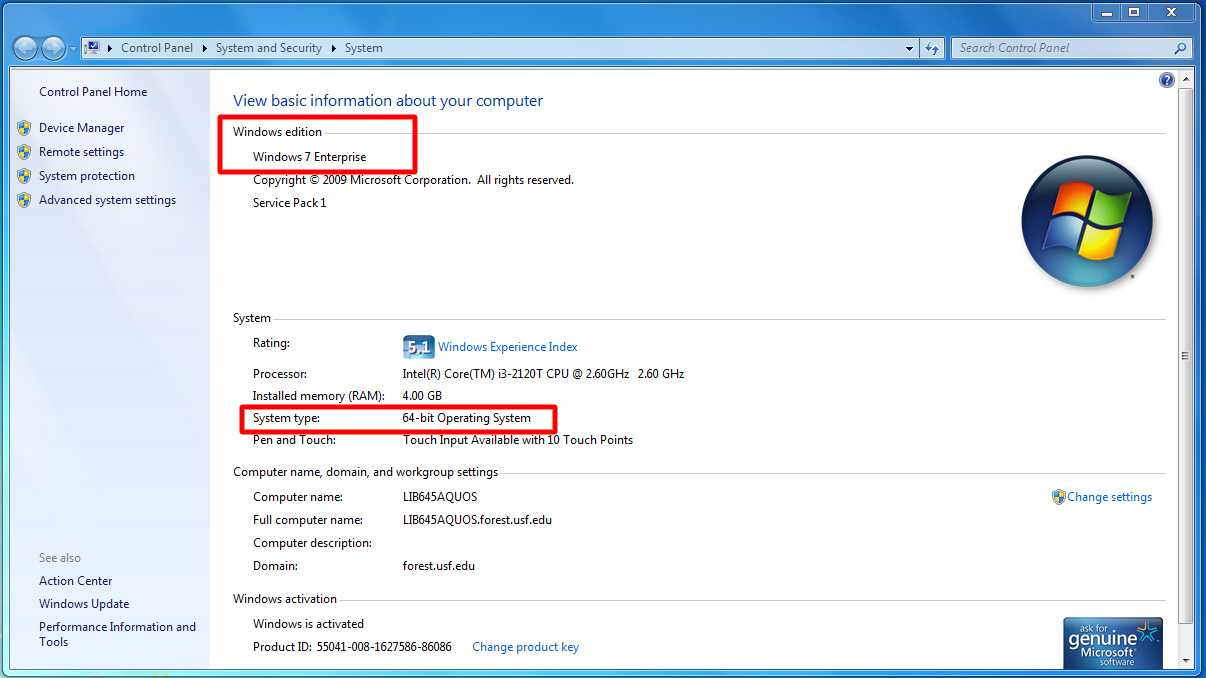
| Click on the Windows icon on the left of the toolbar or hit the Windows key on the keyboard. Type System in the search field that opens just above the Windows icon. Then select the item listed as System under the Control Panel heading as shown in the diagram.
|
|
|
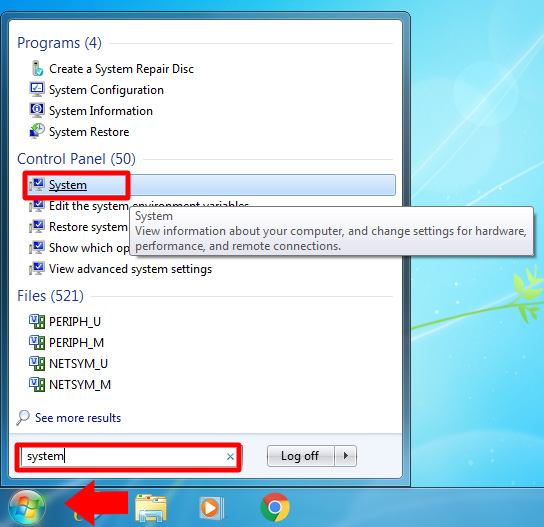 Image RemovedRun the file that is downloaded.
 Image Added Image Added
The System information screen will open and will identify the edition of your Windows operating system and system type (32-bit or 64-bit).
|
|
|
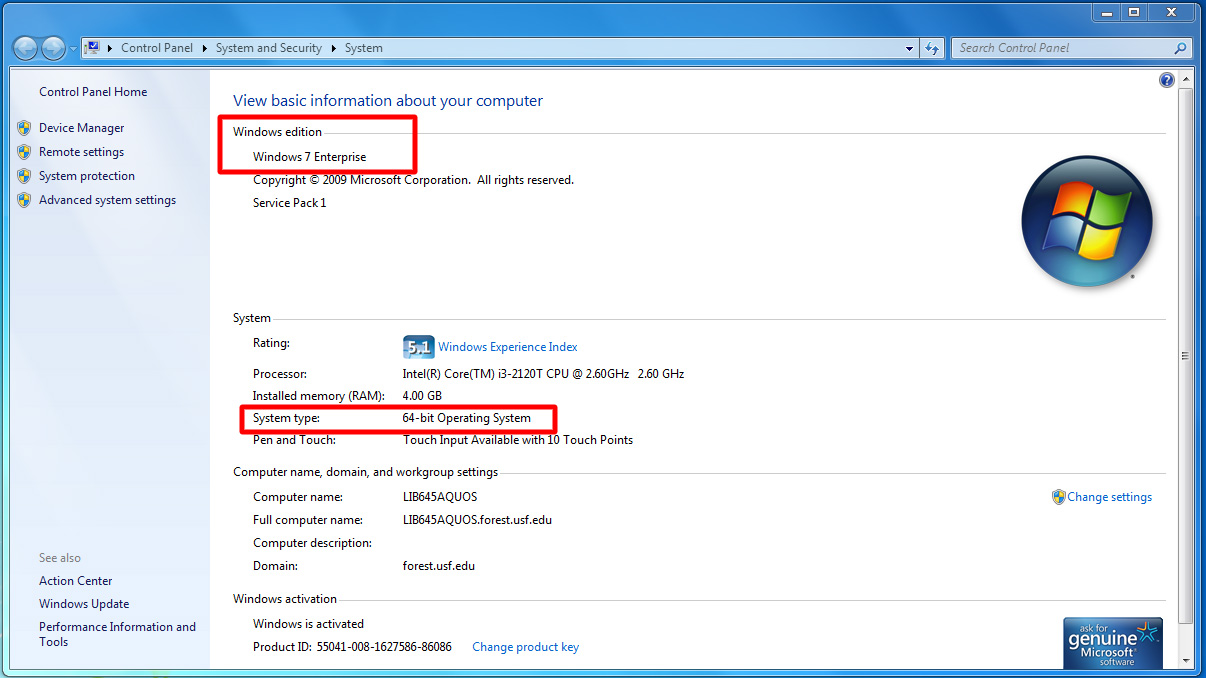 Image Removed
Once you are on the page for the download you need, select Download Now.
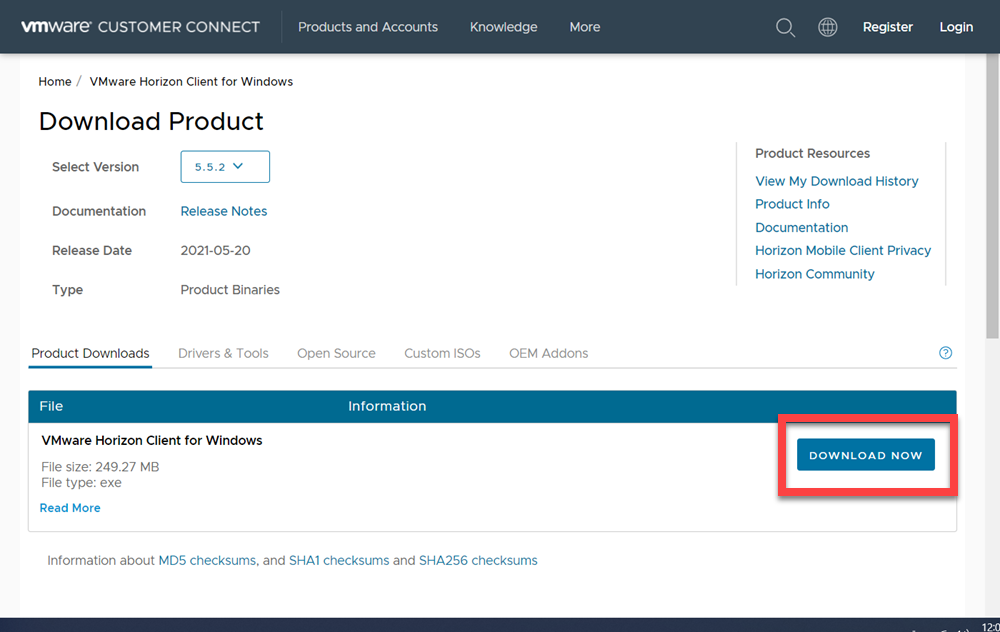 Image Added Image Added
Once the file named VMware-Horizon-Client-5.5.2-18035009 is downloaded, run the file. | Note |
|---|
| A User Account Control dialog box may open, asking if you want to allow the changes to be made to your computer. If this occurs, click Yes. |
The VMware Horizon Client Setup Install Wizard will open and bring up the VMware end-user license agreement dialog box.
Select Agree & Install.
|
.png?version=1&modificationDate=1531243244487&cacheVersion=1&api=v2) Image Removed
Image Removed
Figure 1: VMware Horizon Client Installation Wizard dialog box
Another box will pop up, asking you to restart your computer. Select Restart Now. See Figure 3.
.png?version=1&modificationDate=1531243290670&cacheVersion=1&api=v2) Image Removed
Image Removed
Figure 3: Required restart boxAccess VMware View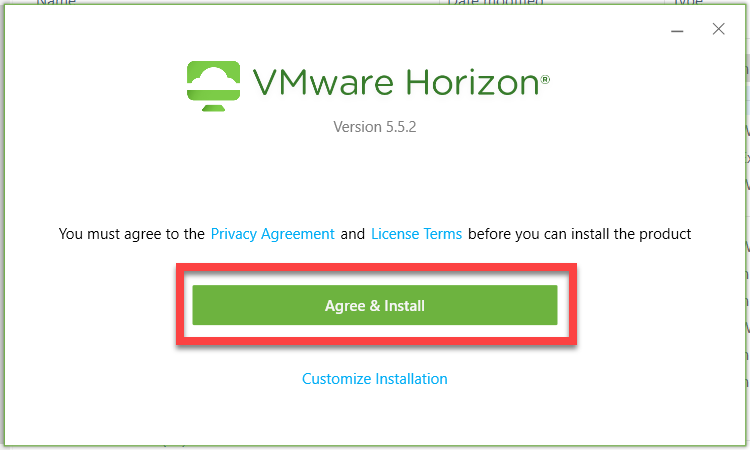 Image Added Image Added
When the install completes, you will see a Success! box. Select Finish.
|
.png?version=1&modificationDate=1531243268830&cacheVersion=1&api=v2) Image Removed
Image Removed
Figure 2: Success! dialog box
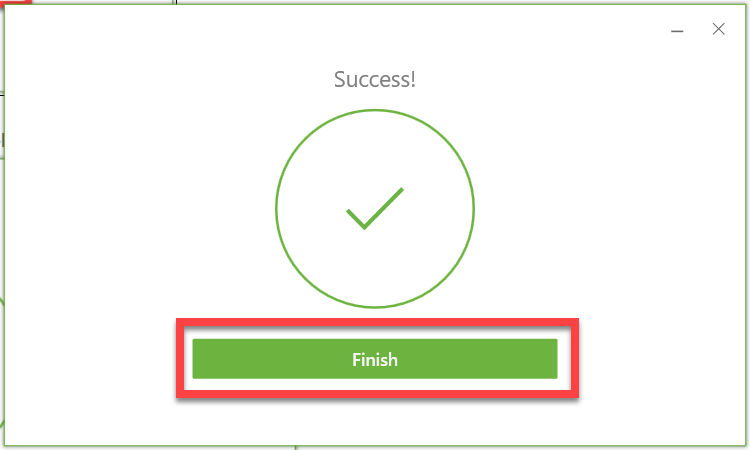 Image Added Image Added
| Warning |
|---|
| Before continuing, make sure that you have anything you are working on saved somewhere. If you do not, there is a high risk of your work being lost. |
- You will need to restart your computer in order for the installation to complete successfully. Select Restart Now.
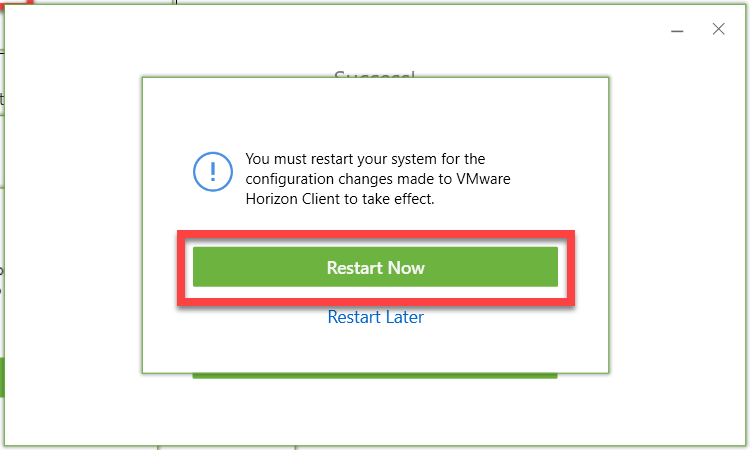 Image Added Image Added
Back to top Access VMware Server- Double-click VMware Horizon Client on your desktop.
|
 Image RemovedNew
 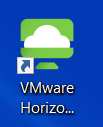 Image Added Image Added
- The VMWare Horizon Client Add Server box will open. Click
|
- New Server or double-click Add Server.
|
.png?version=1&modificationDate=1531243348720&cacheVersion=1&api=v2) Image RemovedFigure 4: VMWare Client Add Server box.
Image RemovedFigure 4: VMWare Client Add Server box.
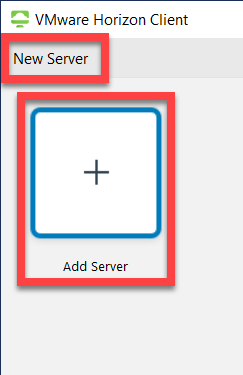 Image Added Image Added
- The VMWare Server Name box will open.
|
- Enter view.health.usf.edu in the field for Connection Server name
|
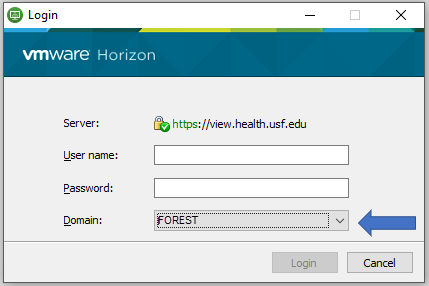 Image Removed
Figure 6: VMWare Client Login box.
A dialog box will open, listing all the VMware Client Views you have access to. See Figure 7.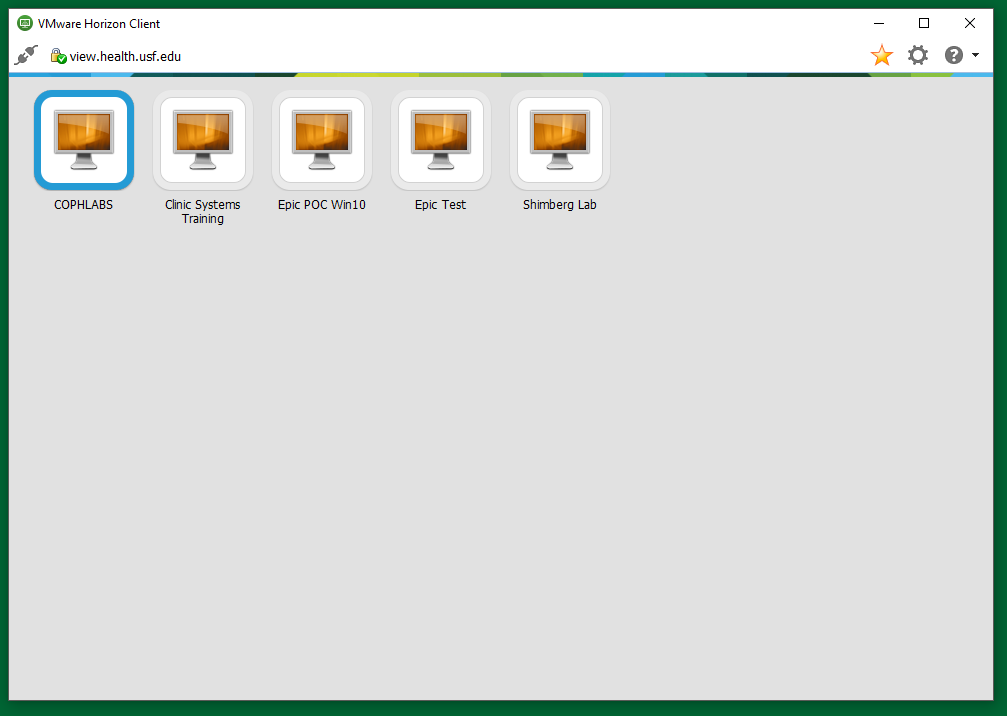 Image RemovedFigure 7: VMware Client View selection list. Click image to enlarge.Double-Click the VMware View
 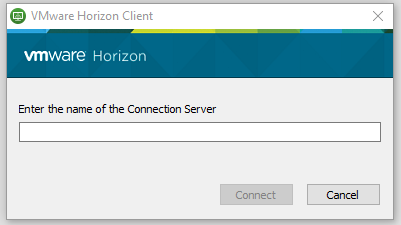 Image RemovedFigure 5: VMWare Server Name box.
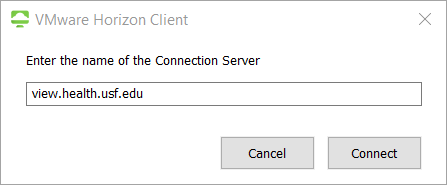 Image Added Image Added
- At login, enter your NetID and password, then select Login.
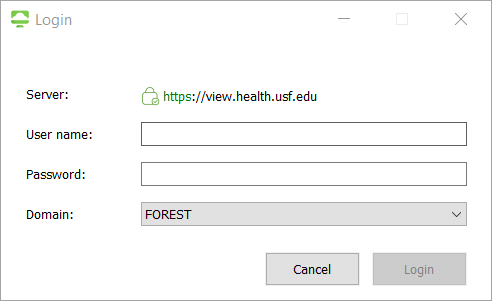 Image Added Image Added
- Once login is successful, you will see all desktops that you have access to.
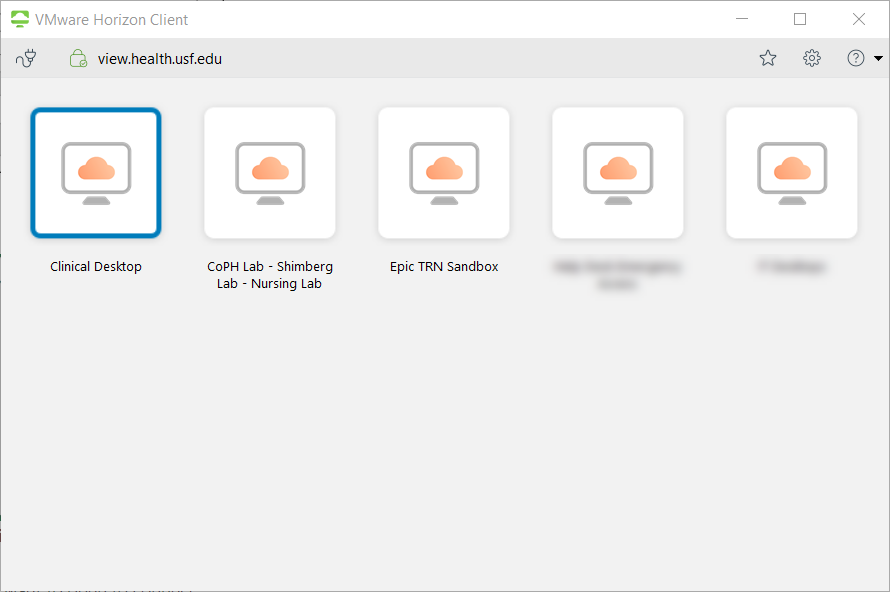 Image Added Image Added
Double-click the VMware you want to open to connect. | Warning |
|---|
PLEASE NOTE: Users utilizing PCIS Prenatal or PCIS My Care Team will no longer see a separate PCIS Icon in the selected view. You will now access the PCIS icon directly via the Clinical Desktop View. |
- The VMware View you selected will launch, initialize, and open.
|
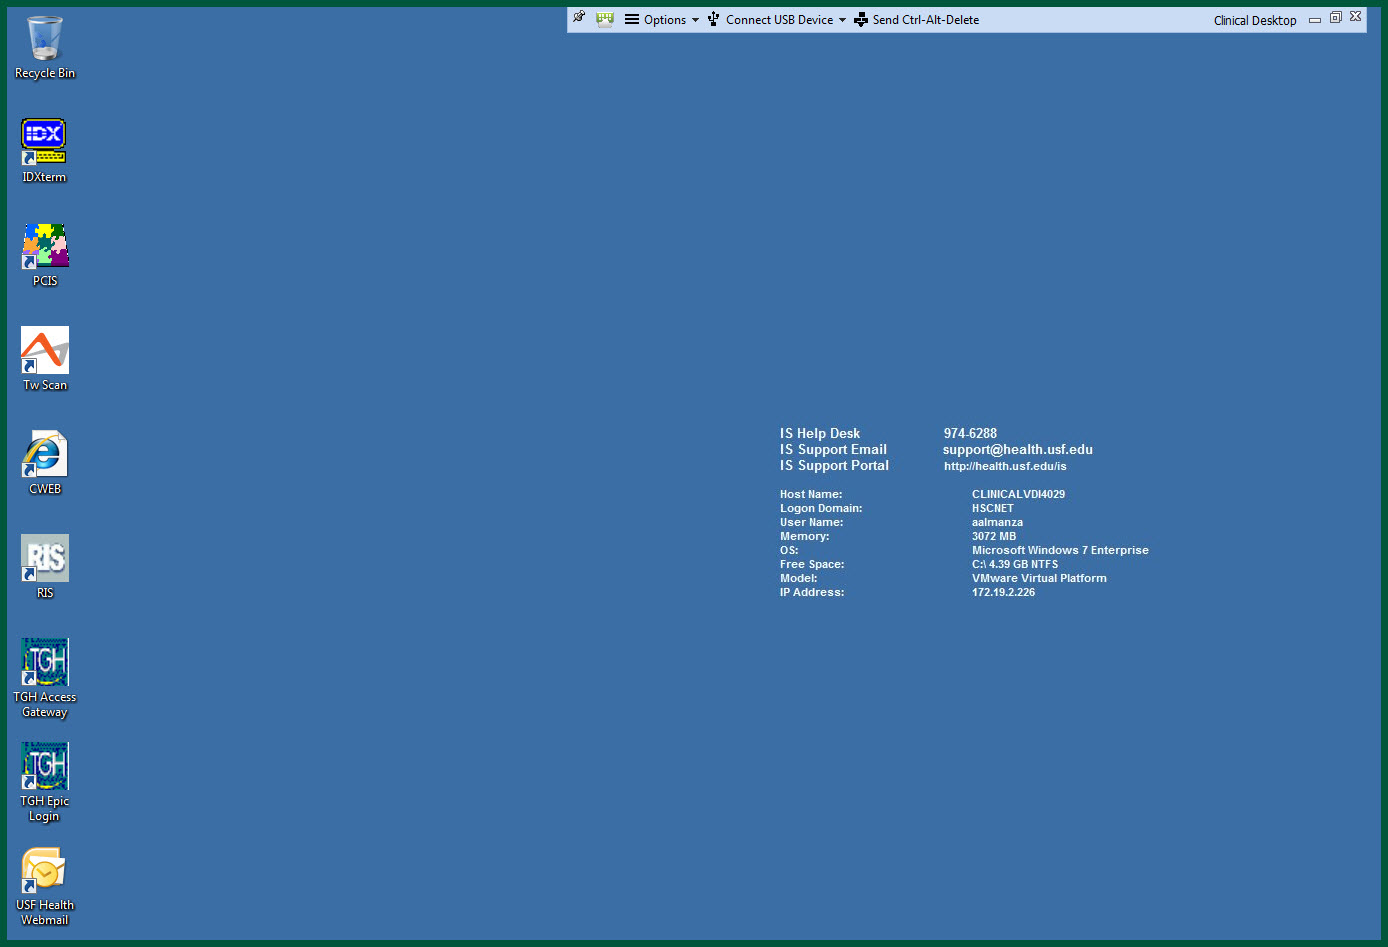 Image Removed Figure 8: VMware Desktop View. Click image to enlarge.
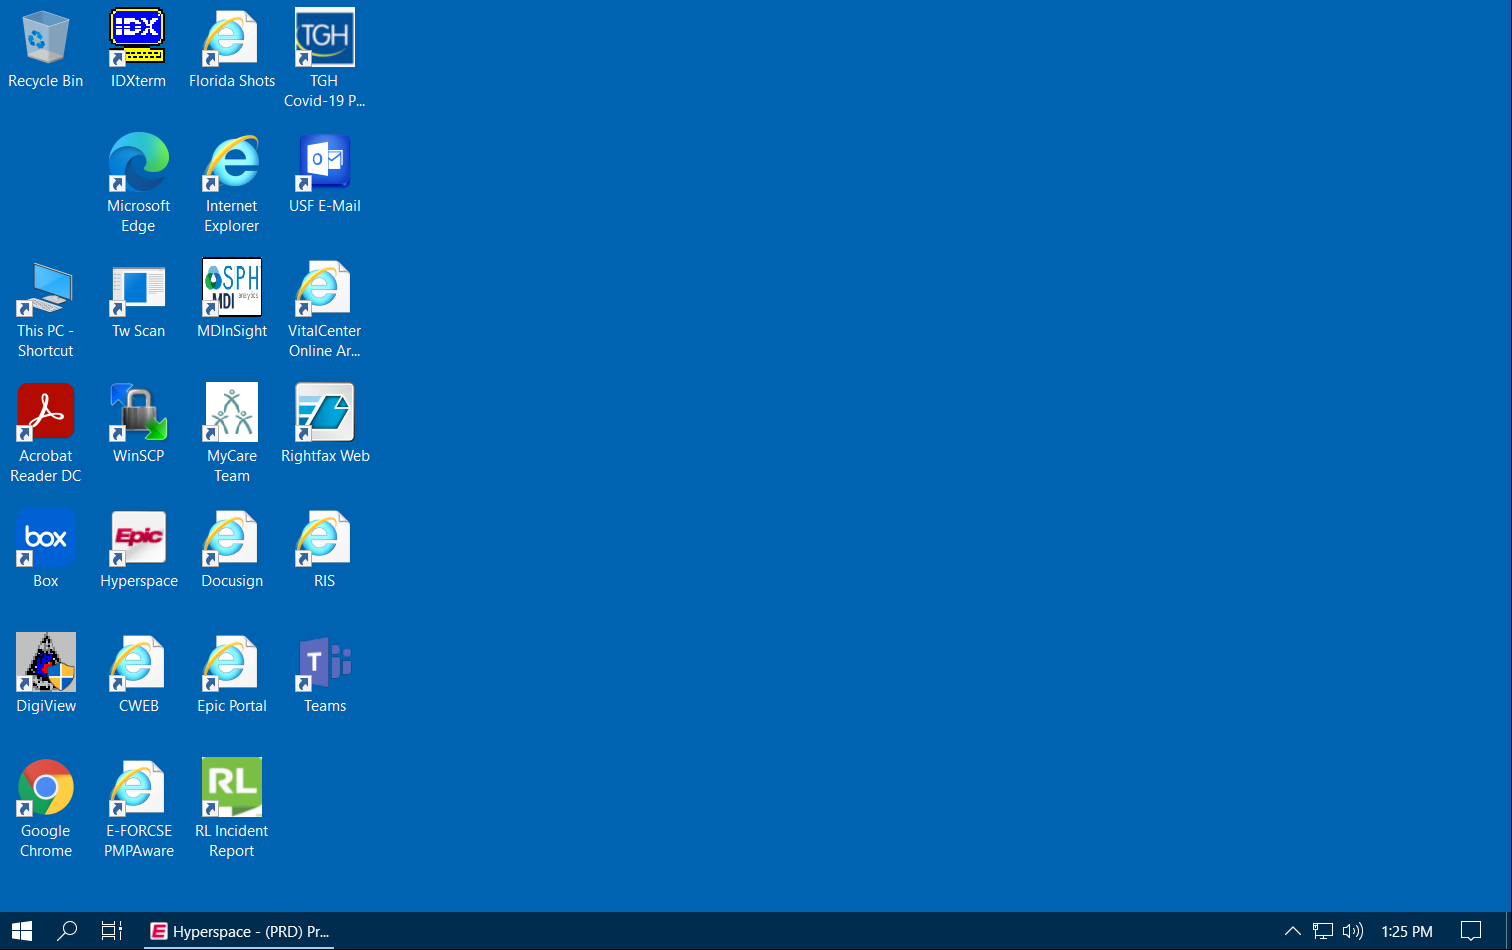 Image Added Image Added
|
desktop, always save to your network drive or Box. If you save the item to the desktop, it |
|
will be deleted once it is logged out. |
Back to top Monitor Settings- To extend the display to a dual monitor, select the
|
- Setting icon.
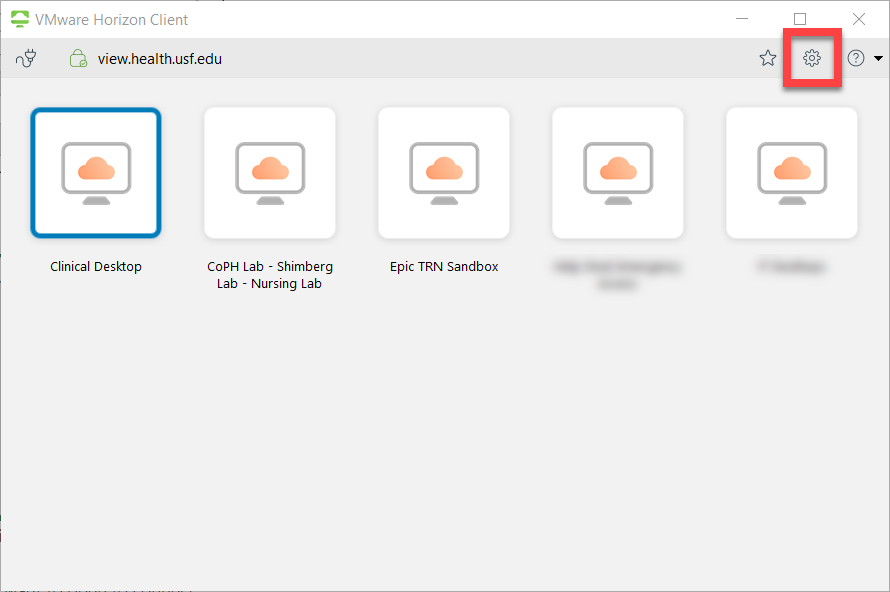 Image Added Image Added
- On the left column, make sure the desktop you wish to change is selected.
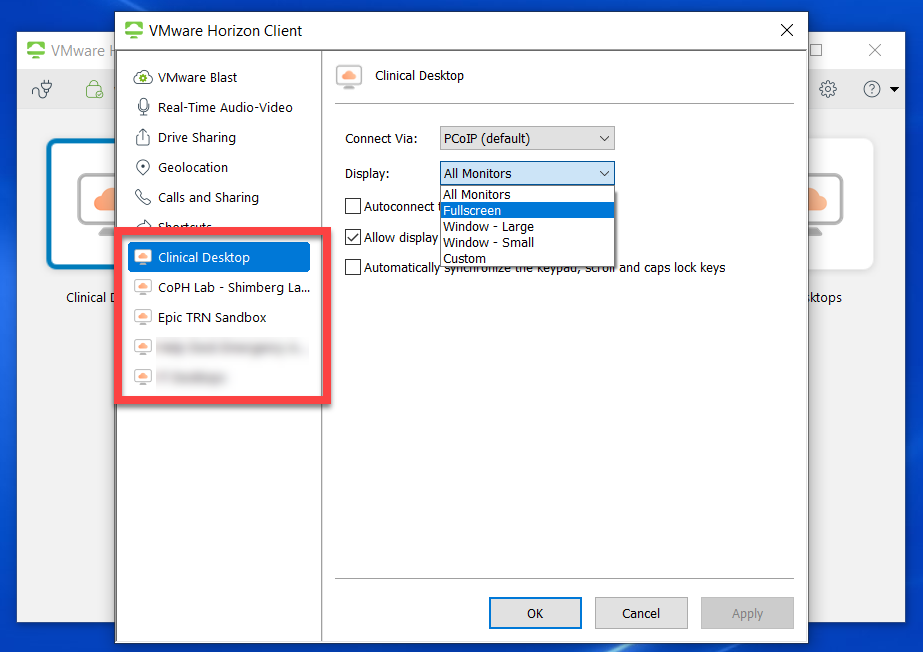 Image Added Image Added
- In the
|
- right column, select the drop
|
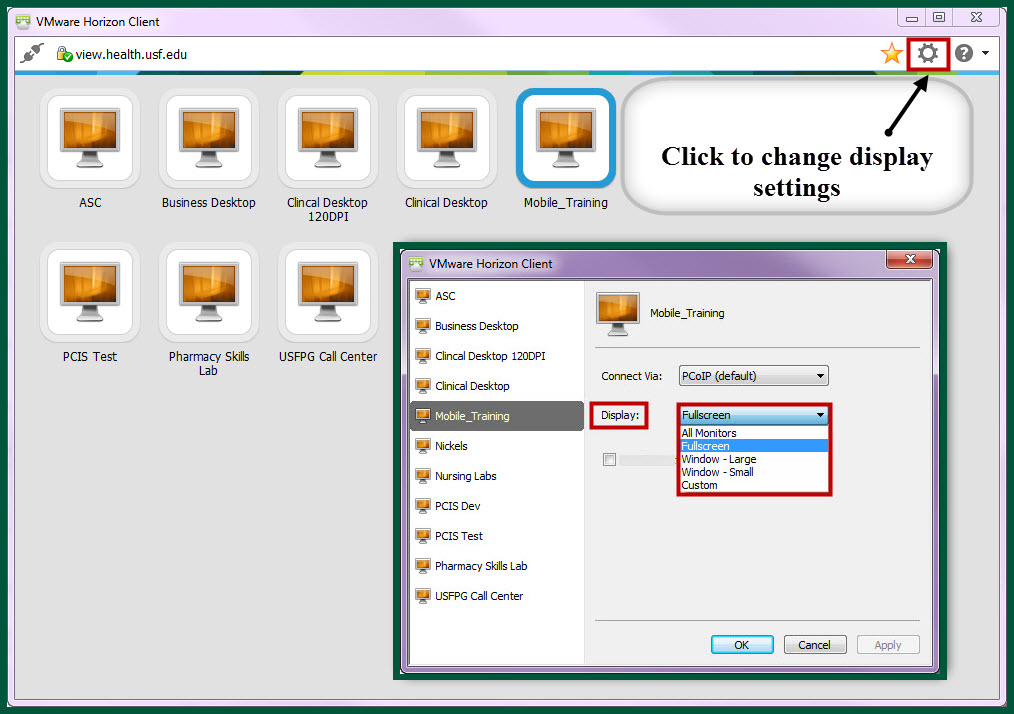 Image Removed
Figure 9: VMware Monitor Settings. Click image to enlarge.- down next to Display and click on what you wish to change it to.
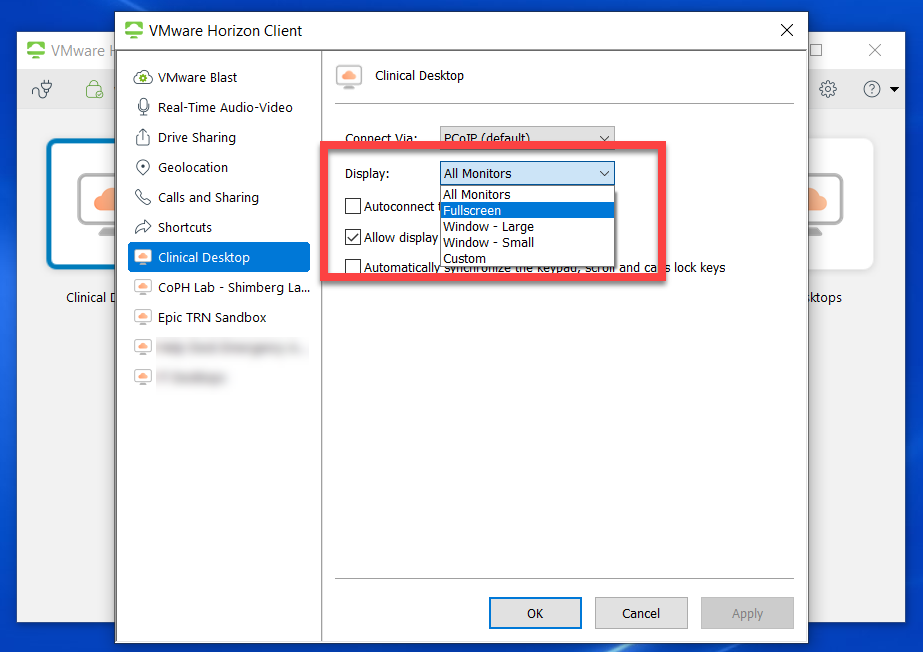 Image Added Image Added
- Once you have selected the display, select Apply.
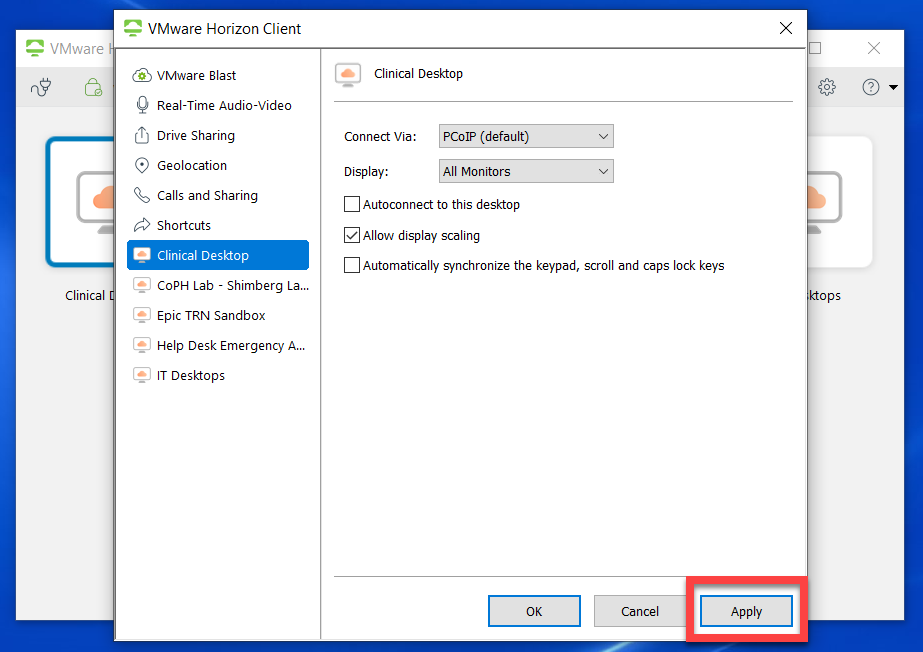 Image Added Image Added
Toolbar Options | Description | Auto Hide | The PushPin in the toolbar represents the Auto Hide. This will allow you to hide the toolbar. | Options | Find Details, Support and Help Information about VMware. | Connect USB Device | Automatically or manually connect USB devices. | Minimize ( _ ) | Minimize the VMware View desktop. | Box ( ) | Re-size the VMware View screen. | Exit ( X ) | Close the VMware view. This will log you out of the client. |
Table 1: VMware View toolbar. Back to top |
| icon | false |
|---|
| title | Table of Contents |
|---|
|
If you are unable to solve your issue with this knowledge base article, please contact the USF IT Service Desk by calling (813) 974-HELP (4357) or emailing help@usf.edu.
If you find any errors or omissions in any knowledge base article, please contact and inform the USF IT Service Desk by calling (813) 974-HELP (4357) or emailing help@usf.edu. |





.png?version=1&modificationDate=1531243244487&cacheVersion=1&api=v2)
.png?version=1&modificationDate=1531243290670&cacheVersion=1&api=v2)

.png?version=1&modificationDate=1531243268830&cacheVersion=1&api=v2)


.png?version=1&modificationDate=1531243348720&cacheVersion=1&api=v2)


