Voicemail System Access
- ccoquera
- Jessica Marshall
- Deborah Nava
Overview
This user guide will walk you through accessing your voicemail (on and off campus), changing your voicemail pin, and setting up call forwarding on your office phone. At the end of the guide you'll find helpful resources and documents that you download and keep with you at your desk.
Access Voicemail from your On-Campus Phone
The first time you access the Cisco voicemail system you will be required to set it up. Follow these steps to set up your voicemail.
Dial 4-6000.
- Listen to the prompts.
- Enter your default PIN.
- Press the # sign.
Access Voicemail from a Phone Outside of USF
Dial (813) 974-6000.
- Press the * sign.
- Enter your ID (your desk phone number - (xxx)-xxx-xxxx).
- Press the # sign.
- Enter your PIN.
- Press the # sign.
Mailbox Matrix
| Setup Options | MAIN MENU | SHORTCUTS |
|---|---|---|
Greetings ...............................................1 Message Settings .................................. 2 Preferences ........................................... 3 Transfer Settings ................................... 4 Alternate Contact # (zero out) ............... 5 Help ....................................................... 0 Exit ......................................................... * | Play new messages ...............................1 Send a message ................................... 2 Review old messages ........................... 3 Setup options ....................................... 4 Help ...................................................... 0 Exit ....................................................... *** | Help .................................................. 0 Cancel/backup .................................. * Skip/confirm ...................................... # Change greeting settings ................. 4 1 Change PIN (password) .................... 4 3 1 Change your name ........................... 4 3 2 |
NOTE
Get Voicemail via Cisco website
- Click http://vmail.usf.edu
- Login with you NetID and password.
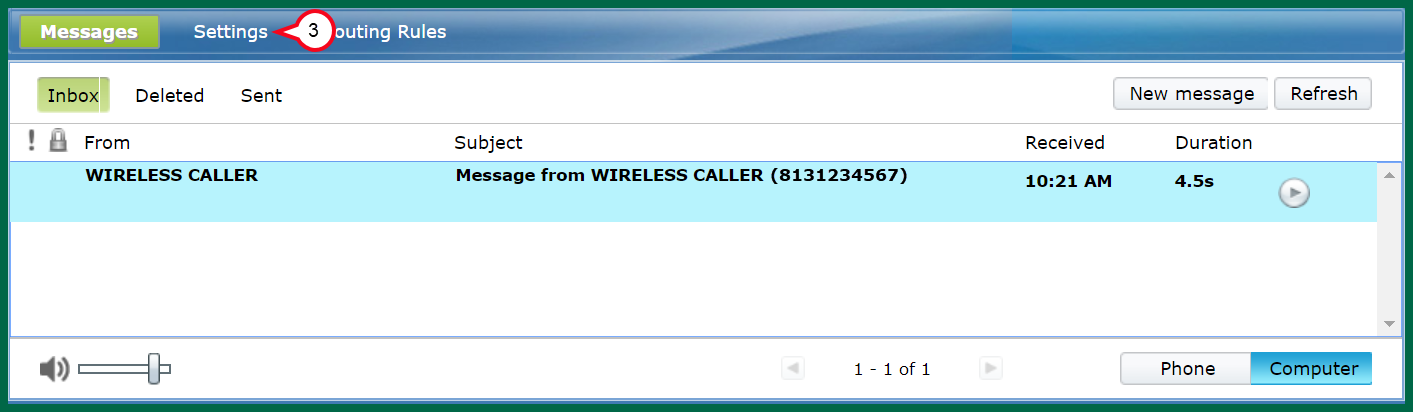
This will open your Cisco Inbox. - Click the Play icon on message in Inbox to play message.

Change Voicemail Pin
- Click http://vmail.usf.edu
- Login with you NetID and password.
This will open your Cisco Inbox. - Click the Settings tab
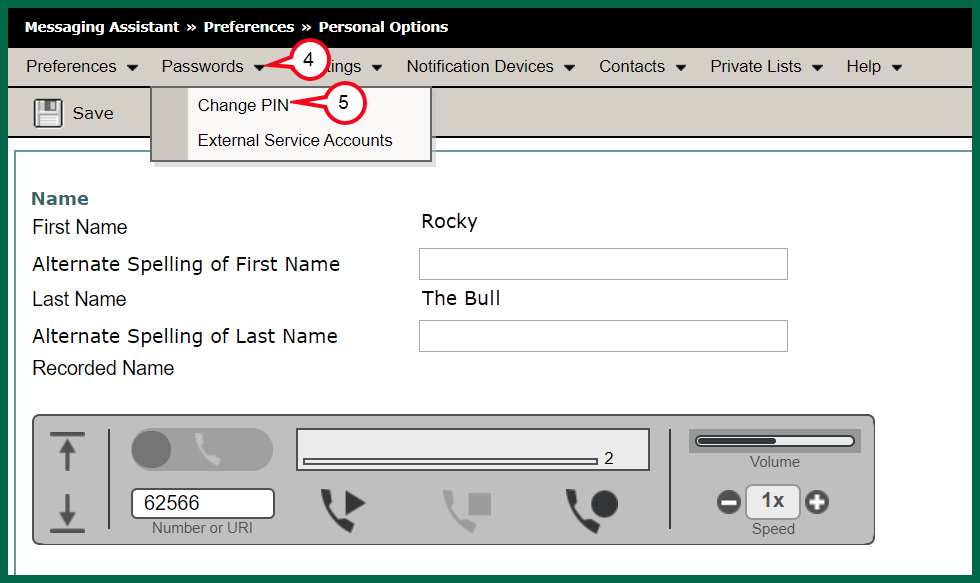
- Click the Passwords drop-down menu
- Select Change PIN.
- Enter your new pin in the "New PIN" field
- Confirm your new pin in the "Confirm New PIN" field
Click Save.
Setting up Call Forwarding
Cisco uses call transfer (forwarding) rules based on caller identity, time of day, and your meeting schedule to forward particular calls to your voicemail or another phone number. Below are steps to set up your call forwarding.
Set up Personal Call Transfer Rules
- Click http://vmail.usf.edu
- Login with your NetID and password
This will open your Cisco Inbox. - Click Settings
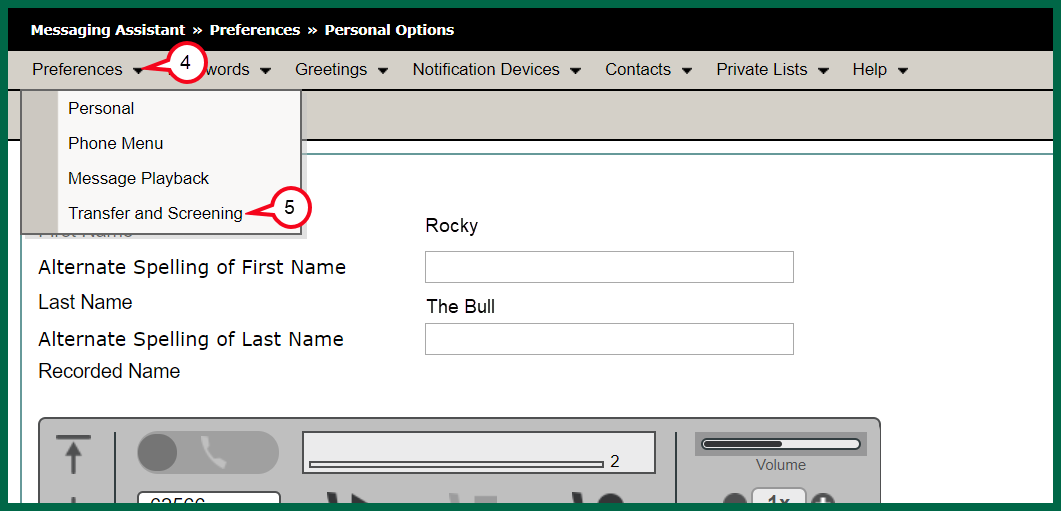
This will open the Messaging Assistant web tool. - Click Preferences
- Click Transfer and Screening
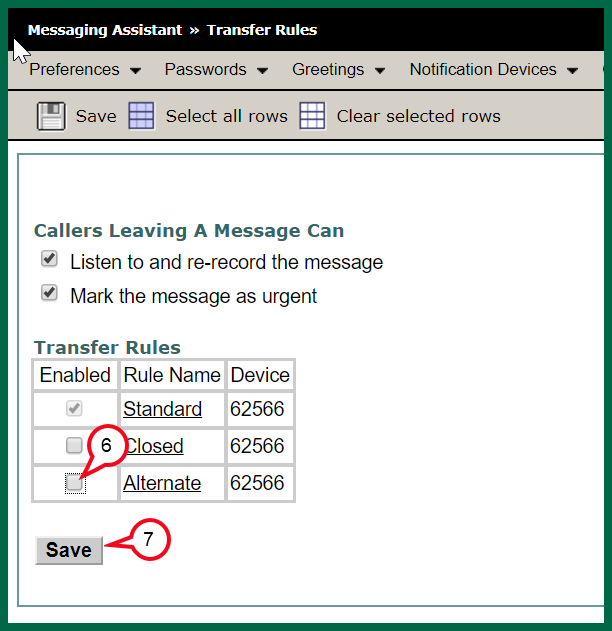
- Check the box next to Alternate
- Click Save
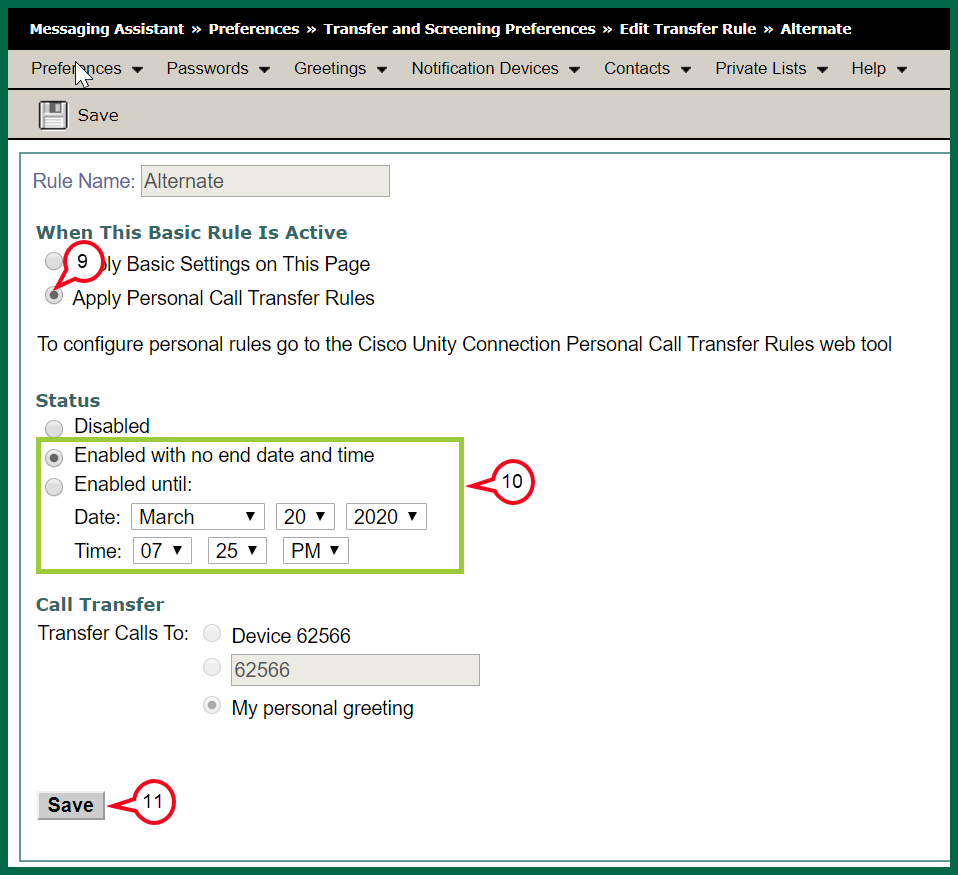
- Click Alternate
- Select "Apply personal Call Transfer Rules"
- Choose from the following in the "Status" Section
- Enable with no End Date and time
- Enable until, then enter the Date and Time.
- Click Save
Set up Destinations
- Navigate to your Cisco Inbox.
- Click http://vmail.usf.edu
- Login with your NetID and password
- Click the Routing Rules tab
This will open the Personal Call Transfer web tool.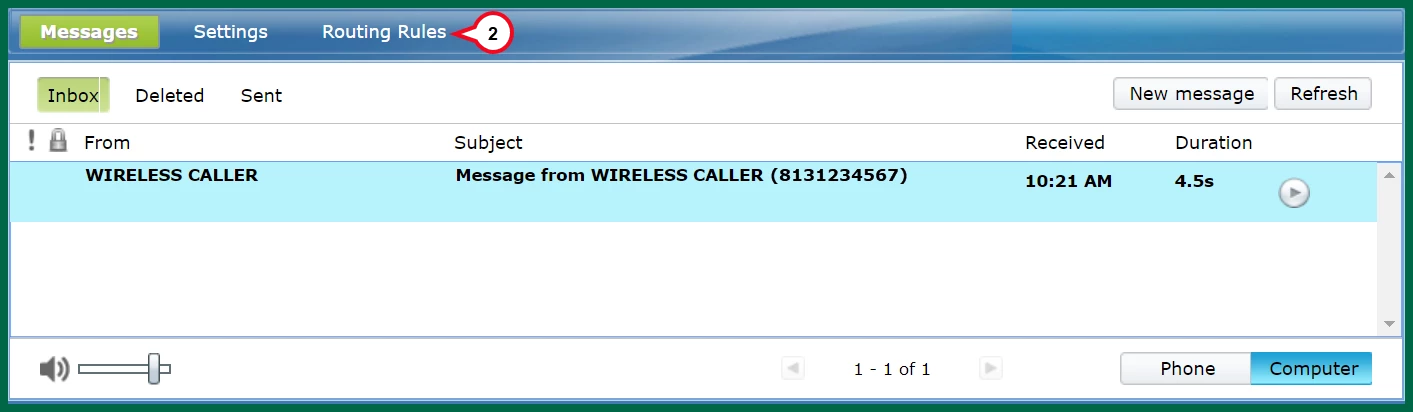
- Click Destinations
- Click View Destinations
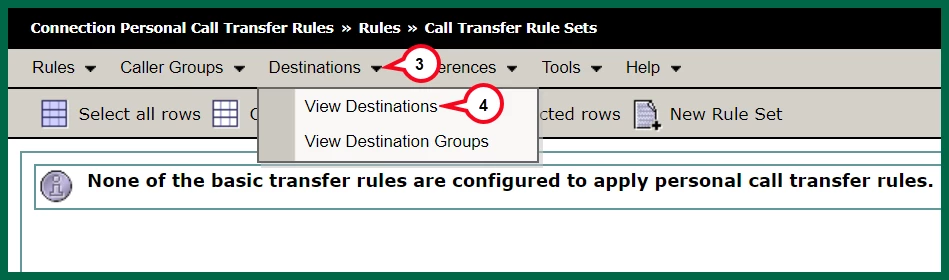
- Click New Destination
The Create Destination page will open. - Enter a name for the phone number that calls will be transferred to in the "Name" field
- Enter 9, the area code, and the phone number in the "Phone Number or URI" field.
- Enter the number of rings you want the system to wait before transferring the call in the "Rings to Wait" field. The default value is four rings.
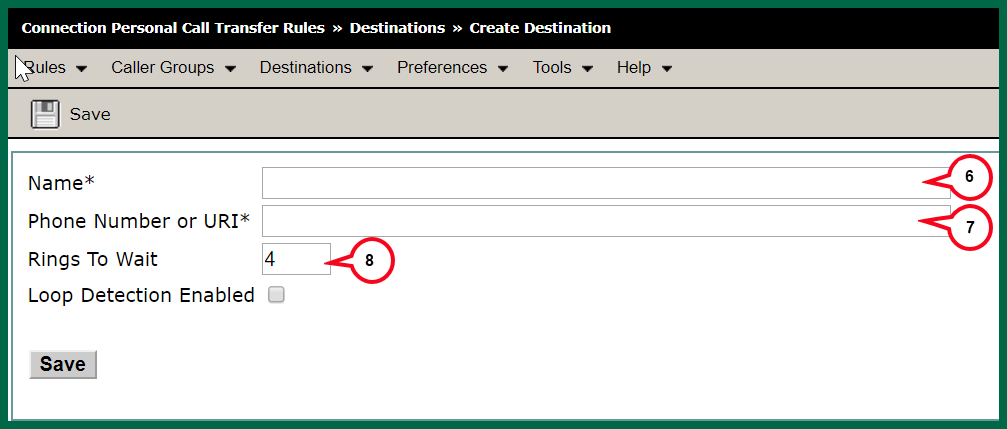
- Click Save
Create Rule Sets
Click Rules
Click View Call Transfer Rule Sets
Click New Rule
Enter a name for the new rule set in the "Name" field
Choose a name that applies to the situation and is easy to remember. (For example, a rule set named “Workweek” might be active Monday through Friday, while a rule set called “Vacation” might be active during the calendar dates of that vacation).Click Save
- Click Add Rule
Complete the required fields
- Click Update Preview to display a text version of the rule so you can confirm that it is correct before you add it to the ruleset
- Click Save
Enable Rule Set
- Click Rules
- Click Enable Rule Sets
- Choose from the following options:
Helpful Resources
Tampa
- Cisco Unity Voicemail Telephone and Outlook Quick Reference Guide
- Cisco Unity Voicemail Optional Notification Quick Reference Guide
- Cisco Unity Voicemail FAQ's
Sarasota
- Cisco Unity Voicemail Telephone and Outlook Quick Reference Guide
- Cisco Unity Voicemail Optional Notification Quick Reference Guide
- Cisco Unity Voicemail FAQ's
St. Petersburg
- Cisco Unity Voicemail Telephone and Outlook Quick Reference Guide
- Cisco Unity Voicemail Optional Notification Quick Reference Guide
- Cisco Unity Voicemail FAQ's