Best Practices
Report Landscape and Terminology
In Power BI, a report can have one or more report pages and all the pages together are collectively referred to as the report. The basic elements of the report are visuals (aka visualizations), standalone images, and text boxes. From the individual data points, to the report elements, to the report page itself, there are innumerable formatting options.
In-depth guidance and instructions for creating and using Power BI reports is available at Microsoft > Learn.
Report Focus: Requirements
Creating a report starts before you build your first visual because a good report needs planning. Know what data you have to work with and write down the requirements for the report. Ask yourself “What is the business need, how is this data going to be used, and by whom?” A key question is “what decisions does the reader want to be able to make based on this report?”
The answer to those questions will drive your design. Every report tells a story. Make sure that story matches the business need. It may be tempting to add visuals that show dramatic insights, but if those insights don’t match the business need, then the report won’t be useful – and in fact your users might be distracted by those visuals. Also, you may find that the information needed to make that decision cannot be gleaned from this data. Can this report be used to measure what is needed?
Reports can be used to monitor, uncover, track, predict, measure, manage, test, and more. If, for example, the business need is a sales report that measures performance, then you might design a report that looks at current sales, compares it to previous sales, compares to competitors, and includes some KPIs that trigger alerts. Perhaps readers can drill down into the sales numbers to see store closures or supply chain issues that may be impacting sales. Another drill-down might be the ability to look at sales by store, region, product, season, and more.
Know the customers for the report and design a report that uses familiar terminology and provides data at a level of detail and complexity on par with the customers’ level of knowledge. Have more than one type of customer? One size doesn’t always fit all; design separate report pages based on expertise and be sure to label each page clearly so customers can self-identify. Another option is to use slicers so customers can tailor the page to fit them. Involve the customer in the planning stage and avoid the mistake of building what you think they need. Be prepared to start over and to iterate.
Once you’ve identified the business need, the customers, and the metrics you’d like to include, the next step is to pick the right visuals to tell the story and present those visuals in the most-effective way possible.
Layout - Report Canvas
The report canvas has a finite amount of space. If you can’t fit all the elements on a single report page, break the report up into pages. A report page can be tailored to a specific audience (e.g., HR, IT, Sales, SLT), or to a specific business question (e.g., How are defects impacting our downtime?, What is our Marketing campaign’s impact on Sentiment?) or as a progressive story (e.g. first page as overview or attention-grabbing “hook”, 2nd page continues the data story, 3rd page dives deeper into the story, etc.). If your entire report fits on a single page, great. If it doesn’t, create separate report pages that logically chunk the content. And don’t forget to give the pages meaningful and helpful names.
Think about filling an art gallery. You wouldn’t put 50 pieces of artwork into a small room, fill it with chairs and paint each wall a different color. As the curator, you’d choose just pieces that have a common theme, lay them out around the room with plenty of space for visitors to move and think, and place informational cards that describes what they’re looking at. There is a reason most modern galleries have plain walls!
Alignment, order, and proximity
The layout of your report elements impacts comprehension and guides the reader through the report page. How you place and position elements tells a story. The story might be “start here and then look here” or “these 3 elements are related to each other.”
- In most cultures, people scan from left to right and top to bottom. Position the most important element in the top left corner of your report. And organize the rest of the visuals in a way that leads to logical navigation and comprehension of the information.
- Position elements that require the reader to make a choice to the left of the visualizations the choice will impact: like slicers, for example.
- Position related elements close to each other; proximity implies the elements are related.
- Another way to convey relationships is to add a border or color background around related elements. Conversely, add a divider to distinguish between different sections of a report.
- Use white space to visually chunk sections of the report page.
- Fill the report page. If you find that you have a lot of extra white space, make your visualizations larger or make the canvas smaller.
- Be intentional with sizing your report elements. Don’t let space availability dictate the size of a visualization.
- Make important elements larger than the others or add a visual element like an arrow to draw attention.
- Align the elements on the report page, either symmetrically or intentionally asymmetrically.
Tell a story at a glance
The overall test should be that somebody without any prior knowledge can quickly understand the report without any explanation from anybody. With a quick glance, readers should be able to quickly see what the page is about and what each chart/table is about. When readers look at your report, their eyes should be drawn to the element you want them to look at first and their eyes will then continue left-right-top-down. YOu can change this behavior by adding visual cues like text box labels, shapes, borders, size, and color. Remember that the function of your report is to meet a business need; not to be pretty. But some level of beauty is required, especially when it comes to first impressions.
Nashville consultant Tony Bodoh explains "Emotion fires a half-second before logic can kick in." Readers will first react at an emotional level to your report page, before they take more time to dig deeper. If your page looks disorganized, confusing, unprofessional…your reader may never discover the powerful story it tells.
Concentrate on creating a common theme or look for your report, and apply it to all pages of the report; using standalone images and other graphics to support and not detract from the real story; and applying all the best practices we discussed up to this point in the article.
For more information on types of visualizations and uses, review this USF created self-paced course: Best Practices for Creating Data Visualizations
Additional Considerations for Report Creation
Removing Visual Header for Non Visuals
Recently we have noticed after designing more in-depth reports with multiple drills and hierarchies that these drill options will overlap with other drill options and graphic options (even lines in Power BI can have options). So we have started removing the Visual Header from all non related graphics on reports.
- When a non interactive visual is added to the report, for example a logo.

- You see on the right of the page a section called "Format Image" or "Format Shape"

- At the very bottom you see the option for the Visual Header.

- Simply make sure the Option is turned Off.

Query Editor
- Query name should not have spaces
- Avoid spaces when naming Columns and Measures
Security
Managed Roles
To define security roles, you can do the following.
Import data into your Power BI Desktop report, or configure a DirectQuery connection.
You cannot define roles within Power BI Desktop for Analysis Services live connections. You will need to do that within the Analysis Services model.Select the Modeling tab.
Select Manage Roles.
Select Create.
Provide a name for the role.
Select the table that you want to apply a DAX rule.
Enter the DAX expressions. This expression should return a true or false. For example: [Entity ID] = “Value”.
You can use username() within this expression. Be aware that username() will have the format of DOMAIN\username within Power BI Desktop. Within the Power BI service, it will be in the format of the user's UPN. Alternatively, you can use userprincipalname() which will always return the user in the format of their user principal name.
After you have created the DAX expression, you can select the check above the expression box to validate the expression.
Select Save.
You cannot assign users to a role within Power BI Desktop. This is done within the Power BI service. You can enable dynamic security within Power BI Desktop by making use of the username() or userprincipalname() DAX functions and having the proper relationships configured.
Power BI RLS Process
To learn how to use the technique of the Power BI RLS Process we must explain briefly the Role Managing. Start following these steps:
- Select the Modeling tab.

- Select Manage Roles.

- Select Create.

Select the table that you want to apply a DAX rule.

Enter the DAX expression that contains the Power BI RLS Process flow. Explained below:
The view (POWERBI_SECURITY_POC_V2) in DWTEST contains the following tables:
- F_USFPG_COLLECTIONS_RVUS
- USFPG_DEPT_PROFILE_V
- L_SECURITY_POWERBI_V
The view (POWERBI_SECURITY_POC_V2) is joined using KEY_DEPT_PROFILE which is available in F_USFPG_COLLECTIONS_RVUS and USFPG_DEPT_PROFILE_V and KEY_GLOBAL_DEPT in L_SECURITY_POWERBI_V and USFPG_DEPT_PROFILE_V.
The DAX username role in Power BI desktop -> [POWERBI_ID] = LEFT (USERPRINCIPALNAME(),FIND("@",USERPRINCIPALNAME())-1) which is used to retrieve the netid of the person who signs-in to Power BI and maps it to the PowerBI ID which is available in the L_SECURITY_POWERBI_V
Once the report is published, in PowerBI service, the username role created can be assigned to individual users or AD groups. So who ever signs-in to the report will see only the rows which has their netid.[1] See below an example of a new role with the dax expression containing a POWERBI_ID and filtering by a specific Department:

To test the role and verify the data is correct just select View as Role, select the role and click OK.


Now you will see a yellow banner in top of the report showing the role name and the option to Stop Viewing:

When the roles are configured as needed you can click Publish and the changes will be applied.

Now we have to configure the security settings in the PowerBi web environment. We select the workplace in which we published the report and select the dataset with the same name of the report. Select the (...) and click the Security option in the ddl:

You will be able to assign different Members to the roles created so they can inherit the rules of the assigned role.

Click Add and then Save. This will assign that member to the specified role.

Now we Test as role to verify if the configuration works as we needed:

Findings:
- Workplace
If you are an Admin in the workspace you will always be able to see all data when you open a report no matter your security role assigned for a particular report.
If you are a Member in the workspace you will be able to see the relevant data permitted in your security role assigned for a particular report.
See image below:

- Multiple Roles
Basically you cannot have one member in more than one Department row-level security role. The way the method is constructed at this moment not allows one person to participate in more than one department. Same report shows data from the MULTIPLE departments an example non-VIP user is approved to access requirement not met. See following images:


A work around can be creating Department row-level security roles that can have more than one department so we can add multiple users to this role. But this will need further investigation and testing.
See below images with the role containing the Pediatrics department with Pathology:


Manage security on your model
To manage security on your data model, you will want to do the following.
- Select the ellipse (…) for a dataset.
Select Security.
This will take you to the RLS page for you to add members to a role you created in Power BI Desktop. Only the owners of the dataset will see Security available. If the dataset is in a Group, only Administrators of the group will see the security option.
You can only create or modify roles within Power BI Desktop.
Working with membersAdd members
You can add a member to the role by typing in the email address, or name, of the user, security group or distribution list you want to add. This member has to be within your organization. You cannot add Groups created within Power BI.
You can also see how many members are part of the role by the number in parenthesis next to the role name, or next to Members.
Remove members
You can remove members by selecting the X next to their name.
RLS has changed several times with each new update so this can change soon.
RLS (Row Level Security)
Based on testing and review, RLS still needs to be worked through in greater details. I have added links to better help with future build and testing of RLS.
• With PowerBI: https://powerbi.microsoft.com/en-us/documentation/powerbi-admin-rls/
• With PowerBI Desktop: https://powerbi.microsoft.com/en-us/documentation/powerbi-desktop-rls/
• With Analysis Services: https://powerbi.microsoft.com/en-us/documentation/powerbi-desktop-tutorial-row-level-security-onprem-ssas-tabular/
Data security
All distribution group members have the same permissions to the data as the content pack creator. The one exception to this is SQL Server Analysis Services (SSAS) on-premises tabular datasets. Because the reports and dashboards are connecting live to the on-premises SSAS model, the credentials of each individual distribution group member are used to determine the data he or she can access.
Creating APP for Shared Content SecurityApp workspaces
App workspaces are the places where you create apps, so to create an app, you first need to create the app workspace. If you’ve ever worked in a group workspace in Power BI, then app workspaces will be familiar. They’re the evolution of group workspaces – staging areas and containers for the content in the app.
You can add colleagues to these workspaces as members or admins. All app workspace members and admins need Power BI Pro licenses. In the workspace you can all collaborate on dashboards, reports, and other articles that you plan to distribute to a wider audience, or even your entire organization.
When the content is ready, you distribute the app. You can send a direct link to that wider audience, or they can find your app from the Apps tab by going to Download and explore more apps from AppSource. Those people can’t modify the contents of the app, but they can interact with it either in the Power BI service, or one of the mobile apps -– filtering, highlighting, and sorting the data themselves.
How are app workspaces different from group workspaces?
All existing group workspaces can serve as app workspaces, and you can publish apps from any of these workspaces. Here’s one way app workspaces and group workspaces are different: You create an app workspace as a place to create and house a specific app. There’s a one-to-one relationship between the app and contents of the app workspace. Everything in the app workspace will be in the app when you distribute it.
Now that you understand apps and app workspaces, let's start creating and publishing an app.
Create an app workspace
Once users in an area have been setup with licenses within O365, a team workspace needs to be created where all the reports developed by the area/developers can deploy and share their reports. This team workspace is created in O365 and can be accomplished by putting in a Service Now ticket addressed to the Office 365 team. You can request for a specific workspace name which will be used in accordance with existing naming conventions to create the said workspace. As a part of this workspace creation, one or more users of the workspace will be set up as “administrators” of the workspace. This role will let these specific users add more users to the workspace or remove them as needed.
(Optional) - For any groups that want to share the developed reports on PowerBI to users who do not also have a PowerBI Pro license, it is necessary to add the workspaces hosting those reports into the ‘Premium Capacity’ license. There is currently no formal process for this. The best way to go about this is to request the Office 365 team for premium access via a Service Now ticket at which point it will run the request by IT senior leadership. Once cleared by IT senior leadership, O365 admins can turn on the ‘Premium Capacity’ on the specific workspace. Any dashboard on this workspace can now be shared with users who may not have a pro license themselves.
After workspaces have been created in O365, it will appear in the app in Power BI, too.

Distribute an app
When you’ve finished creating and perfecting the dashboards and reports in your app workspace, you package it all up as an app and distribute it.
- In the workspace, select the Publish app button in the upper right to start the process of sharing all the content in that workspace.

- First, on Details, fill in the description to help people find the app. You can set a background color to personalize it.

- Next, on Content, you see the content that’s going to be published as part of the app – everything that’s in that workspace. You can also set the landing page – the dashboard or report people will see first when they go to your app. You can choose None. Then they’ll land on a list of all the content in the app

- Last, on Access, decide who has access to the app: either everyone in your organization, or specific people or email distribution lists.

- When you select Finish, you see a message confirming it’s ready to publish.
- In the success dialog box, you can copy the URL that’s a direct link to this app and send it to the people you’ve shared it with.

The business users that you've distributed the app to can find it in two different ways. You can send them the direct link to the app, or they can search for it in Microsoft AppSource, where they see all the apps that they can access. Either way, after that whenever they go to Apps, they’ll see this app in their list.
Change your published app
After you publish your app, you may want to change or update it. You notice that when you open your app from Apps, even though you’re the one who published it, you can’t edit it – Edit Report is grayed out.

But it’s easy to update it if you’re an admin or member of the app workspace.
- Open the app workspace that corresponds to the app.

Open the dashboard or the report. You see that you can make any changes you want.
The app workspace is your staging area, so your changes aren't pushed live to the app until you publish again. This lets you make changes without affecting the published apps.
- Go back to the app workspace list of contents and select Update app.

- Update Details, Content, and Access, if you need to, then select Update app.

The people you’ve distributed the app to automatically see the updated version of the app.
Unpublish an app
Any member of an app workspace can unpublish the app.
- In an app workspace, select the ellipsis (...) in the upper-right corner > Unpublish app.

This action uninstalls the app for everyone you've distributed it to, and they no longer have access to it. It doesn't delete the app workspace or its contents.
Publish from Power BI Desktop
When you publish a Power BI Desktop file to the Power BI service, the data in the model and any reports you created in Report view are published to your Power BI workspace. You’ll see a new dataset with the same name, and any reports in your Workspace navigator.
Publishing from Power BI Desktop has the same effect as using Get Data in Power BI to connect to and upload a Power BI Desktop file.
Note
Any changes you make to the report in Power BI, for example, add, delete, or change visualizations in reports, will not be saved back to the original Power BI Desktop file.
To publish a Power BI Desktop dataset and reports
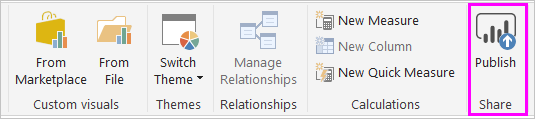
In Power BI Desktop select File > Publish > Publish to Power BI or click Publish on the ribbon.
Sign in to Power BI.
Select the destination.

When complete, you receive a link to your report. Click the link to open the report in your Power BI site.

Re-publish or replace a dataset published from Power BI Desktop
When you publish a Power BI Desktop file, the dataset and any reports you created in Power BI Desktop are uploaded to your Power BI site. When you re-publish your Power BI Desktop file, the dataset in your Power BI site will be replaced with the updated dataset from the Power BI Desktop file.
This is all straightforward, but there are a few things you should know:
- If you already have two or more datasets in Power BI with the same name as the Power BI Desktop file, publish could fail. Make sure you have only one dataset in Power BI with the same name. You can also rename the file and publish, creating a new dataset with same name as the file.
- If you rename or delete a column or measure, any visualizations you already have in Power BI with that field could be broken.
- Power BI ignores some format changes of existing columns. For example, if you change a column’s format from 0.25 to 25%.
- If you have a refresh schedule configured for your existing dataset in Power BI and you add new data sources to your file and then re-publish, you’ll have to sign into them in Manage Data Sources prior to the next scheduled refresh.
- When you republish a dataset published from Power BI Desktop and have a refresh schedule defined, a dataset refresh is initiated as soon as you republish.
Power BI Apps FAQ
How are app workspaces different from group workspaces?
With this release, we have renamed all group workspaces to app workspaces. You can publish an app from any of these workspaces. The functionality remains on par with group workspaces for the most part. Over the next few months, we plan on the following enhancements to app workspaces:
- Creating app workspaces won't create corresponding entities in Office 365 like group workspaces do. So you can create any number of app workspaces without worrying about different Office 365 groups being created behind the scenes (you can still use an Office 365 group’s OneDrive for Business to store your files).
- Today you can add only individuals to the members and admin lists. Soon you'll be able to add multiple AD security groups or modern groups to these lists to allow for easier management.
How are apps different from organizational content packs?
Apps are an evolution and simplification of content packs, with a few major differences.
- After business users install a content pack, it loses its grouped identity: it's just a list of dashboards and reports interspersed with other dashboards and reports. Apps, on the other hand, maintain their grouping and identity even after installation. This makes it easy for business users to continue to navigate to them over time.
- You can create multiple content packs from any workspace, but an app has a 1:1 relationship with its workspace. We believe this makes apps easier to understand and maintain over the long run. See the roadmap section of the Power BI blog for more on how we plan to improve this area.
- Over time we plan to deprecate organizational content packs, so we recommend you create apps from now on.
What about read-only members in groups?
In groups, you can add read-only members who can only view the content. The main problem with this approach was that you couldn't add security groups as members. With apps, you can publish a read-only version of your app workspace to large audiences, including security groups. You can stage your changes to the dashboards and reports in the app without affecting end users. We recommend that you use apps in this way in the future. Over the long run, we plan to deprecate read-only members of workspaces as well.