| Anchor |
|---|
| Creation of MyStudentWebsite |
|---|
| Creation of MyStudentWebsite |
|---|
|
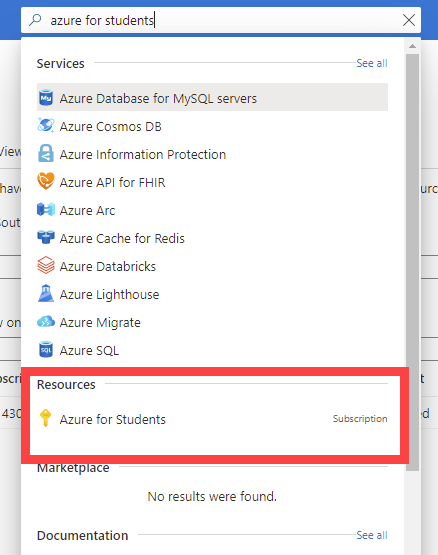
Creation of MyStudentWebsite- Open a browser and navigate to https://portal.azure.com
- Sign in using your USF email address and password.
- Once at the Azure Homepage, select Subscriptions.

- In the top search field, enter and select Azure for Students under Resources.
- In the left column, select Resource Groups.
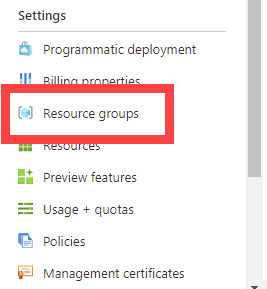
- Select Create in the top banner.

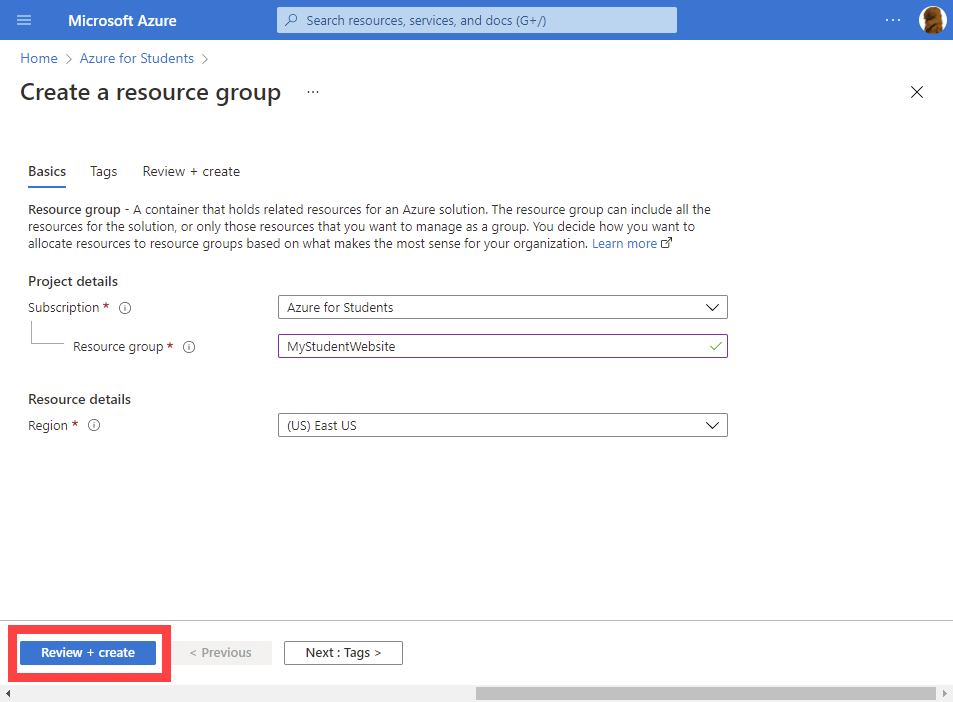
- Under Resource group, enter MyStudentWebsite to name the group.

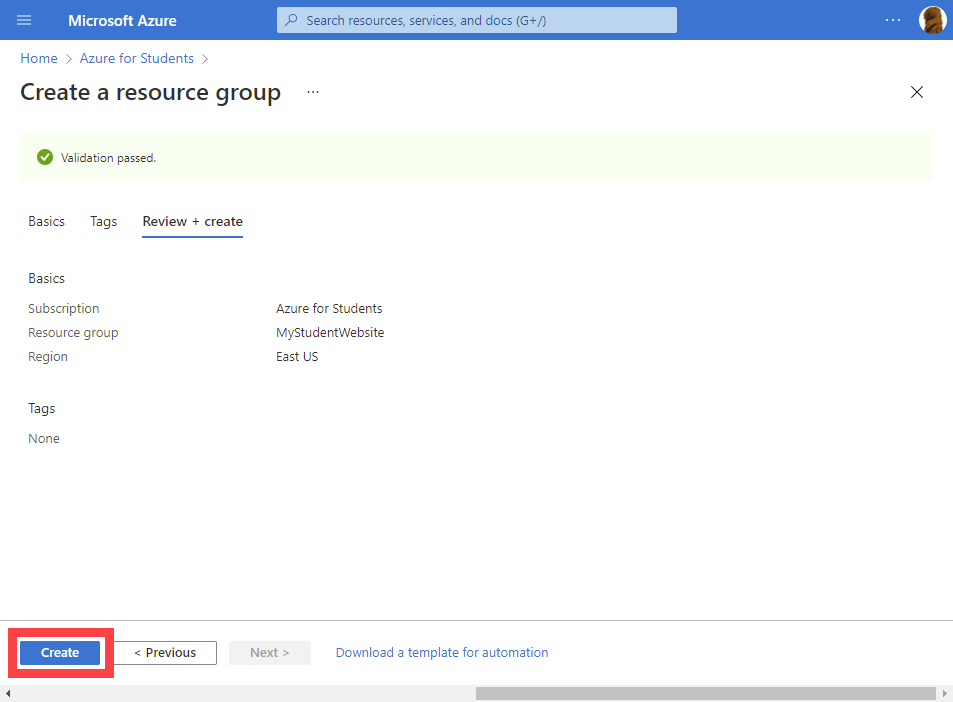
Select Review+Create to the bottom left.
 | Note |
|---|
Make sure that Region is set to (US) East US. |
- Select Create.
Back to top | Anchor |
|---|
| Configuration of MyStudentWebsite |
|---|
| Configuration of MyStudentWebsite |
|---|
|
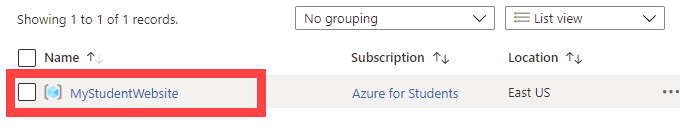
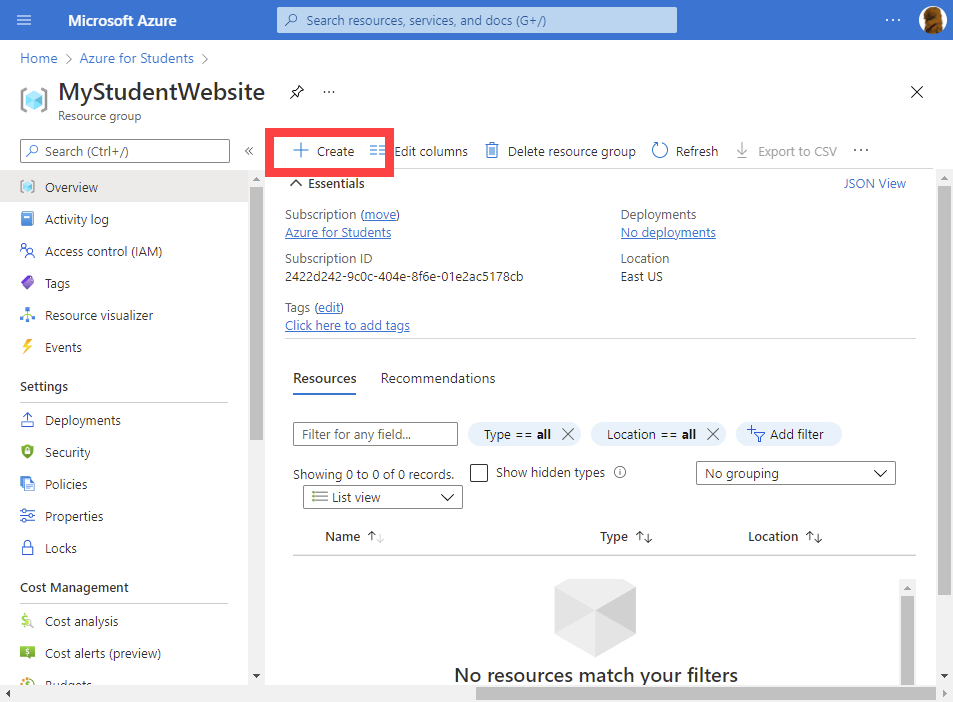
Configuration of MyStudentWebsite- Once the Resource group is created, select the group from the list provided.
- Select Create in the top banner.
- In the search field, enter Web Apps.
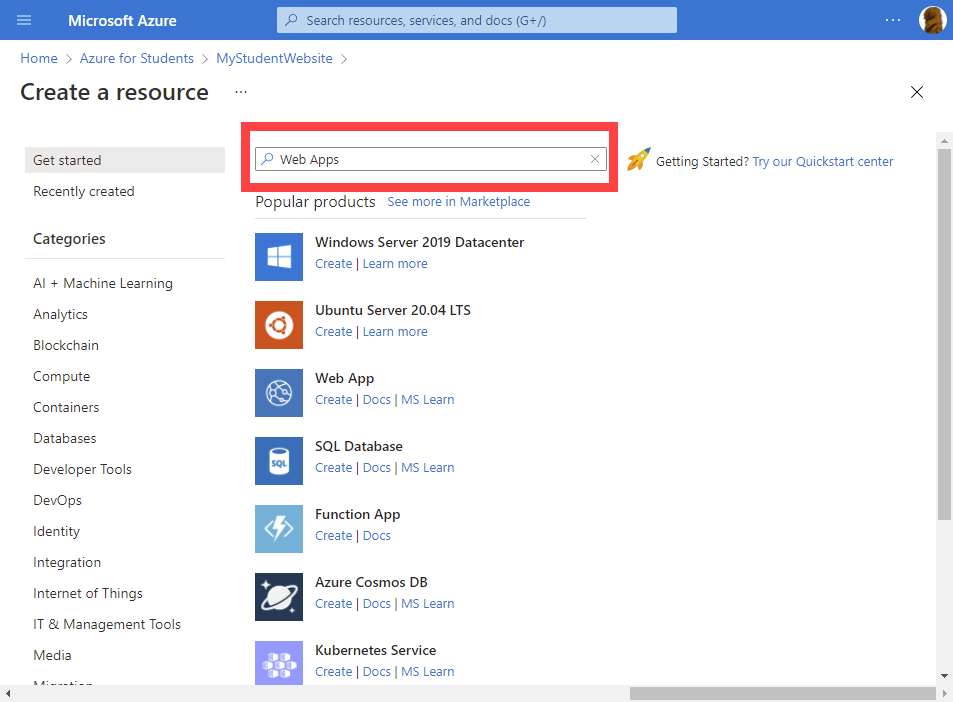
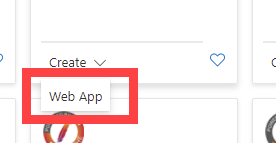
- Once the search is completed, select Create dropdown under Web App.
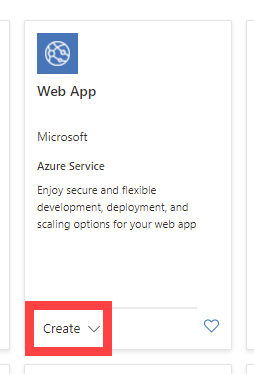
- Select Web App.
- Under Instance Details, you will need to name you your Web App. In the Name field, enter your NetID.

- Under the Runtime Stack drop down, select ASP .NET V4.88 or the desired current version of ASP.NET.

- Under Region, select East US.

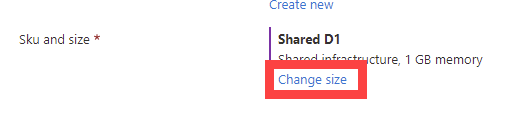
- Under Sku and Size, select Change Size.
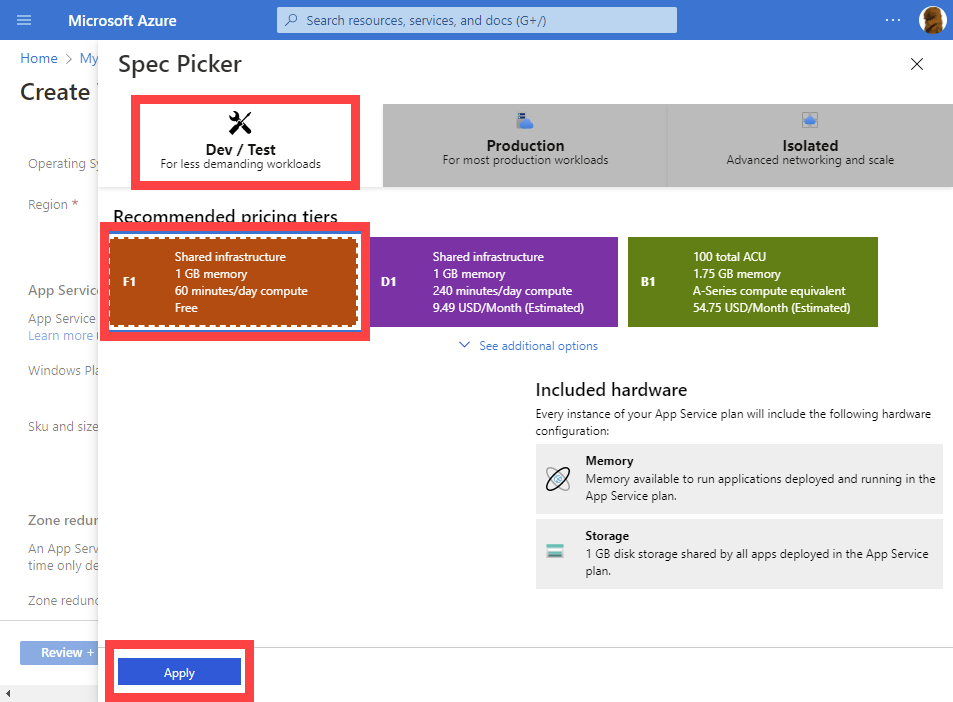
- In the right column labeled Spec Picker, select Dev/Test.
- Select F1 Standard subscription (Free Version).
- Select Apply.
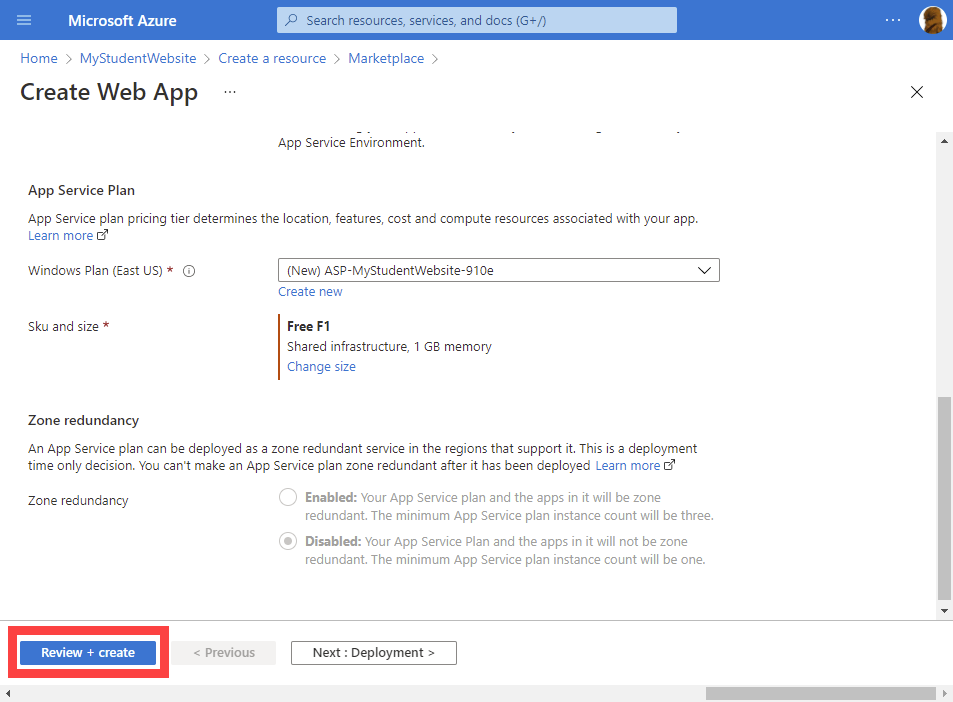
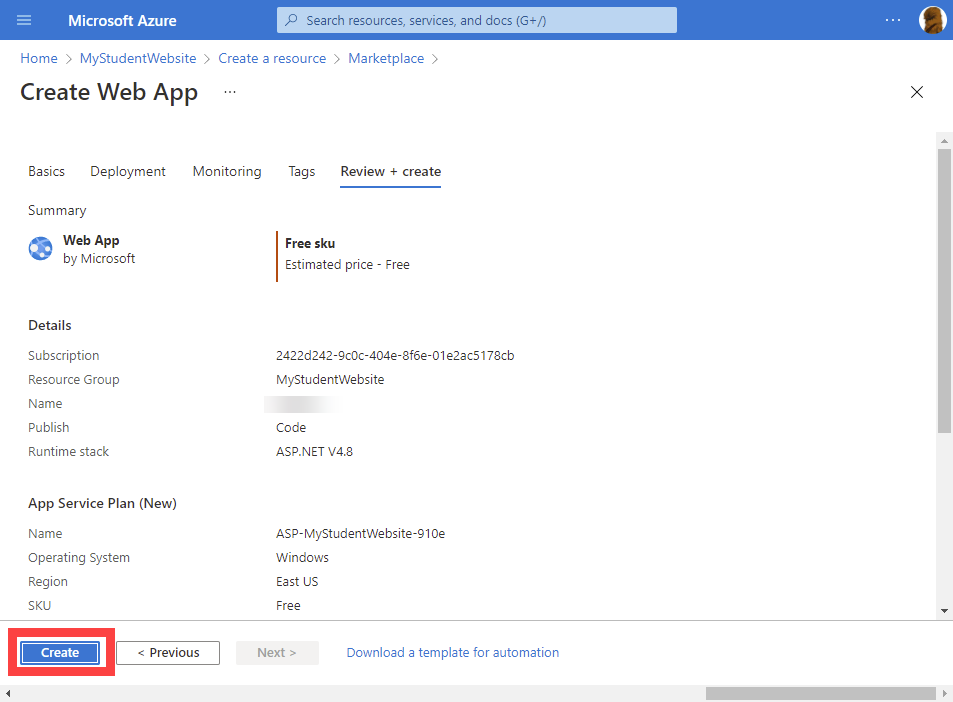
- Select Review+Create at the bottom left.
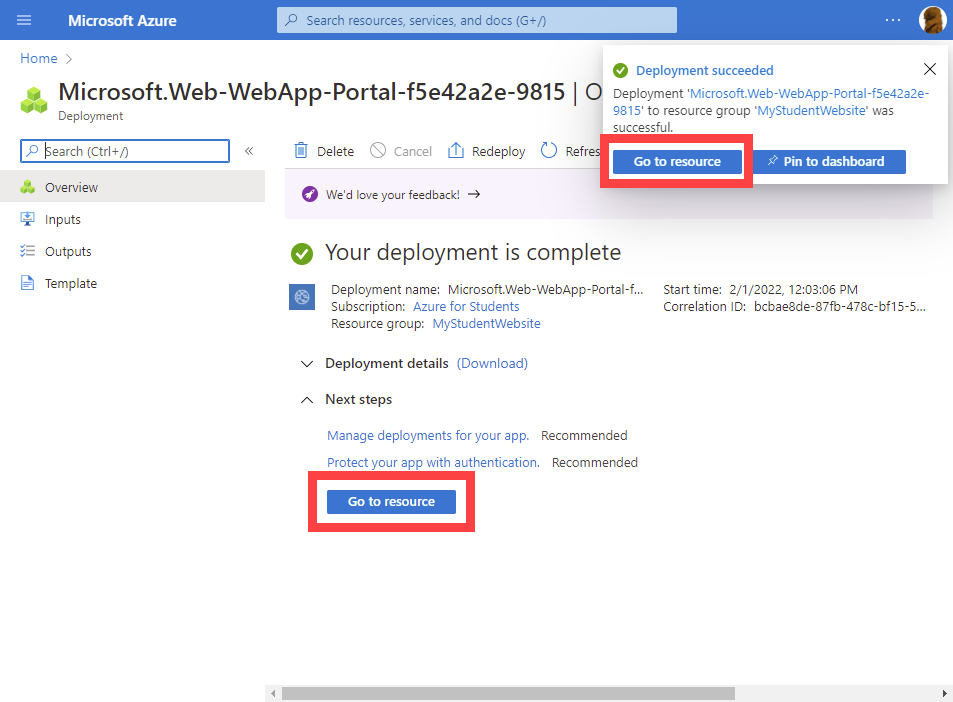
- Select Create. There can be a short wait time before you can proceed.
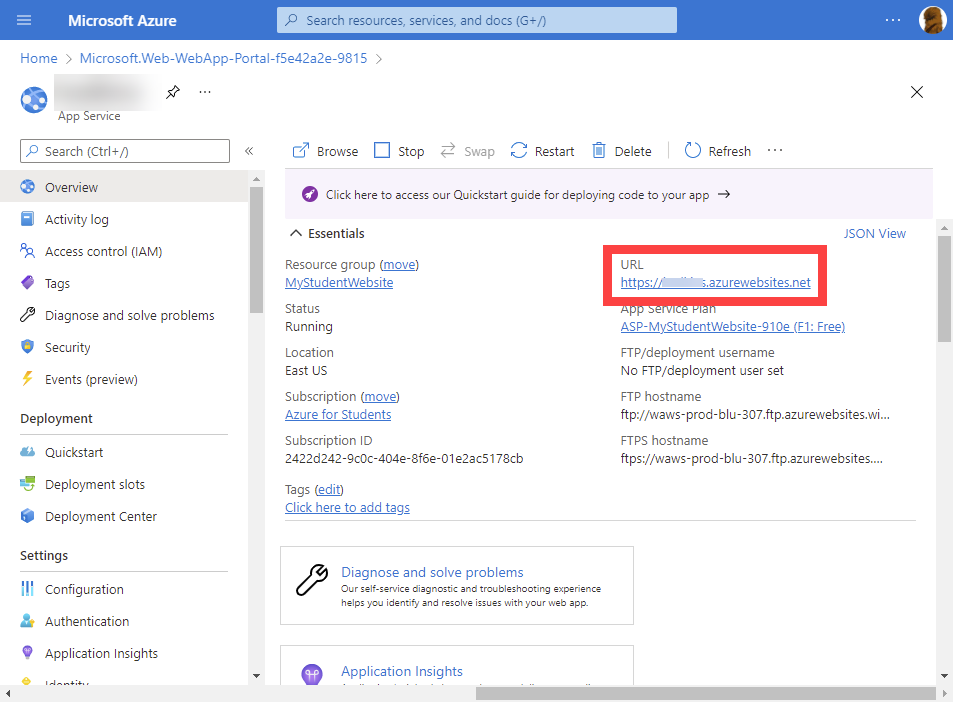
- Select Go to resource
- URL will list what your website will be called. It should be called https://<your netid>.azurewebsites.net
Back to top | Anchor |
|---|
| Uploading Your Website |
|---|
| Uploading Your Website |
|---|
|
Uploading Your WebsiteOnce the creation has been completed, a pop up will occur in the upper right of the browser to let you know it is done.
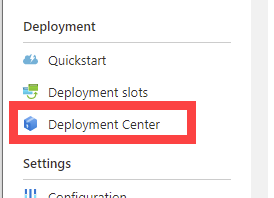
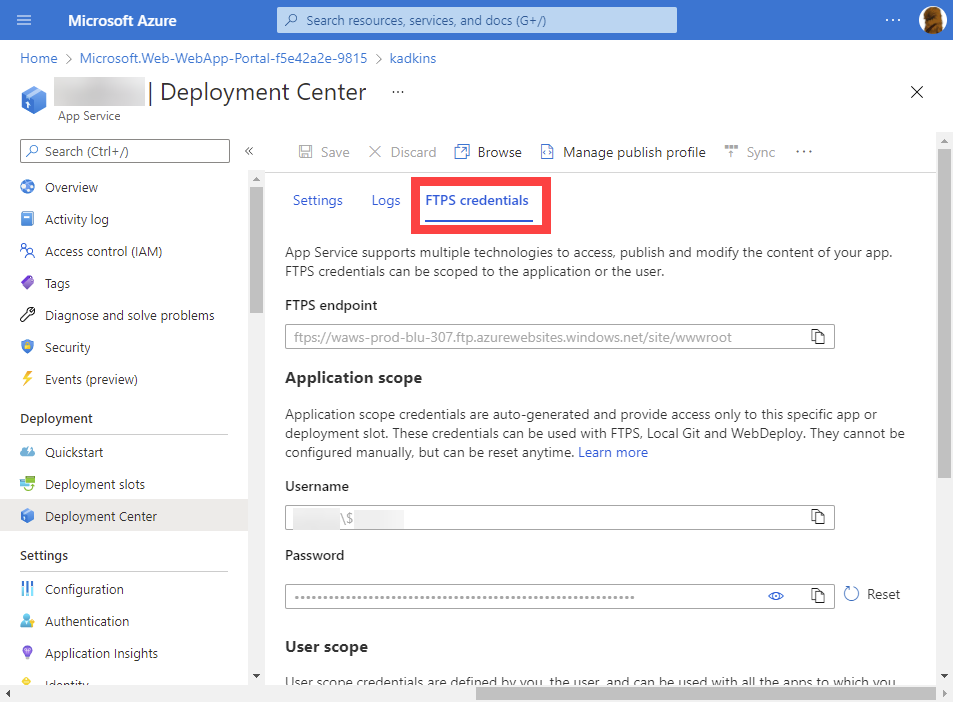
- Select Deployment Center in the left column.
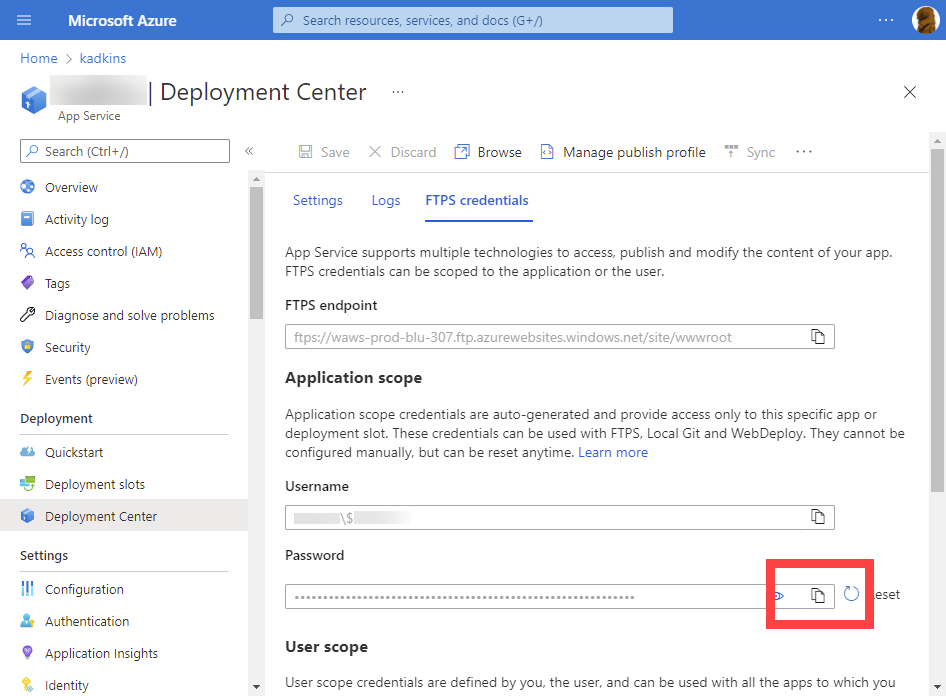
- Select FTPS Credentials.
- Open FileZilla.
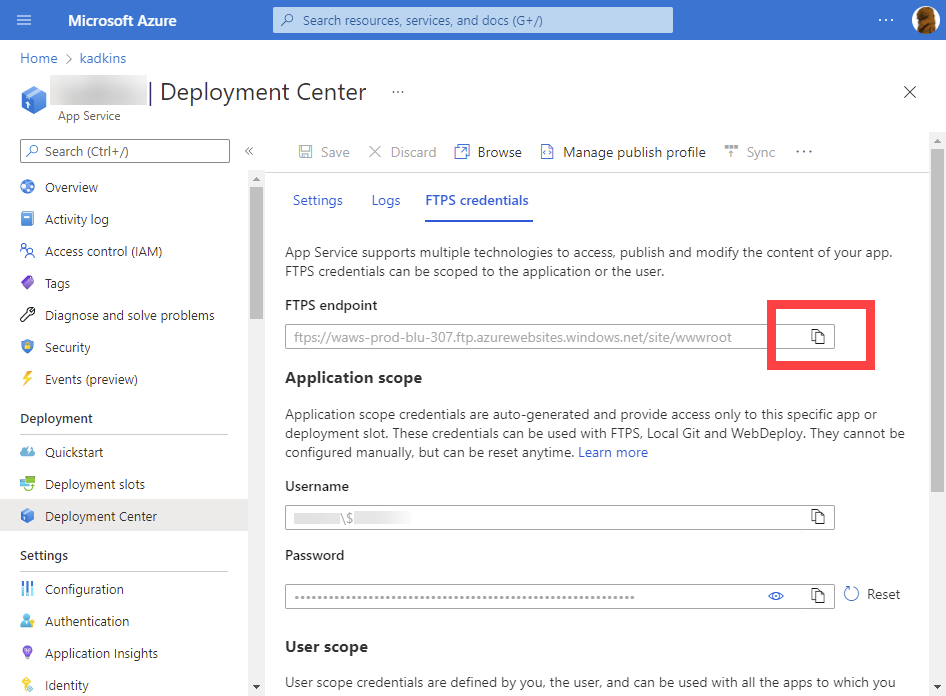
- In the Deployment Center, select the copy icon to the right of the FTPS endpoint.
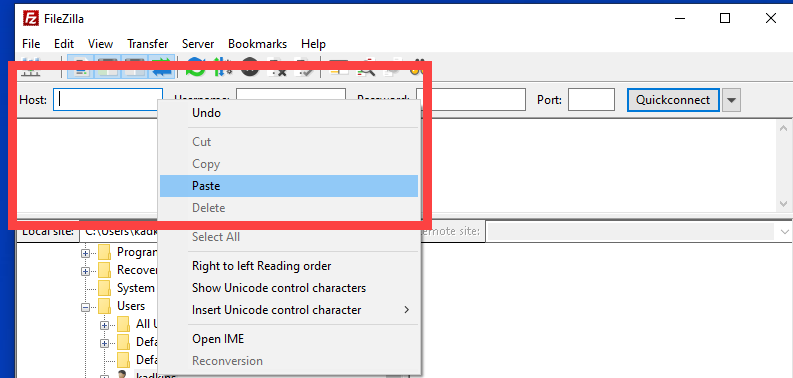
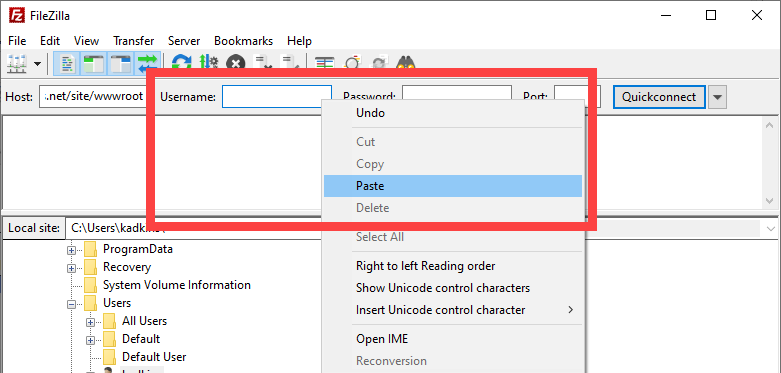
- In FileZilla, right-click in Host and select Paste.
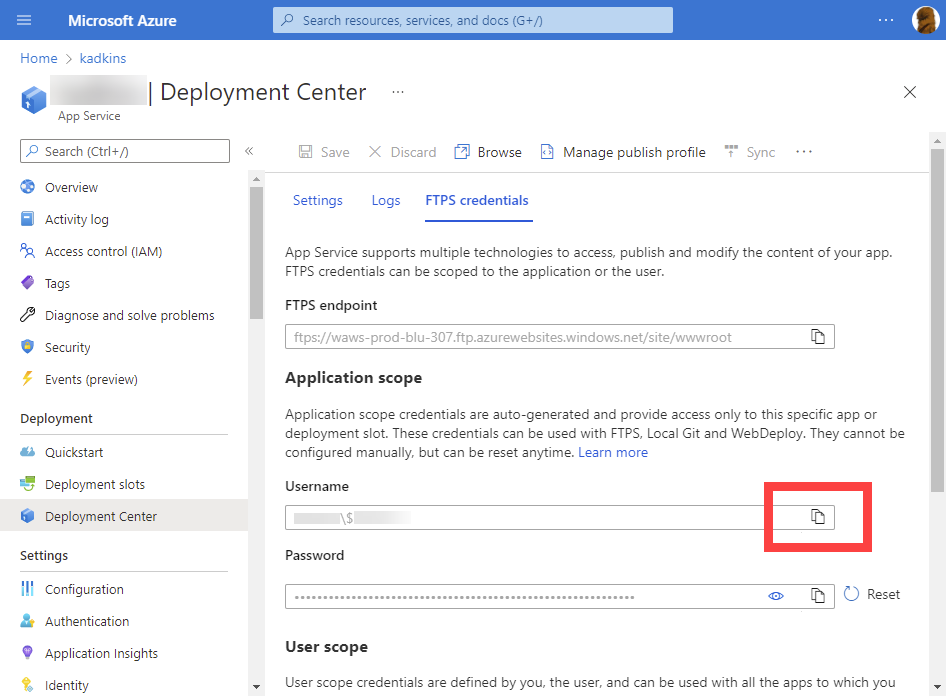
- In the Deployment Center, select the copy icon to the right of the Username.
- In FileZilla, right-click in Username and select Paste.
- In the Deployment Center, select the copy icon to the right of Password.
- In FileZilla, right-click in Password and select Paste.
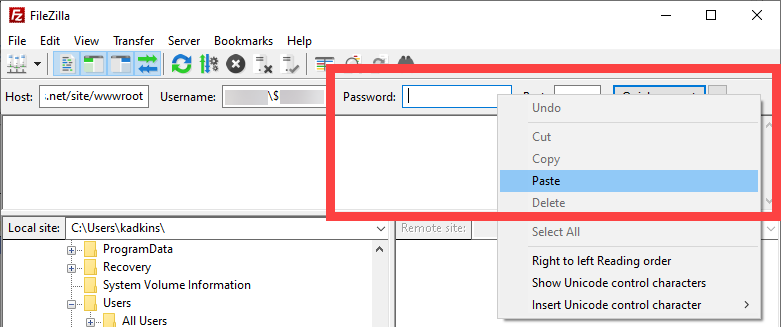
- Left Leave the Port blank.
- Select Quickconnect.

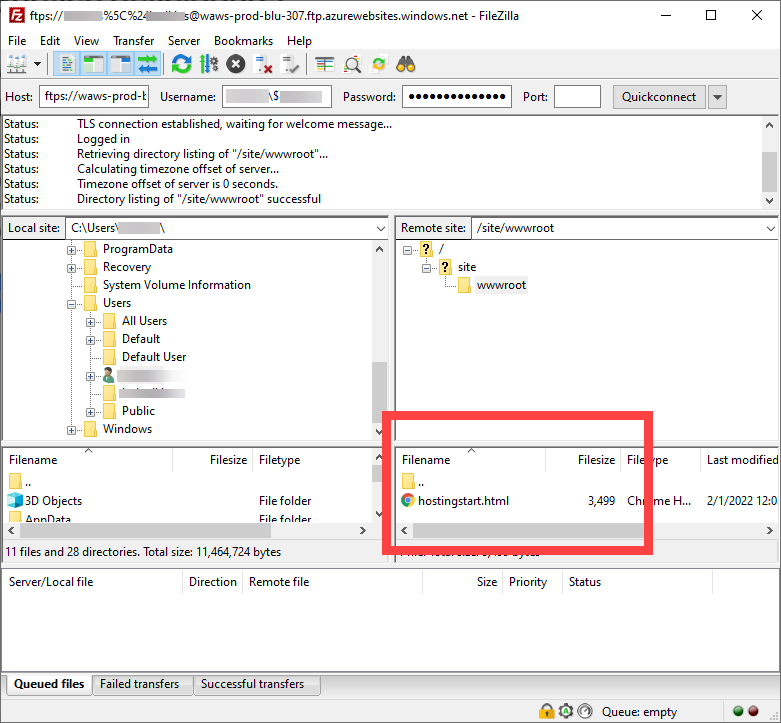
- Once it is completed the connect, you will see the wwwroot under Remote Site.
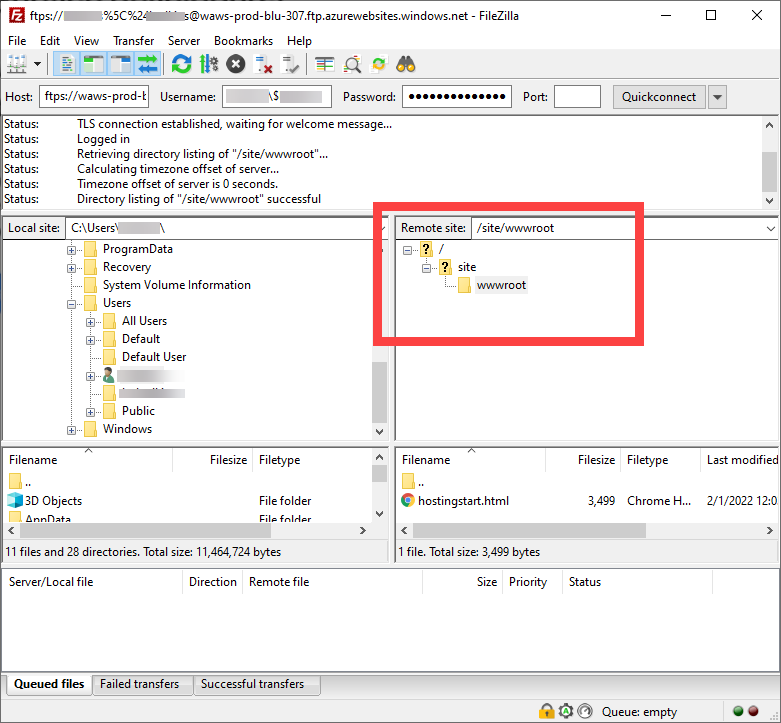
- Delete hostingstart.html from under the Filename under Remote Site.
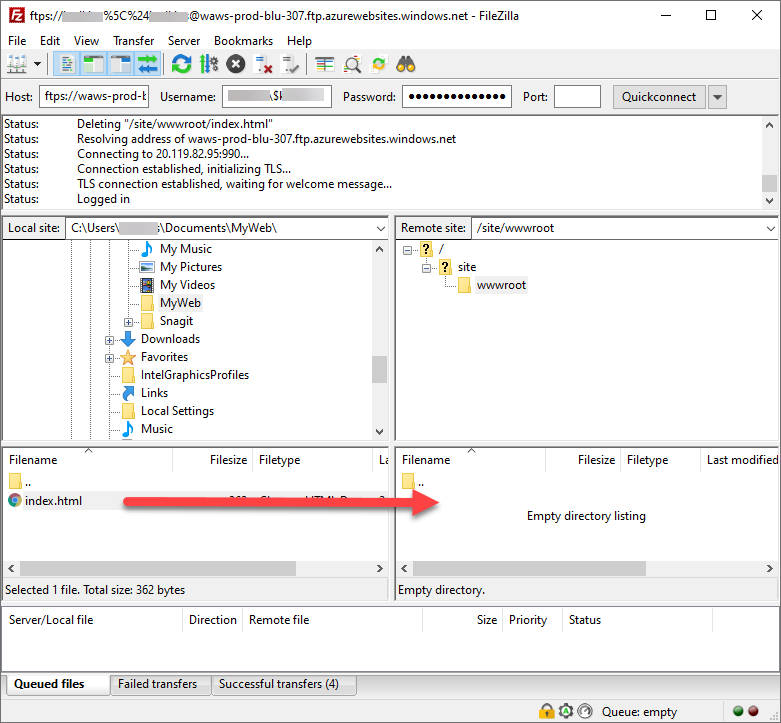
- In the left columns, locate your html you with wish to upload to your Azure Website under Local site.
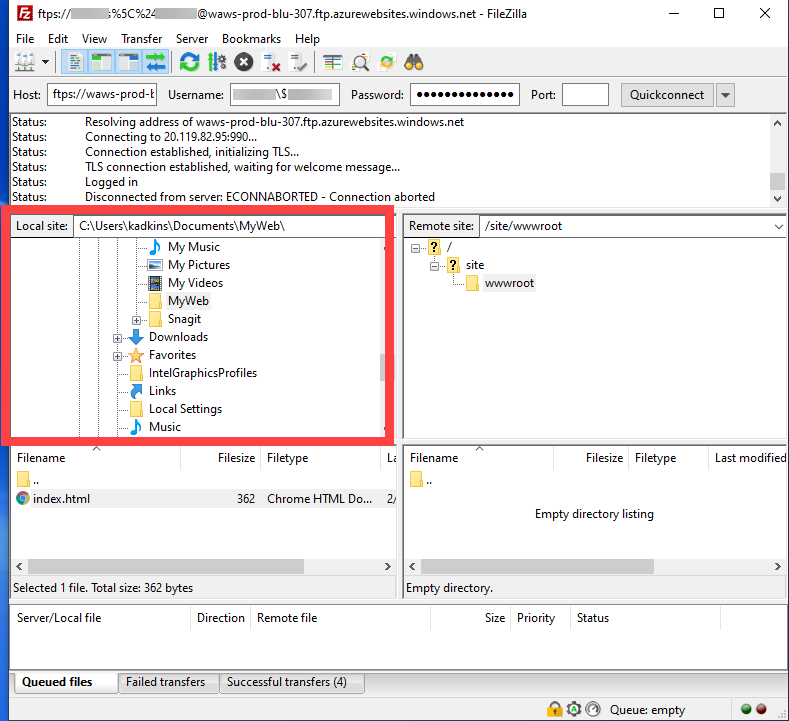
- Drag your .html file into the wwwroot file where you deleted the hostinstart.html
 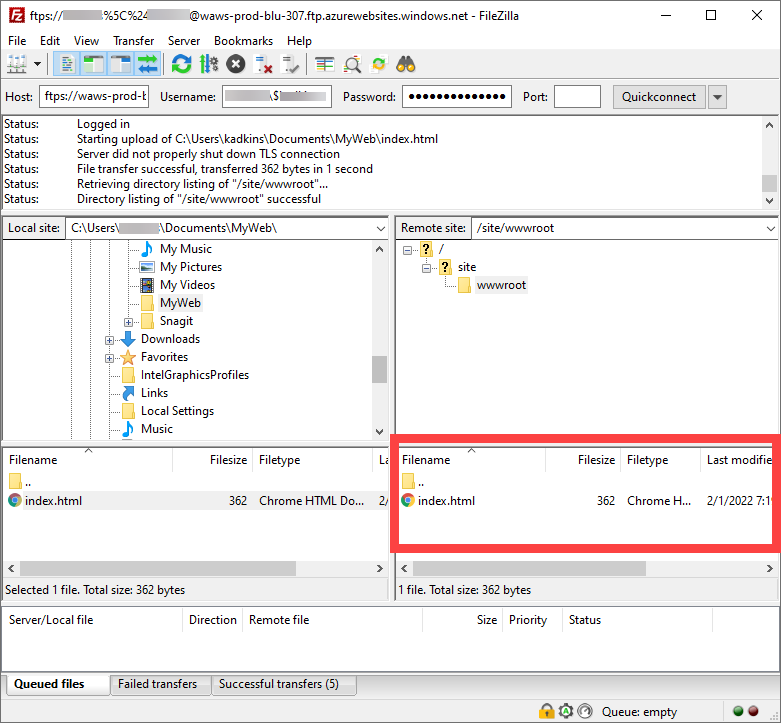
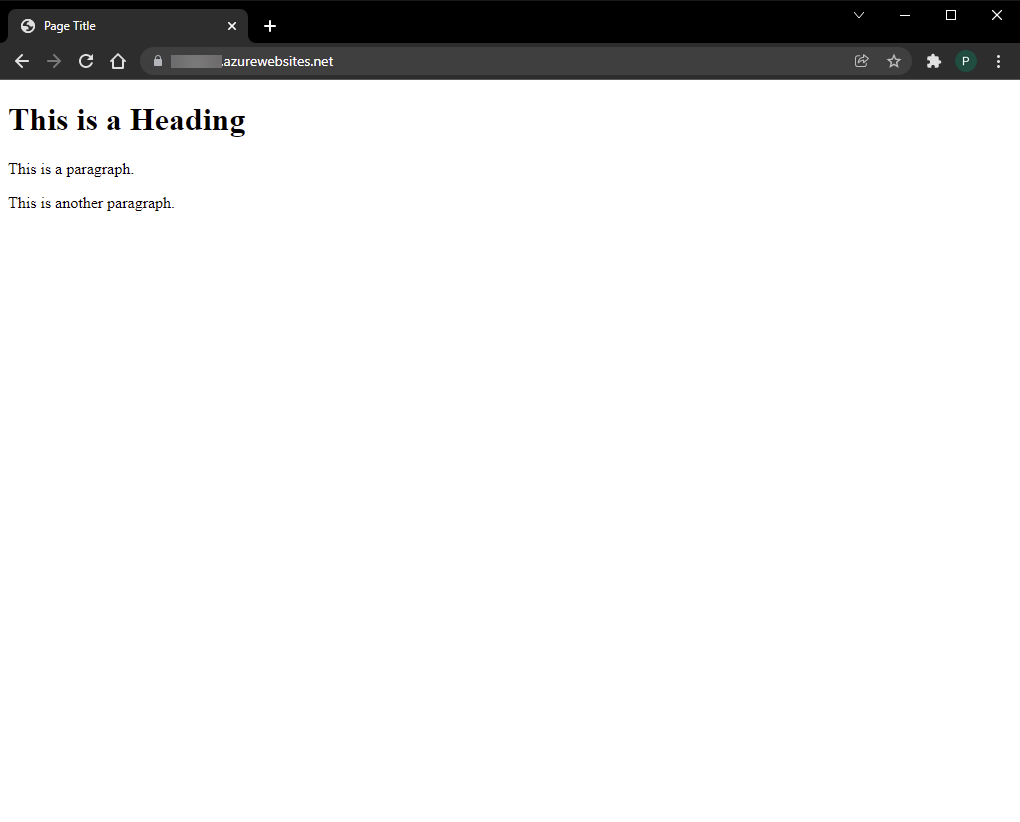
- Open a web browser and navigate to the your MyStudentWebsite URL (https://<your netid>.azurewebsites.net) to see the website live.
Back to top |