
Sitecore Media Library is the tool you use to upload, store, and serve images on your website.
On This Page
| Table of Contents | ||||
|---|---|---|---|---|
|
| Info |
|---|
Looking for information on adding videos or documents to your website? See our documentation. |
Sitecore Media Library
Images that you use on your website are uploaded and served through the Sitecore Media Library. It supports all standard image formats such as JPG, GIF, PNG, and SVG. You’re also free to manage your images as you go because our components provide you with a direct interface to upload and select images as you work.
Selecting Images in Components
Components that support images include a field in the content edit window that allows you to directly access the Sitecore Media Library.
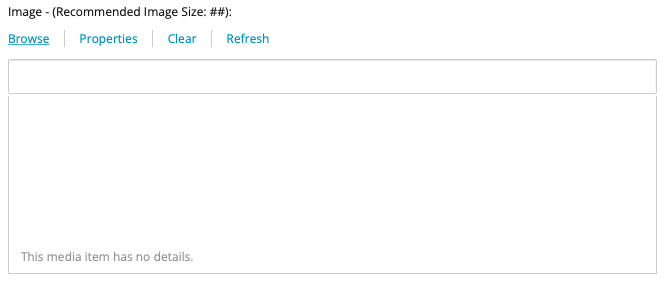
Scroll to the Image field in the Edit window and click the Browse button. The Select Media window will open.
Find and select the image that you want to insert from the Media Library. There are multiple ways to locate the image you want:
navigate through the content tree
search for the item on the Search field
use one of the many predefined filters or presets like My images or Recently uploaded by me
Click the image you want and then click the blue Select button in the lower right of the window. The Select Media window will close and you will be returned to the Edit window to continue editing other content fields.
Uploading Images
If your image does not exist in the Media Library, you can upload it from the same Select Media window that you used to select images.

Scroll to the Image field in the Edit window and click the Browse button. The Select Media window will open.
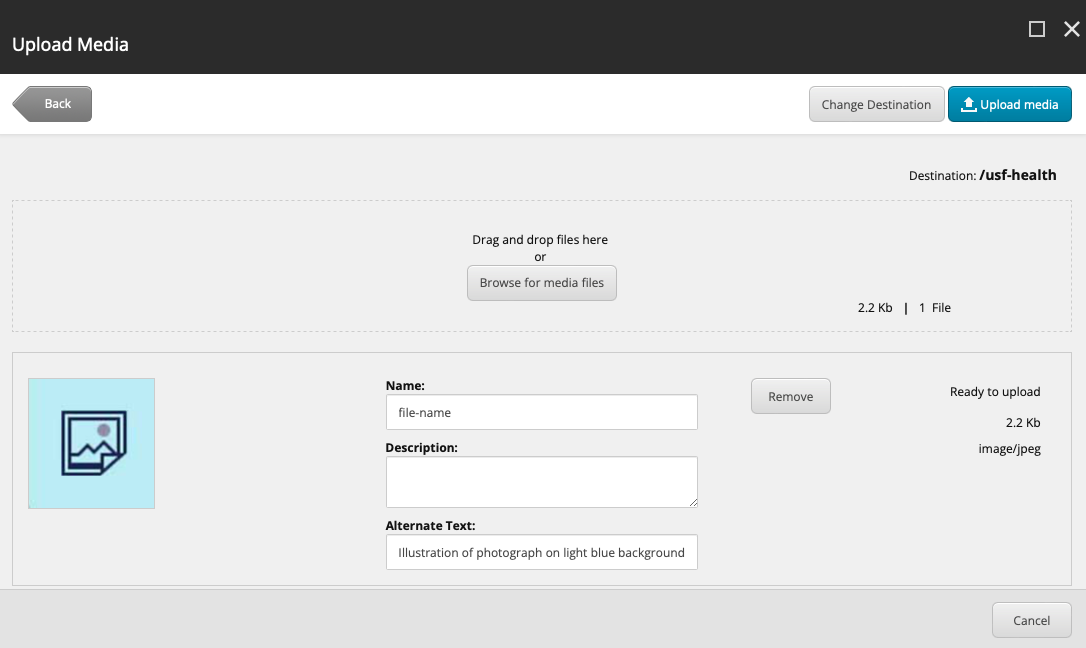
Click the blue Upload button in the top left. The Upload Media window will open.
Click the gray Change Destination button in the upper right. The Media Library file tree will expand allowing you to find the appropriate destination folder for your image.
Click the appropriate folder. The Media Library file tree will close itself and you will see the new destination you have set.
Upload your image by either dragging and dropping it into the labeled area or clicking the Browse for media files button. Your new image will appear on the screen with a preview, information fields, file statistics, and a button to remove it.
Fill in the Alternate text field with a short description of the image. This step is important as it allows visitors with screen readers to understand your image without having to see it.
If needed, upload additional images following the same drag and drop area or Browse for media files button.
Click the Upload media button and your images are now in the Media Library ready to be selected.
Was this helpful? We welcome feedback for this Sitecore documentation: Take the User Survey