Versions Compared

Key

  • This line was added.
  • This line was removed.
  • Formatting was changed.
excerpt

Overview

The Remote Desktop Gateway (RDG) is used to access your on-campus Windows computer from another remote computer. It provides additional security for our connections with university computing resources.


Info
iconfalse
titleTable of Content

Table of Contents
minLevel2


Excerpt


Warning
The computer you are connecting to must be running Windows 7 or above; you cannot use RDG to connect to a Mac, though you can connect from a Mac.

Requirements and Setup

Checking your user group

Your account must be in the destination computer’s Administrators or Remote Desktop Users groups.  

  1. Hit the Windows key on your keyboard (Note: on Windows 10 click on the circle icon next to the Windows icon on your task bar)
  2. Type lusrmgr.msc into the search bar
  3. Hit the Enter key on your keyboard
  4. Click on the Groups folder on the left
  5. Double click on Administrators in the center column (pictured below)
    A new window should pop up
    Image Modified
  6. Look for you profile in the pop up
  7. Double click Remote Desktop Users in the center column (pictured below)
    A new window should pop up
    Image Modified
  8. Look for your profile in the pop up

Newly, Deployed Machines

If you have a newly deployed machine, you will need to add yourself to the Remote Desktop Users mainly by doing the following

  1. Click on the Windows Start button in the lower left Image Added
  2. Type CMD and right-click Command Prompt and select Run as Administrator.
  3. Select Yes on the windows prompt
  4. Enter the following. Make sure you replace <NetID> with your NetID.
    1. Net localgroup “Remote Desktop Users” /add “AzureAD\<NetID>@usf.edu
  5. Hit Enter once the above is entered into the command prompt.
  6. If successful, you should receive a message that the user has been added.


Note

Found your profile under either Administrators or Remote Desktop Users? Continue through the instructions.

Can't find your profile under either Administrators or Remote Desktop Users? Contact us at help@usf.edu and we will add you.

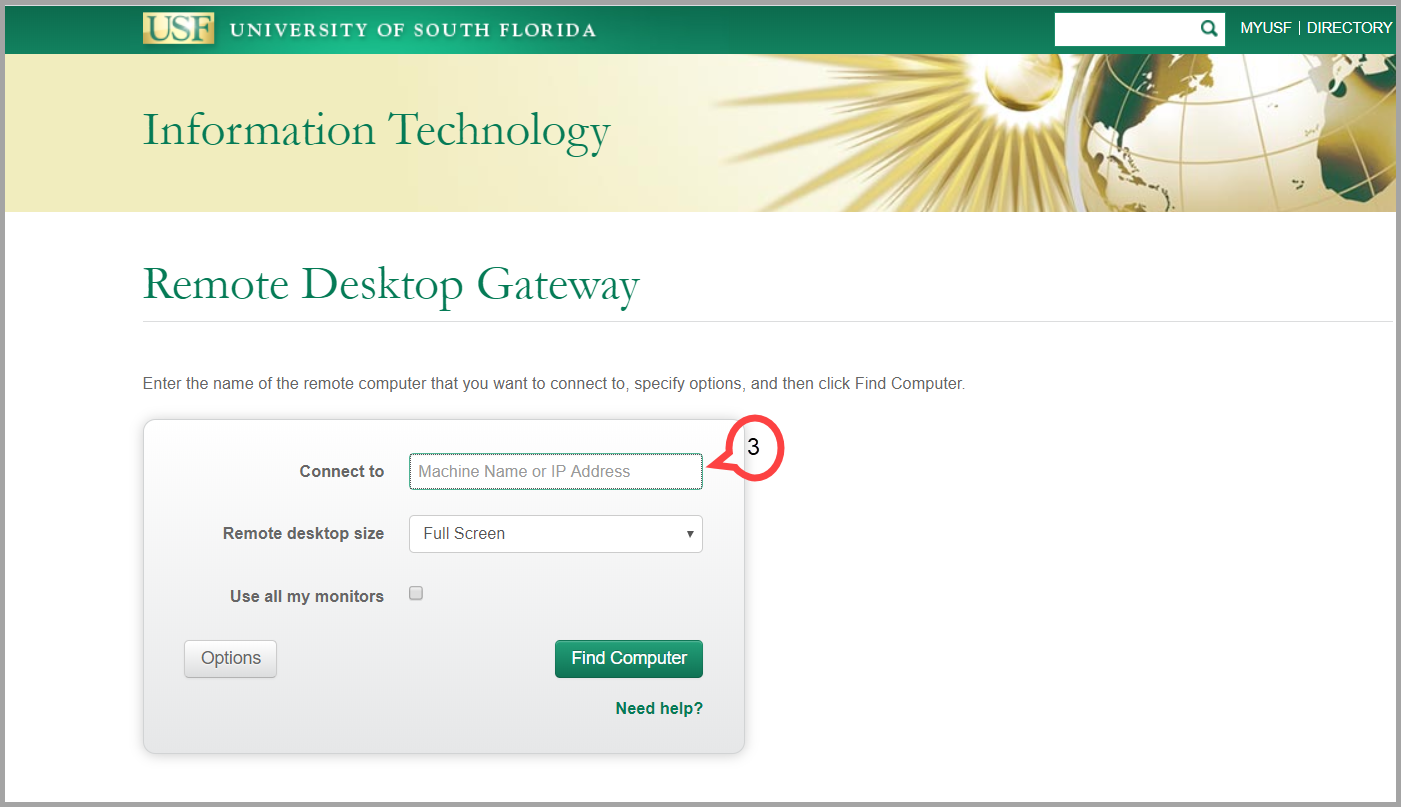
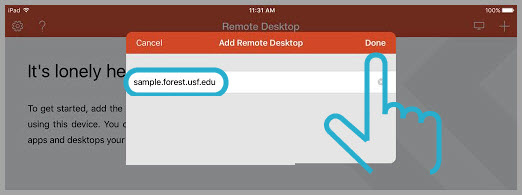
Back to top

Finding your computer's name

You will need to know the computer’s name (ends in forest.usf.edu), or its IP address.  

      In Windows 7:

  1. Hit the Windows key on your keyboard 
  2. Type computer name in the search field that comes up
  3. Hit the Enter button on your keyboard
  4. Click See the name of this computer.
    The name is displayed in the Full Computer Name field
     

      In Windows 8:

  • Hit the Windows key on your keyboard 
  • Type computer
  • Right-click on This PC 
  • Select Properties
    The name is displayed in the PC name field.
          

            In Windows 10:

    1. Click on the circle icon, next to the Windows icon, on your task bar
    2. Type computer name into the search bar
    3. Hit the Enter key on your keyboard
    4. Click View your PC name
      The name is displayed in the PC name field

    Mac:

    1. Select System Preferences
    2. Click on the Sharing pane.
      Your computer name is listed at the top of the new window.

    Back to top

    Connecting 


    Note
    • Make sure your browser (Chrome, Firefox, Microsoft Edge) is the most recent version.
    • The computer you are logging in remotely from must have an up-to-date version of Microsoft's Remote Desktop Connection, which is automatically installed on Windows 7 and later.  
    • Macs with OSX 10.7 or later can get this app from the App Store, see the Mac instructions below.


    Warning

    If remoting into recently deployed machine using Its modern endpoint management, you will need to first log into VPN.usf.edu


    Windows


    1. Go to http://usfweb.usf.edu/remote/ 
    2. Login with your NetID and password 
    3. Enter the computer name or IP address you wish to connect to (pictured below)
      Image Modified
    4. Choose your remote desktop size
    5. Click the Find Computer button
      RDG will go through a series of checks (computer is found, awake, and connection is solid) and display the results to you
    6. Click the Connect button
      RDG will download a ‘USFRemoteAccess.rdp’ file
    7. Execute USFRemoteAccess.rdp file  

      Tip
      Security window popped up? Click Connect 


    8. Log in with your

    credentials
    1. credentials 
      You are logging into your destination computer

      Note

      If remoting into a new, recently deployed machine, you must log in use AzureAD\<netid>@usf.edu for your user name.


      Tip
      Using dual-factor authentication on your computer? You will be prompted to authenticate.


    Once you have completed this process, you will have a window to your destination computer and may use it as if you were sitting in front of it.  When you are finished you can simply log out of your remote computer and the window will close. 

    Back to top

    Mac

    Info
    iconfalse

    Already have the Microsoft Remote Desktop app? Skip to Step 5


    1. Launch the App Store 
    2. Search for the Microsoft Remote Desktop
    3. Click on Microsoft Remote Desktop
    4. Enter your credentials for your Apple account
    5. Anchor
      Step5
      Step5
      Launch Microsoft Remote Desktop
    6. Click on New in the upper left
    7. Choose Add gateway from the Gateway drop down menu (pictured below)
      Image Modified
    8. Click on the Plus sign to add a gateway:
    9. Fill out the following fields (Pictured below)
      1. Gateway Name = USF
      2. Server = rdg.usf.edu

      3. User name = Your USF email

      4. Password = Your NetID password
      Image Modified
    10. Close the Preferences screen
    11. Choose USF from the Gateway drop down menu 
    12. Enter your email address and password under Credentials
    13. Enter your computer name in the PC Name field
    14. Close out of the Edit Remote Desktops screen
    15. Click on USF under My Desktops (pictured below)
      Image Modified
    16. Click on Continue
      You will be connected

    Back to top

    IPad

    Info
    iconfalse

    Already have the Microsoft Remote Desktop app? Skip to Step 5


    1. Tap on the App Store 
    2. Search Microsoft Remote Desktop
    3. Tap on Get 
    4. Tap on Install 
    5. Anchor
      OpenApp
      OpenApp
      Open the Microsoft Remote Desktop app
    6. Tap the Plus sign (pictured below)
      Image Modified
    7. Tap Desktop
    8. Tap PC Name
    9. Enter your computer's name (pictured below)
      Image Modified
    10. Tap Done
    11. Tap the panel on the Remote Desktop main menu
    12. Enter the credential you use on your machine

      Tip
      Tapping the controls at the top will allow you to zoom, switch between mouse pointer and touch functionality, bring up a keyboard, etcImage Modified
    AnchorTopTop Info
    iconfalse
    titleTable of Contents
    Table of ContentsminLevel2