Creation of MyStudentWebsite- Open a browser and navigate to https://portal.azure.com
- Sign in using your USF email address and password.
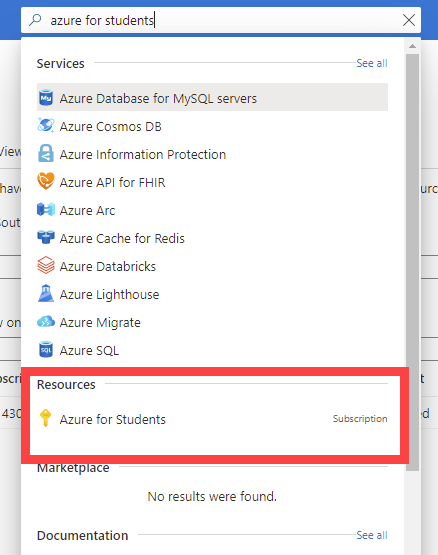
- Once at the Azure Homepage, select Subscriptions.

- In the top search field, enter and select Azure for Students under Resources.
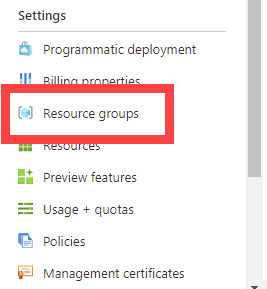
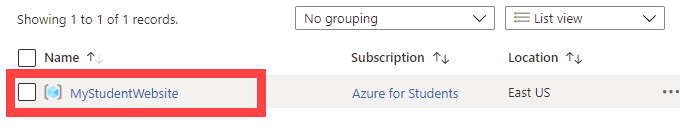
- In the left column, select Resource Groups.
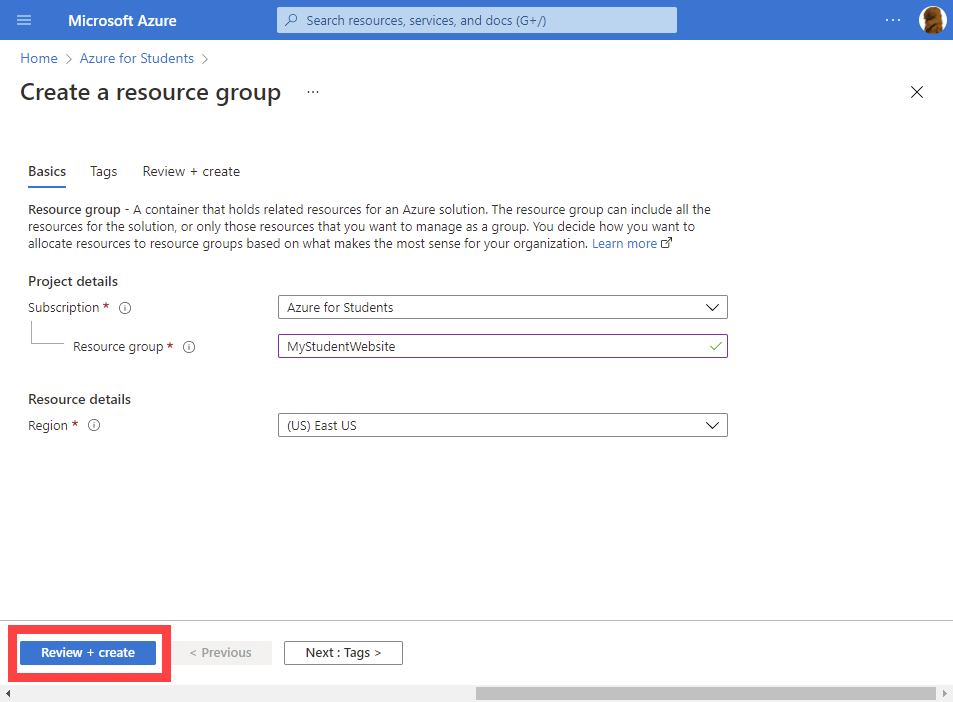
- Select Create in the top banner.

- Under Resource group, enter MyStudentWebsite to name the group.

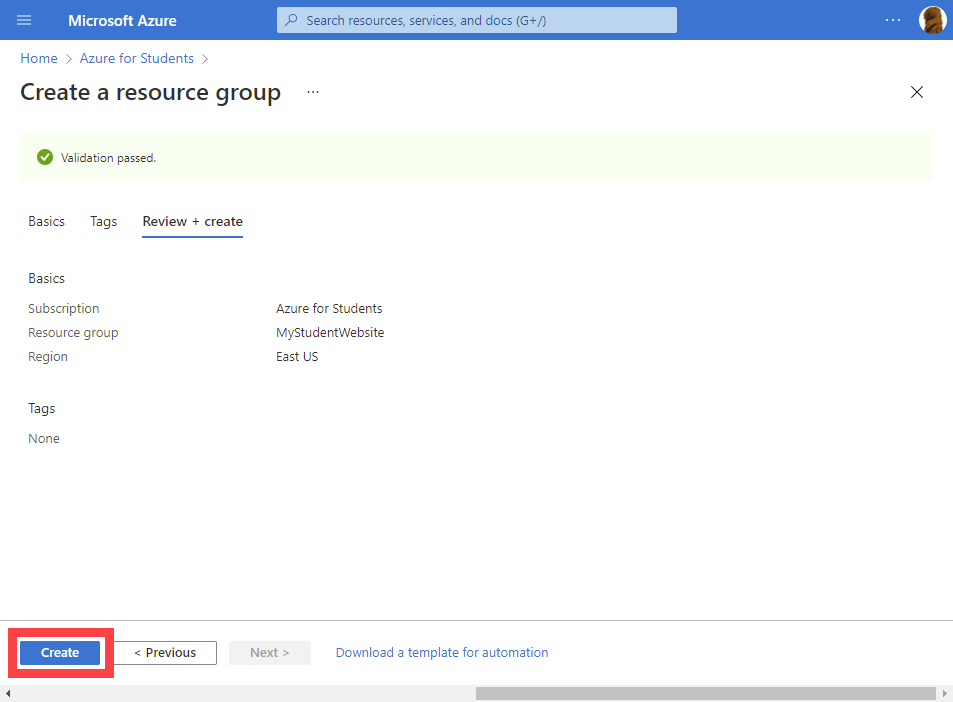
Select Review+Create to the bottom left.
 | Note |
|---|
Make sure that Region is set to (US) East US. |
- Select Create.
Back to top | Anchor |
|---|
| Configuration |
|---|
| Configuration |
|---|
|
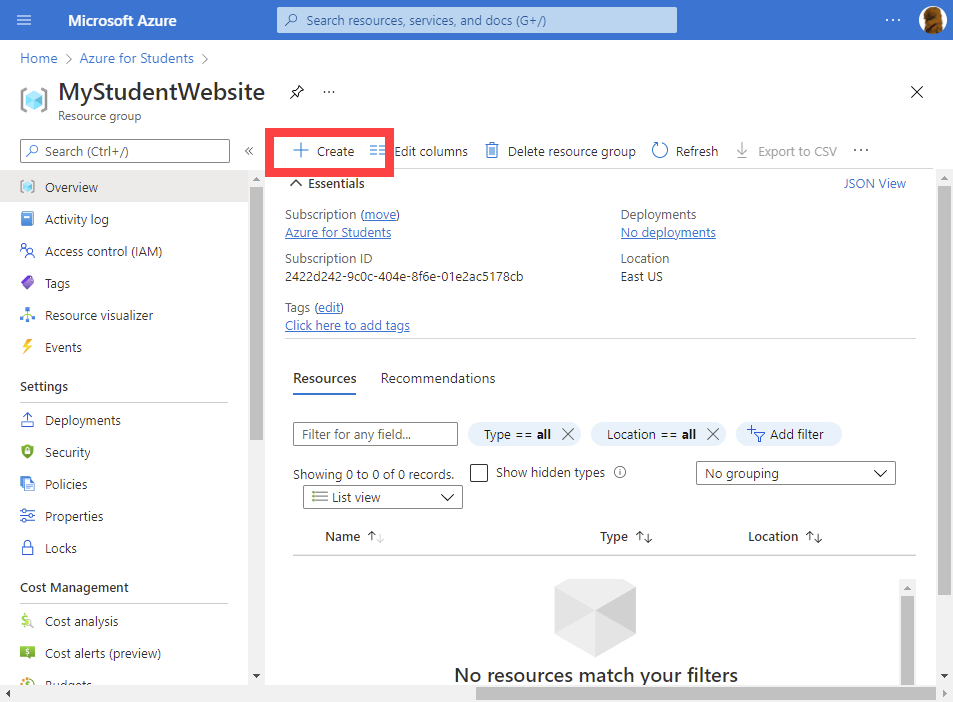
Configuration of MyStudentWebsite- Once the Resource group is created, select the group from the list provided.
- Select Create in the top banner.
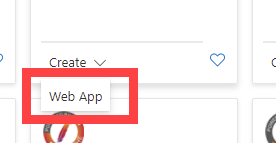
- In the search field, enter Web Apps.
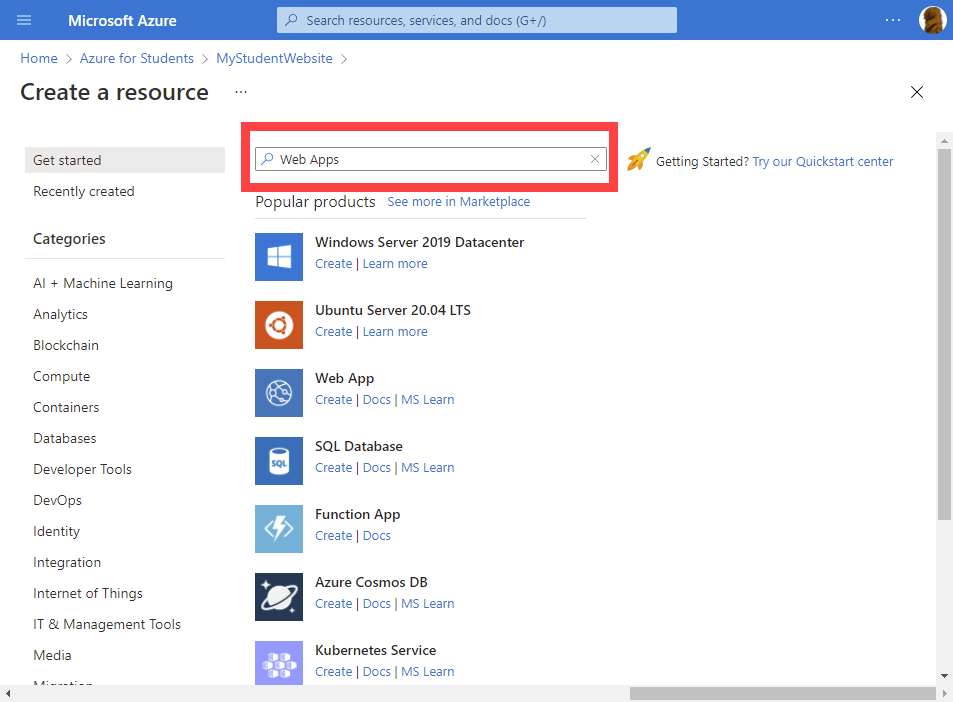
- Once the search is completed, select Create dropdown under Web App.
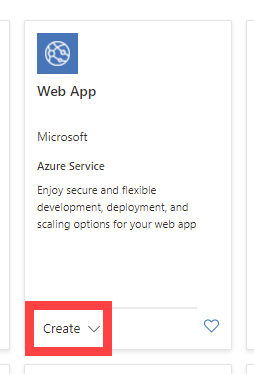
- Select Web App.
- Under Instance Details, you will need to name your Web App. In the Name field, enter your NetID.

- Under the Runtime Stack drop down, select ASP .NET V4.8 or the desired current version of ASP.NET.

- Under Region, select East US.

- Under Sku and Size, select Change Size.
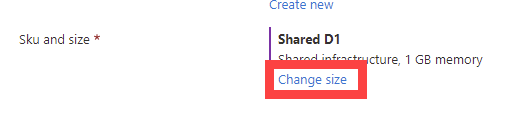 Image Removed Pricing plan, if it is not already set to 'Free F1(Shared infrastructure)', select Explore pricing plan. Image Removed Pricing plan, if it is not already set to 'Free F1(Shared infrastructure)', select Explore pricing plan.
 Image Added Image Added
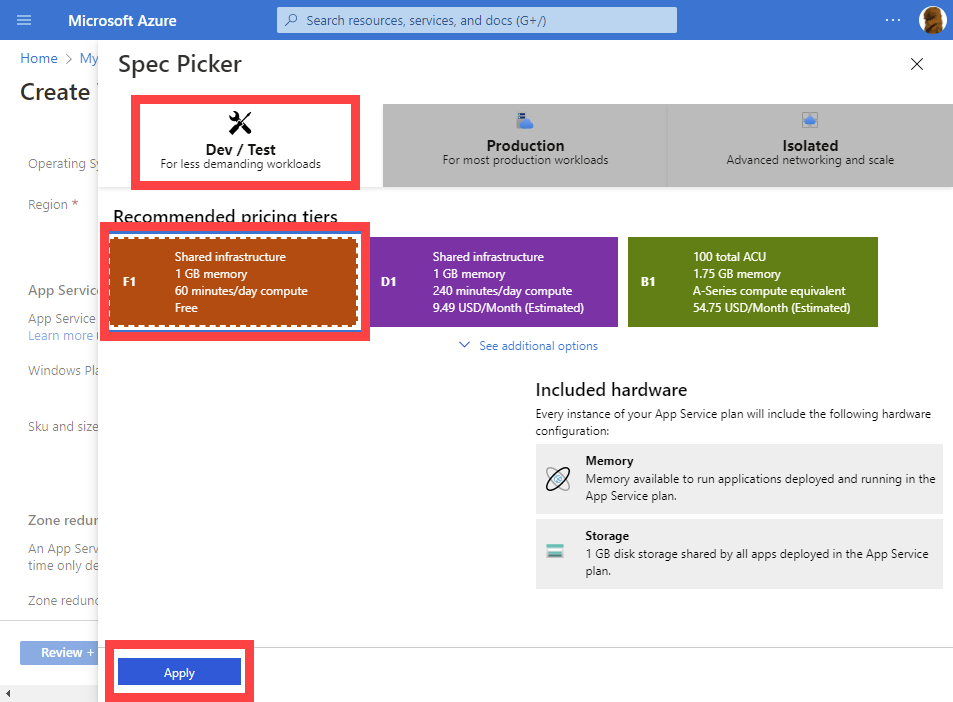
- In the right column labeled Spec Picker, select Dev/Test.
- Select F1 Standard subscription (Free Version).
- Select Apply.
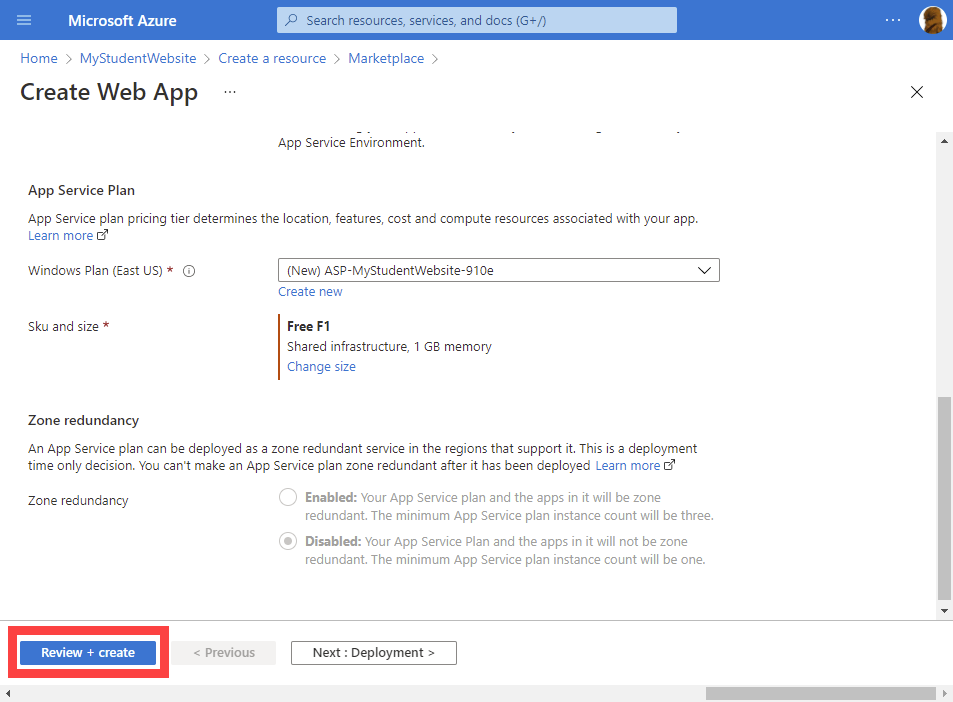
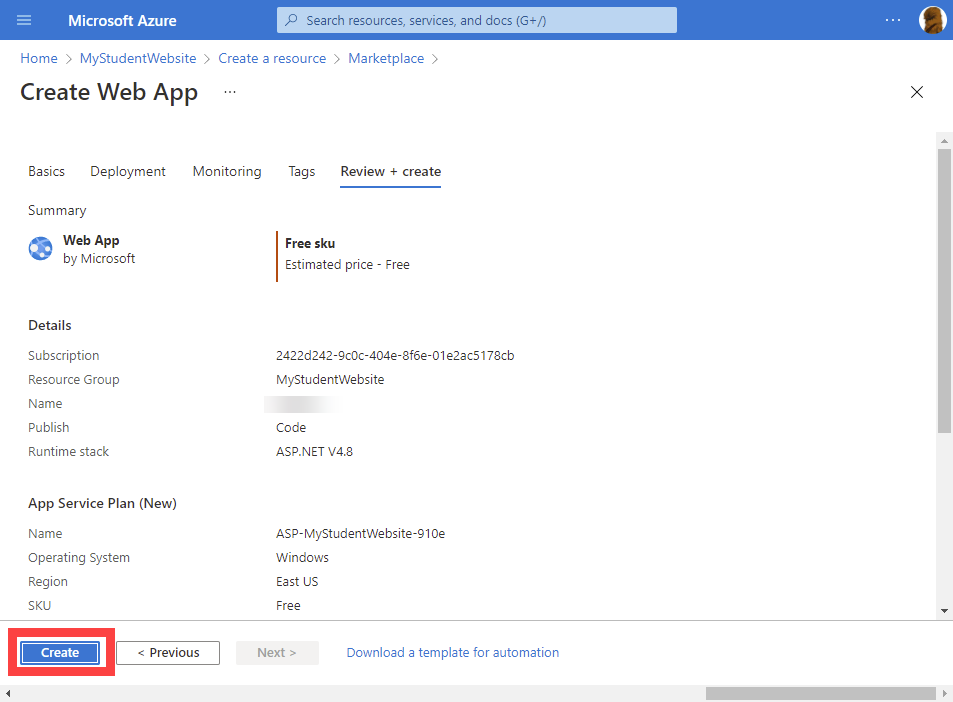
- Select Review+Create at the bottom left.
- Select Create. There can be a short wait time before you can proceed.
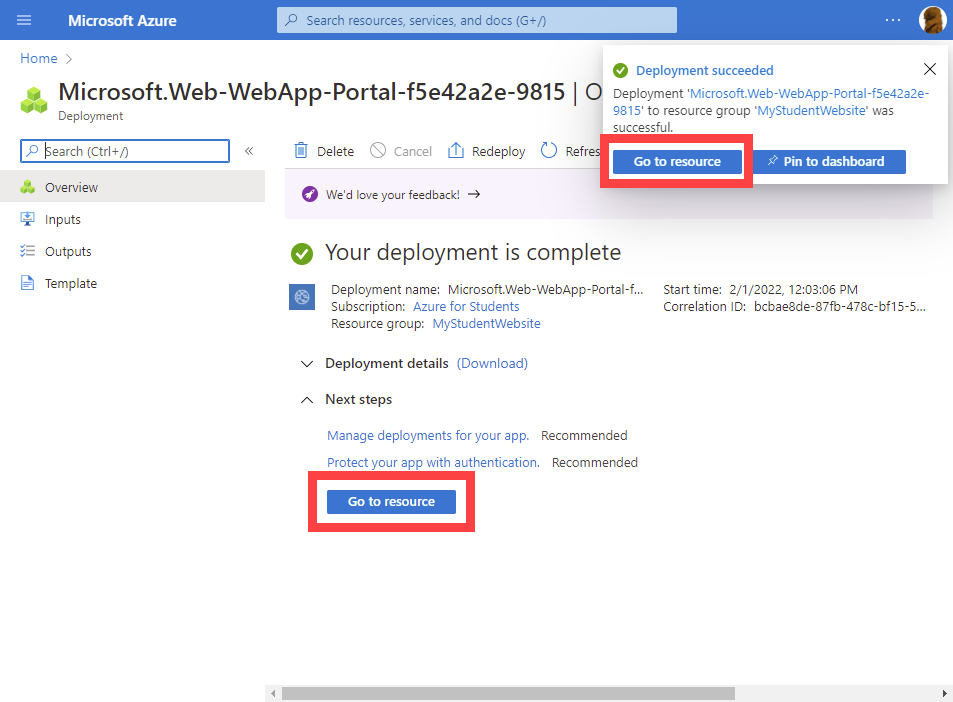
- Select Go to resource
- URL Default Domain will list what your website will be called. It should be called https://<your netid>.azurewebsites.net
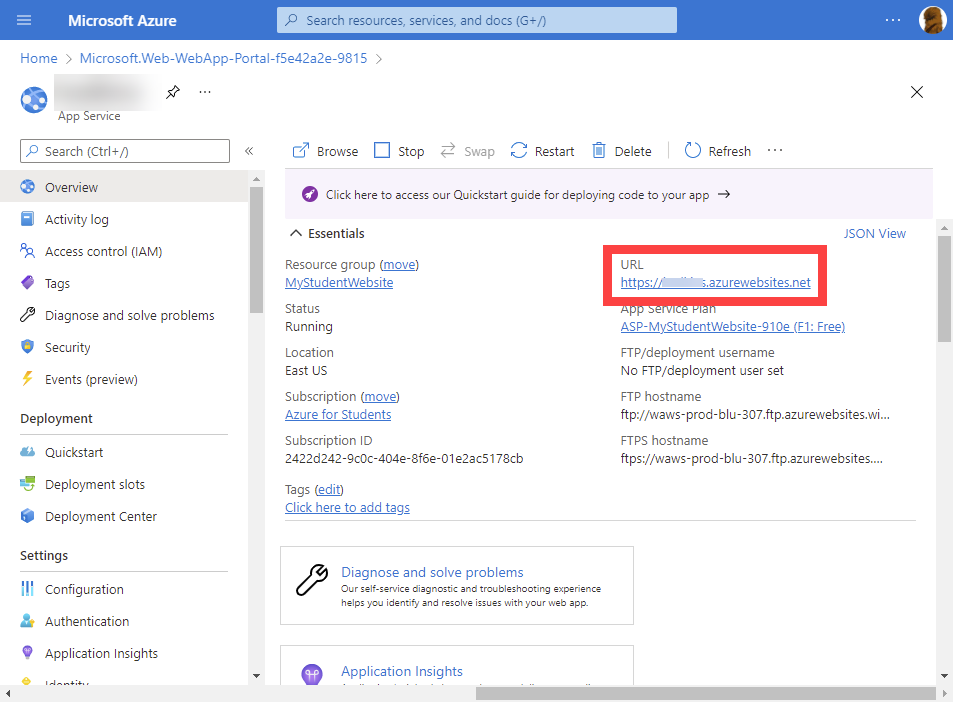 Image Removed Image Removed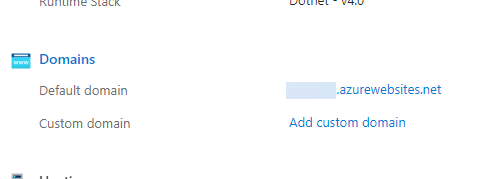 Image Added Image Added
Back to top Uploading Your WebsiteOnce the creation has been completed, a pop up will occur in the upper right of the browser to let you know it is done.
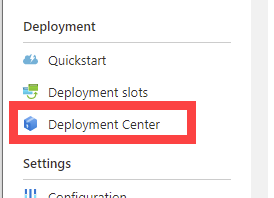
- Select Deployment Center in the left column.
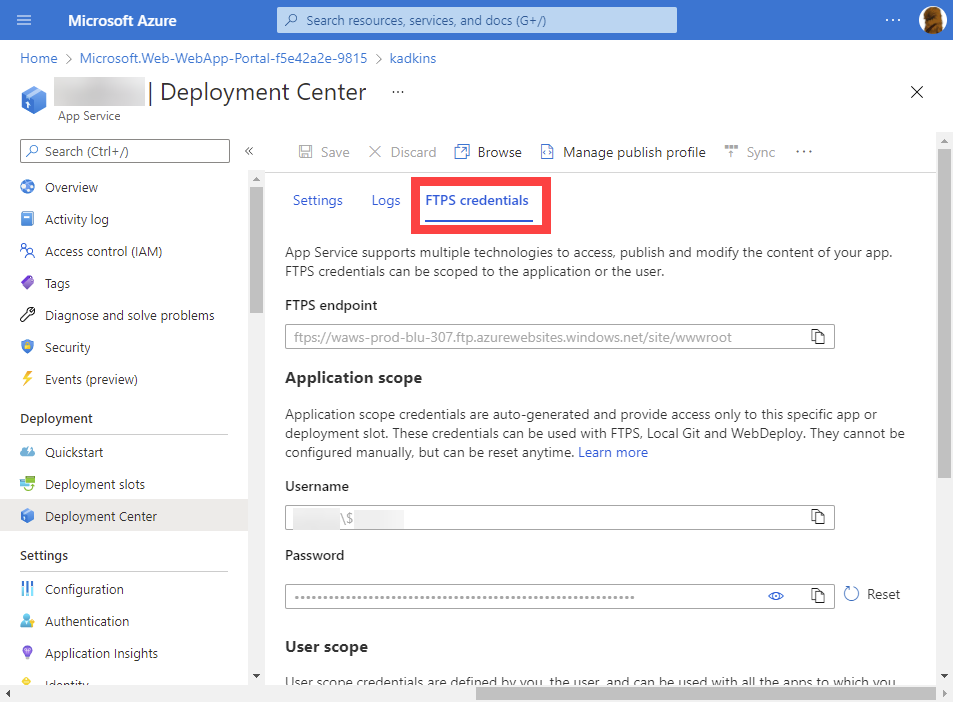
- Select FTPS Credentials.
- Open FileZilla.
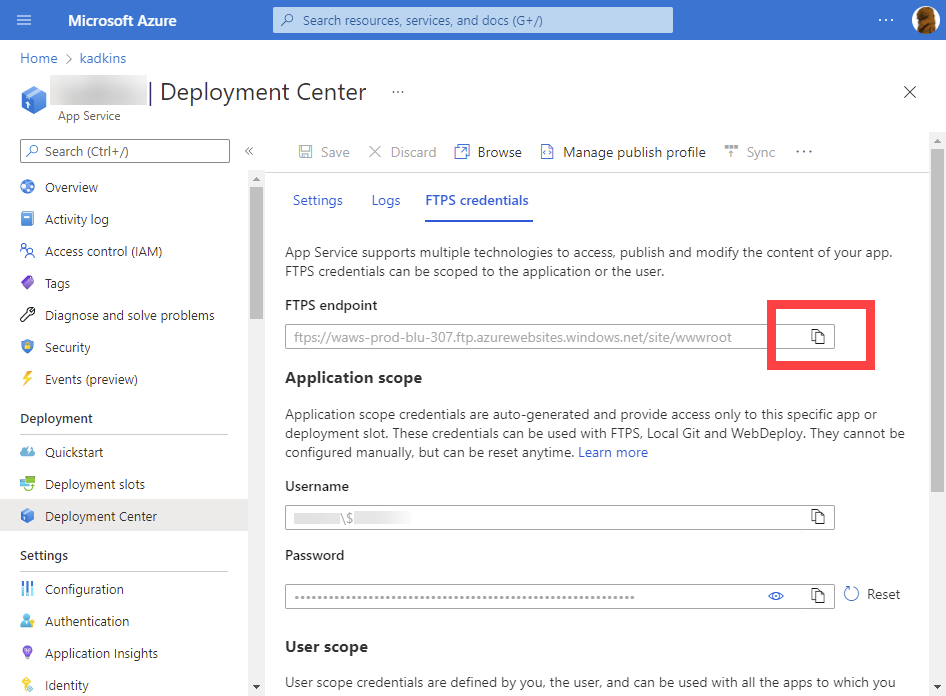
- In the Deployment Center, select the copy icon to the right of the FTPS endpoint.
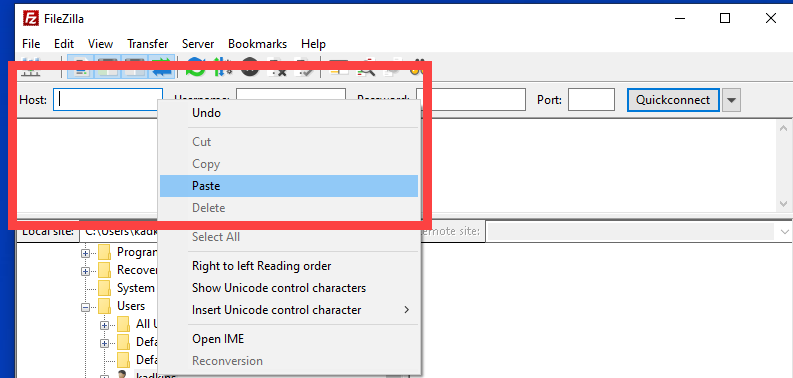
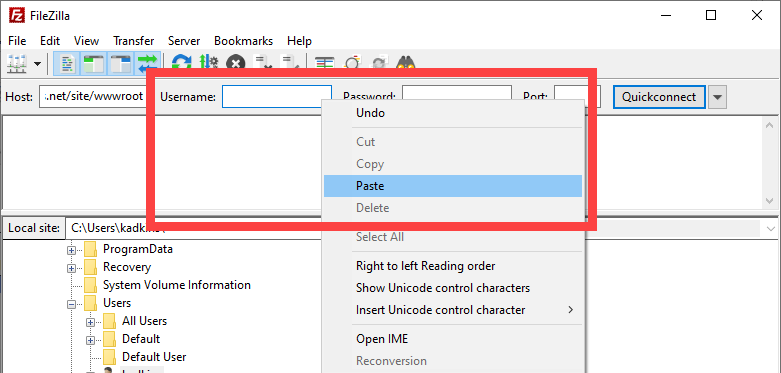
- In FileZilla, right-click in Host and select Paste.
- In the Deployment Center, select the copy icon to the right of the Username.
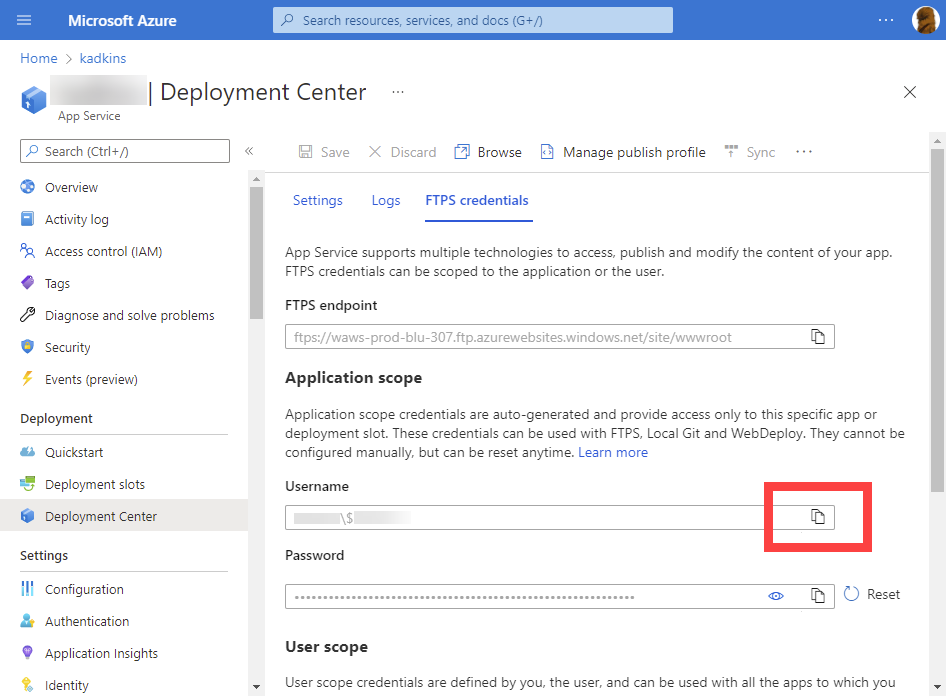
- In FileZilla, right-click in Username and select Paste.
- In the Deployment Center, select the copy icon to the right of Password.
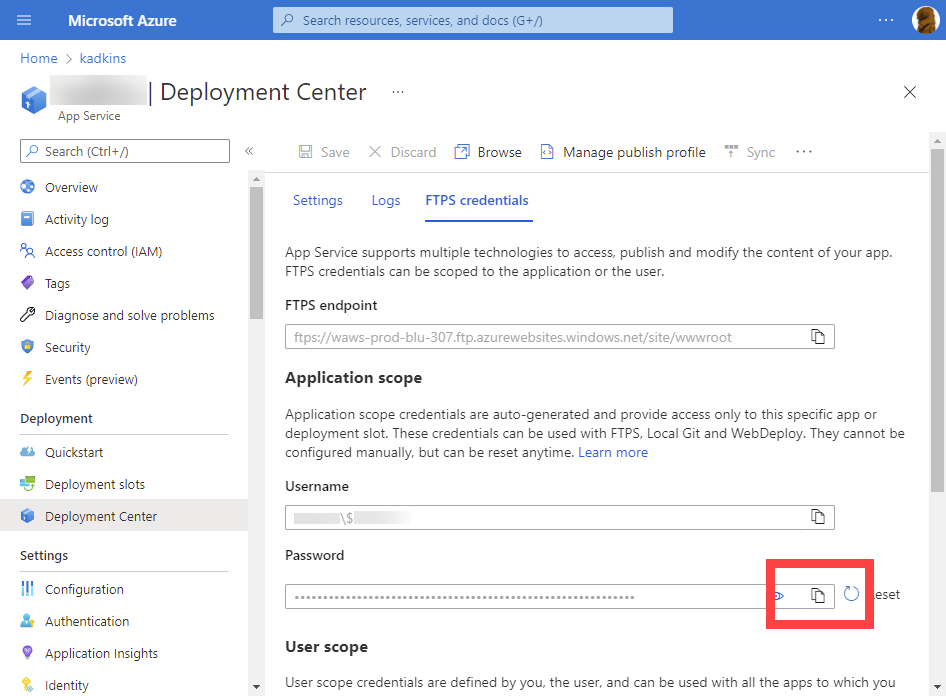
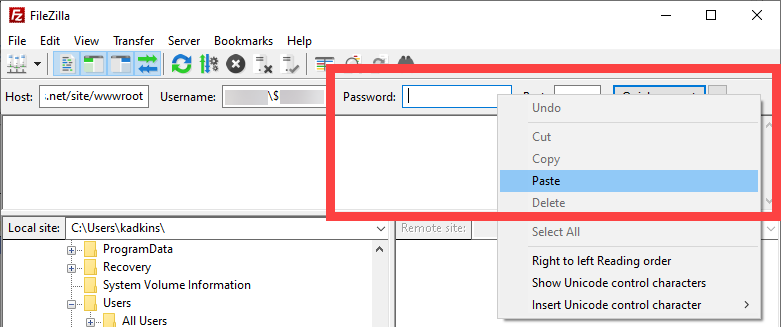
- In FileZilla, right-click in Password and select Paste.
- Leave the Port blank.
- Select Quickconnect.

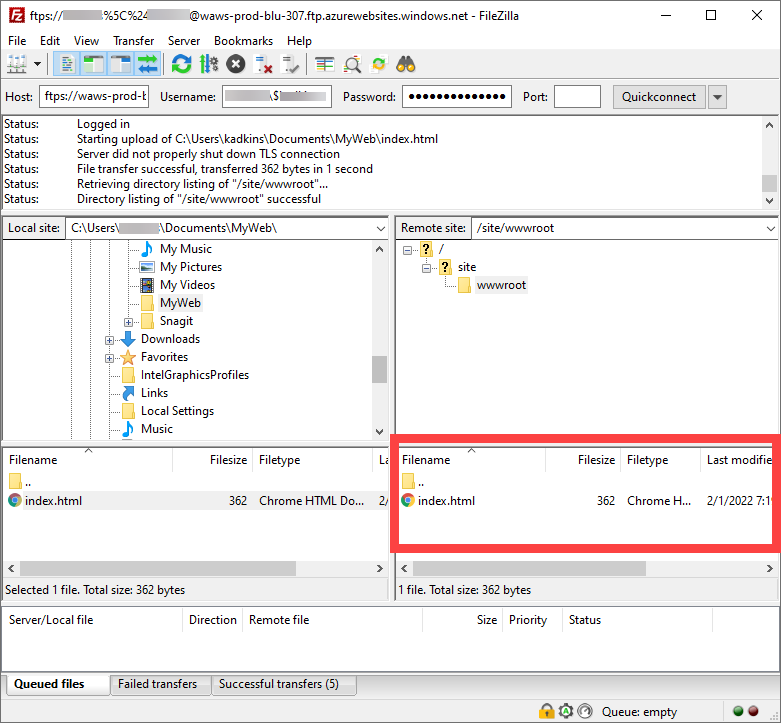
- Once it is completed the connect, you will see the wwwroot under Remote Site.
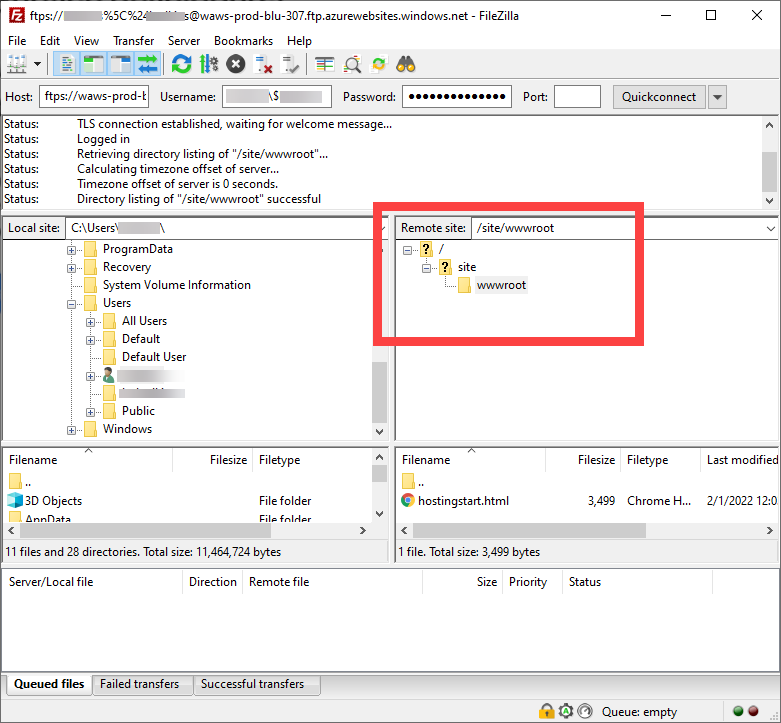
- Delete hostingstart.html from under the Filename under Remote Site.
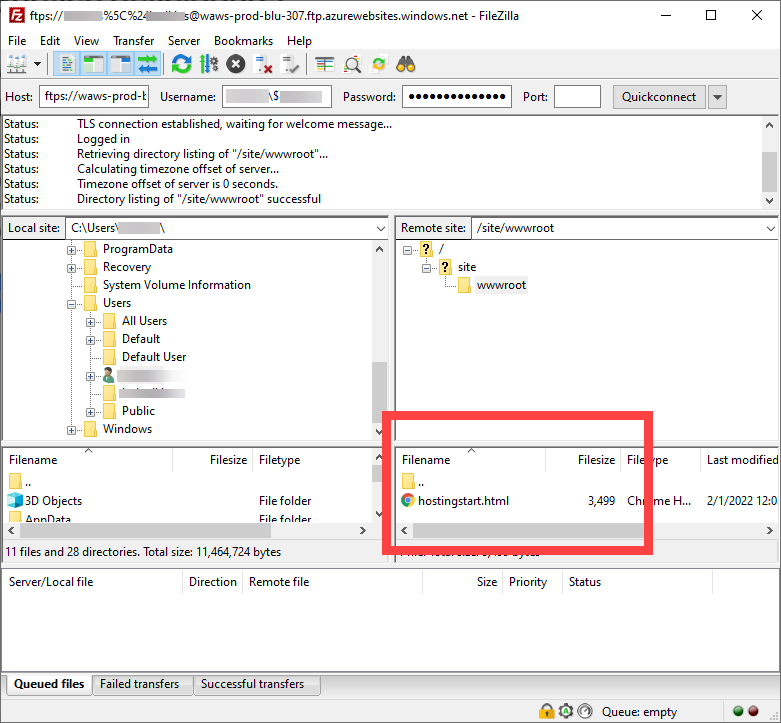
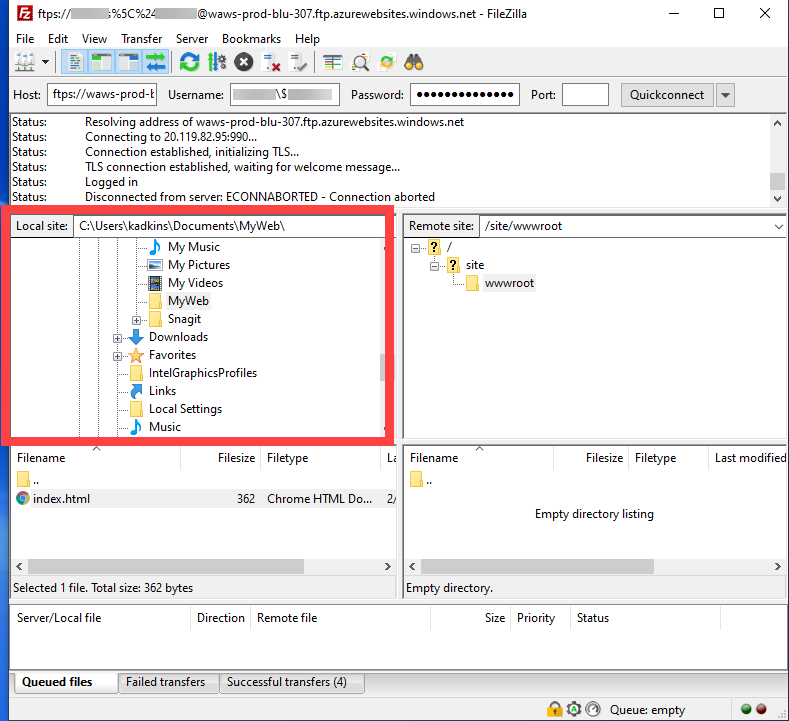
- In the left columns, locate your html you wish to upload to your Azure Website under Local site.
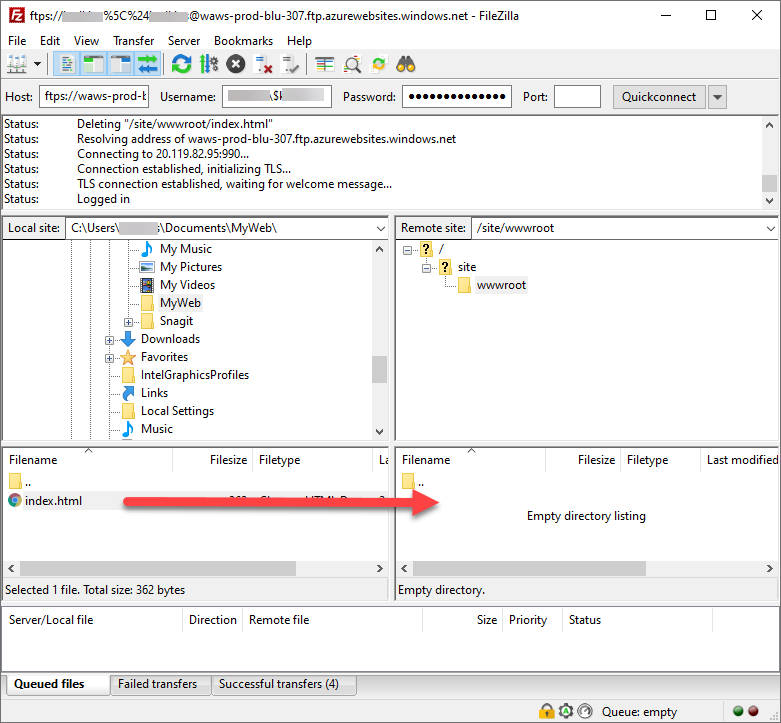
- Drag your .html file into the wwwroot file where you deleted the hostinstart.html
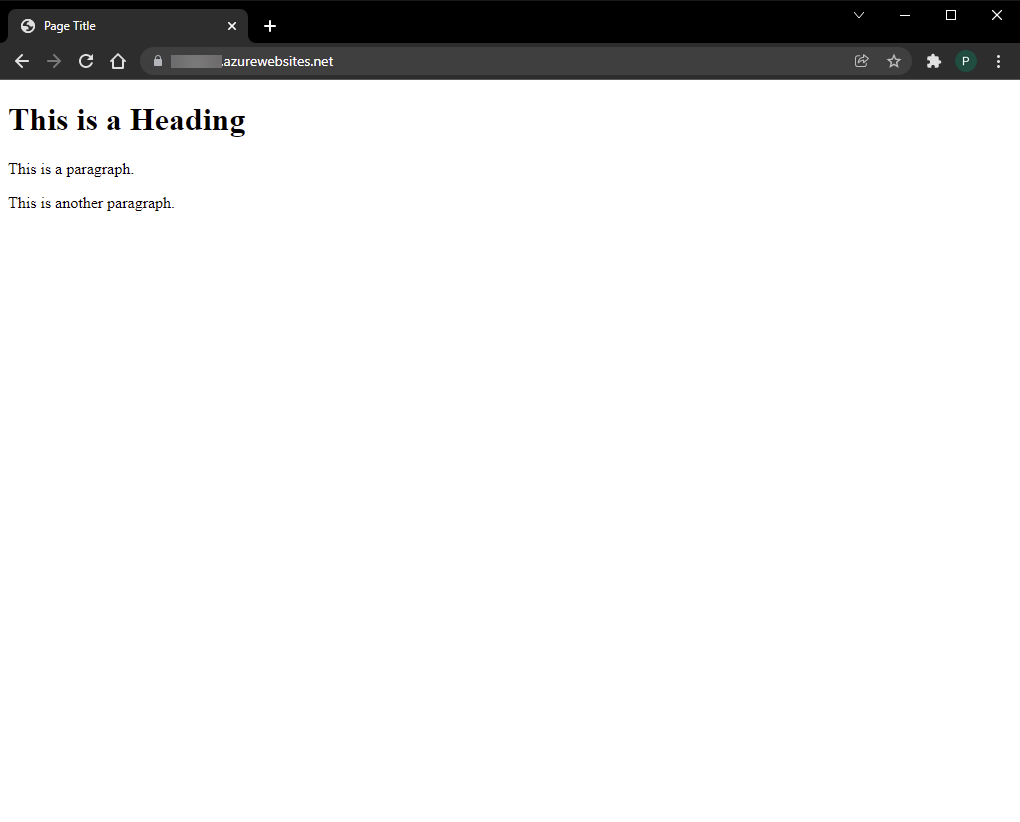
- Open a web browser and navigate to the your MyStudentWebsite URL (https://<your netid>.azurewebsites.net) to see the website live.
Back to top |