| Anchor | ||||
|---|---|---|---|---|
|
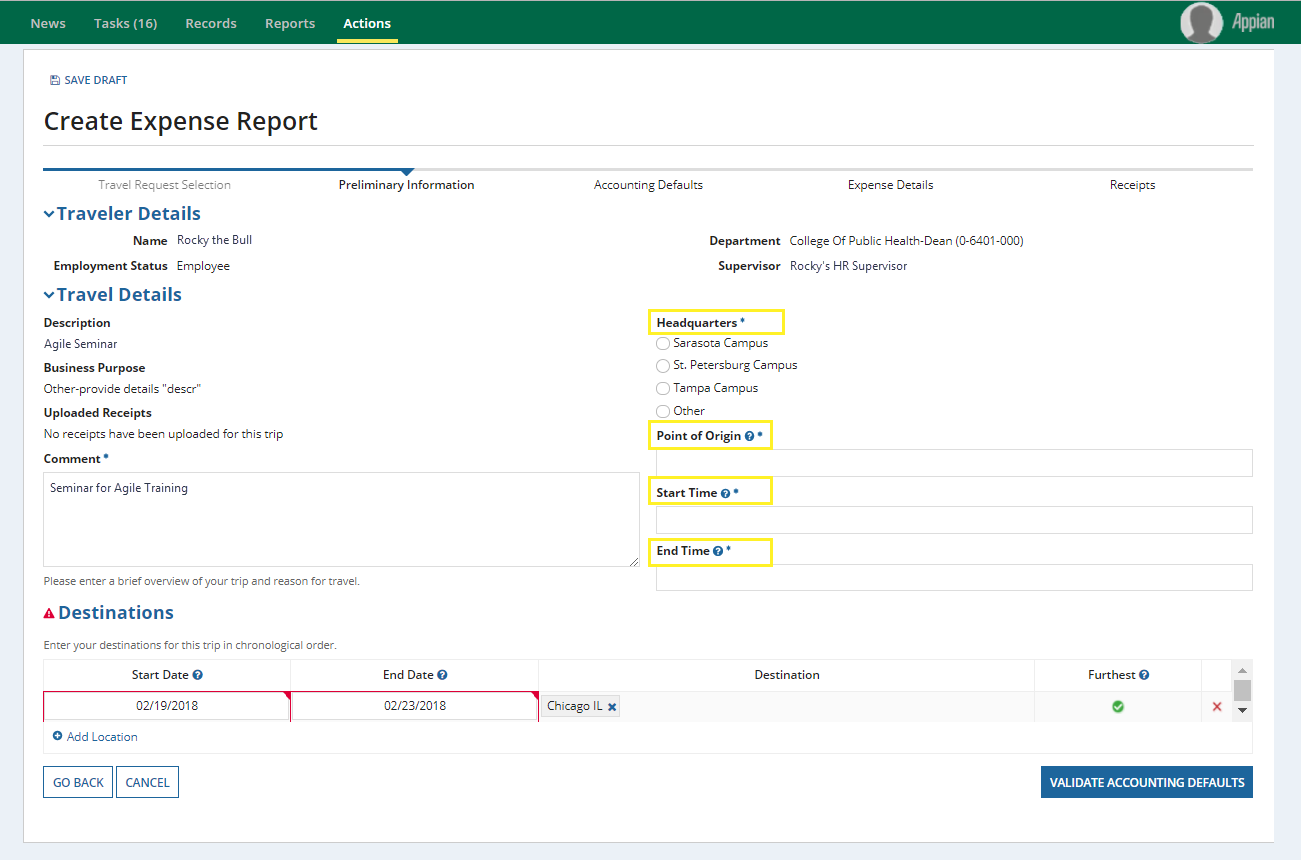
Step 1: Traveler and Trip Details
To create an Expense Report:
- Log in to my.usf.edu.
- Click Archivum in the Business Systems menu.
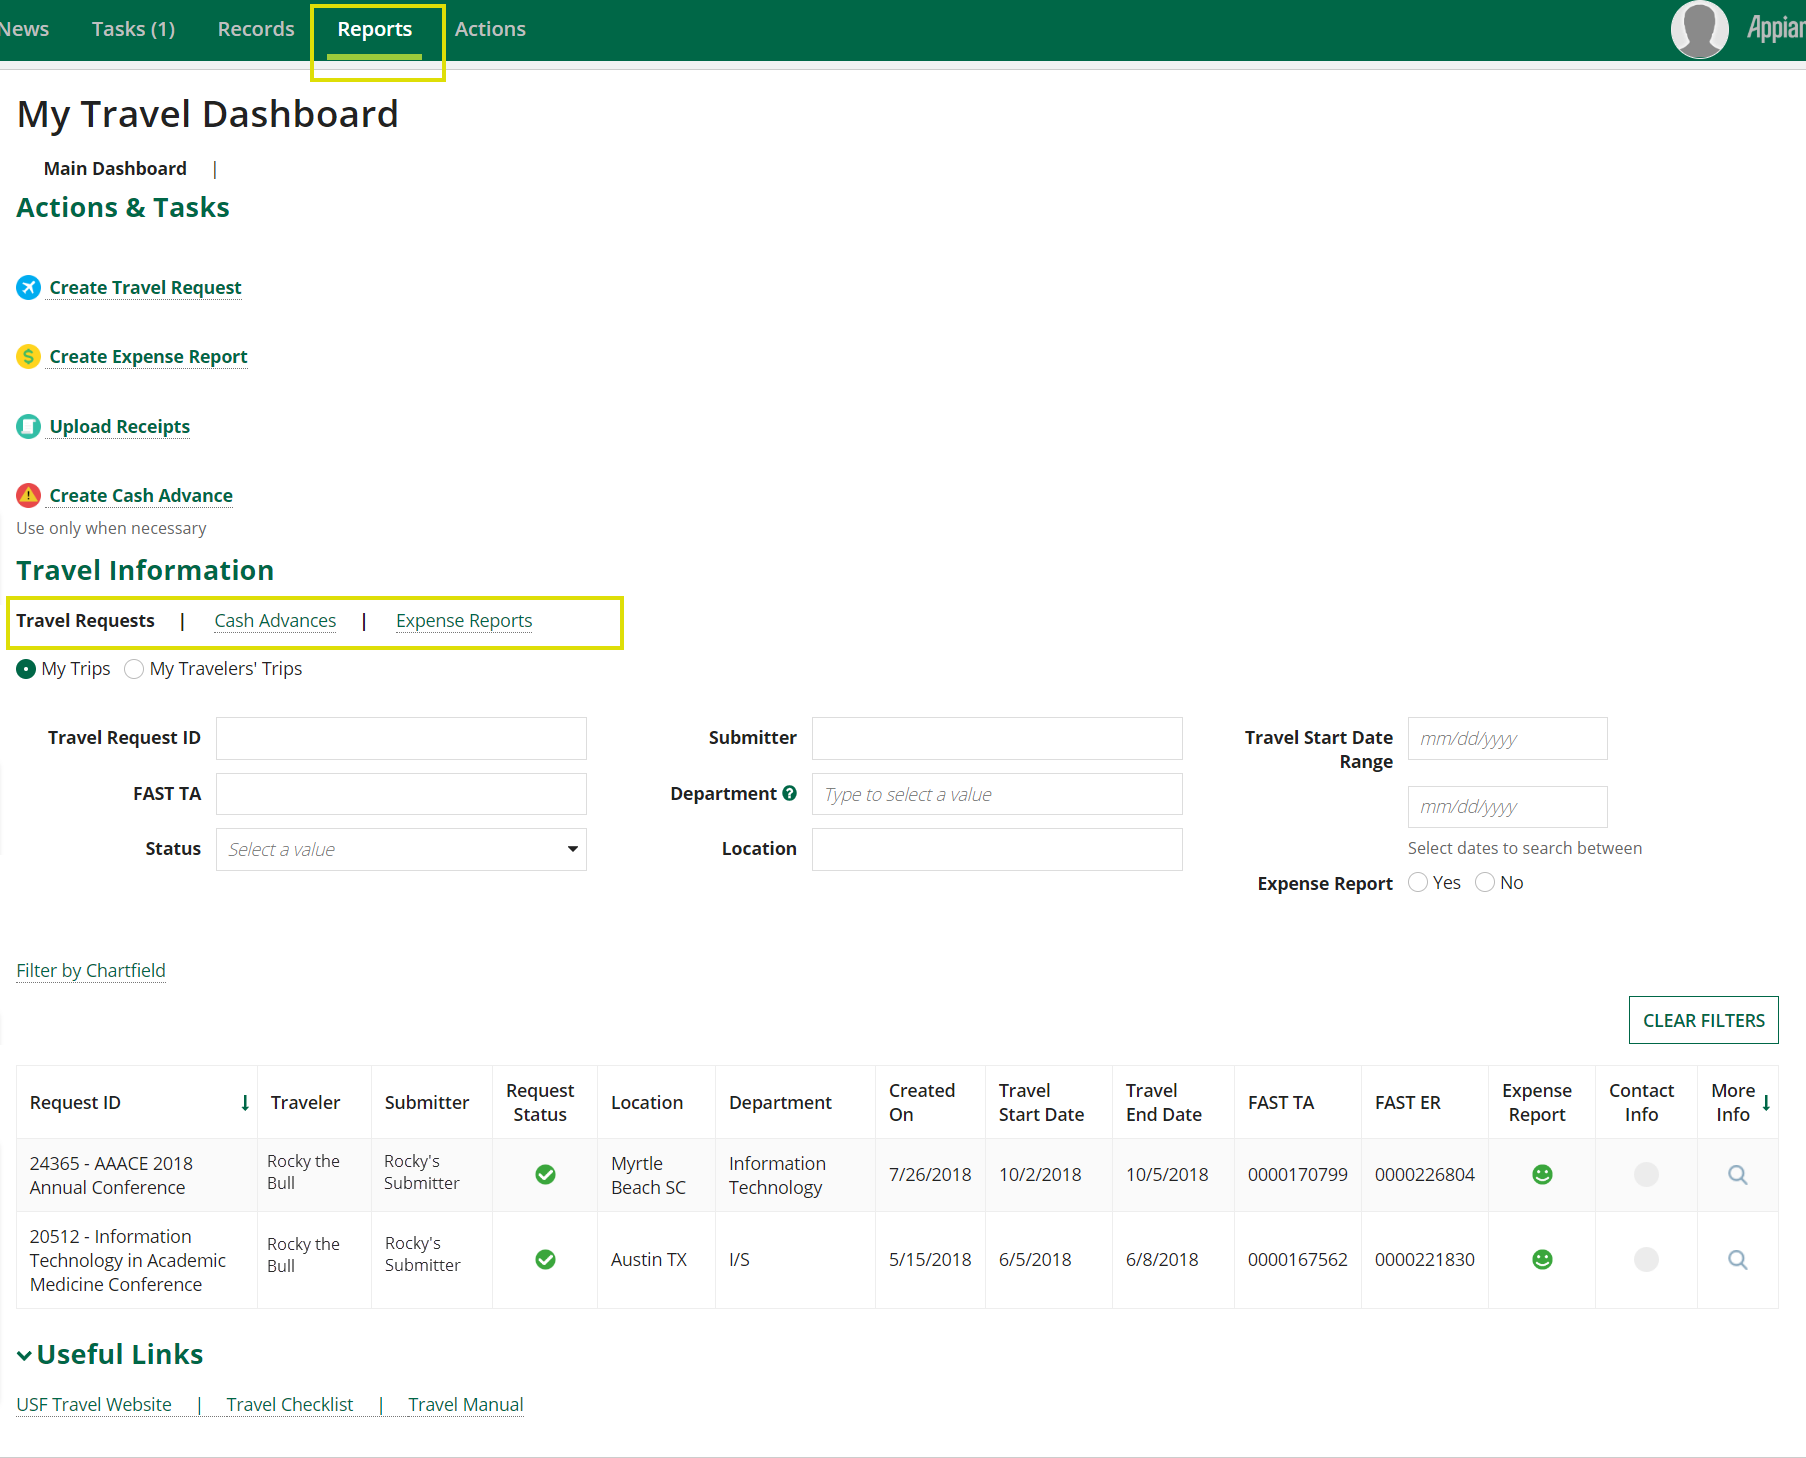
- Click Reports at at the top of the screen.
- Click “My Travel Dashboard.”
- Click “Create Expense Report” in the Actions & Tasks section.
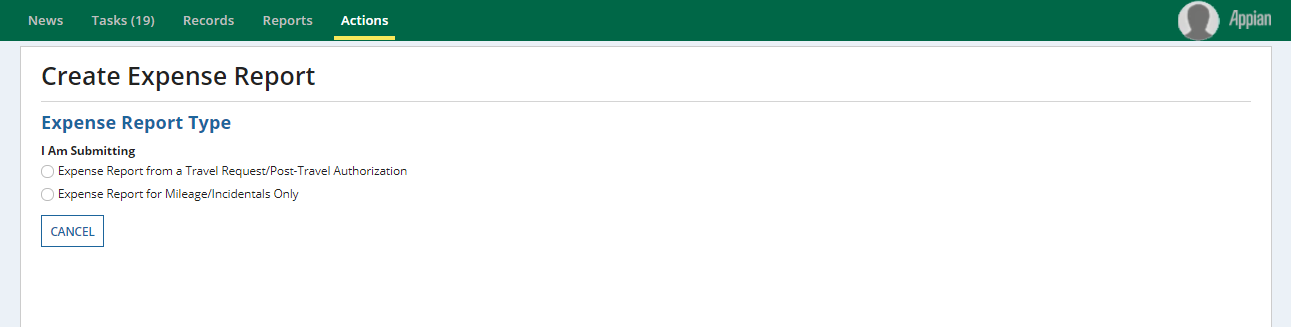
Click image GIF below to enlargeview steps.
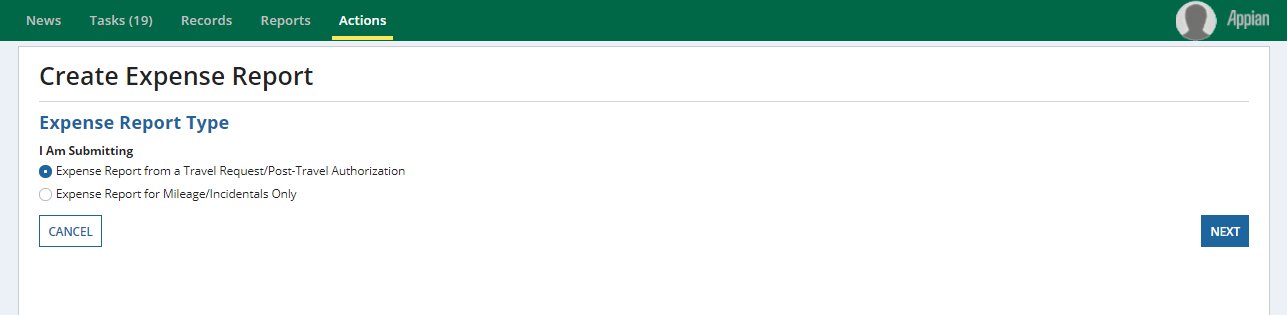
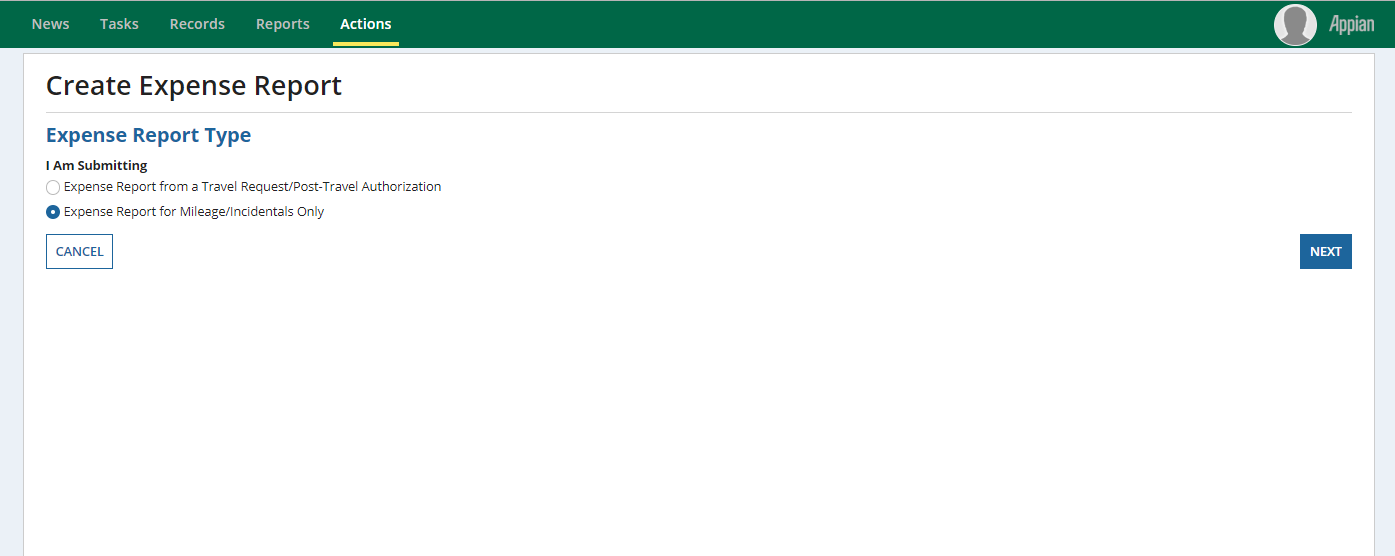
Select the type of Expense Expense Report:
- Expense Report from a Travel Request/Post Travel Authorization
- Expense Report for Mileage/Incidentals Only.
- If you choose Expense Report for Mileage/Incidentals Only, skip Step 2: Expense Report from a Travel Request/Post-Travel Authorization and click to expand 10903519613.
- If you choose Expense Report for Mileage/Incidentals Only, skip Step 2: Expense Report from a Travel Request/Post-Travel Authorization and click to expand 10903519613.
Click image below to enlarge.
| Anchor | ||||
|---|---|---|---|---|
|
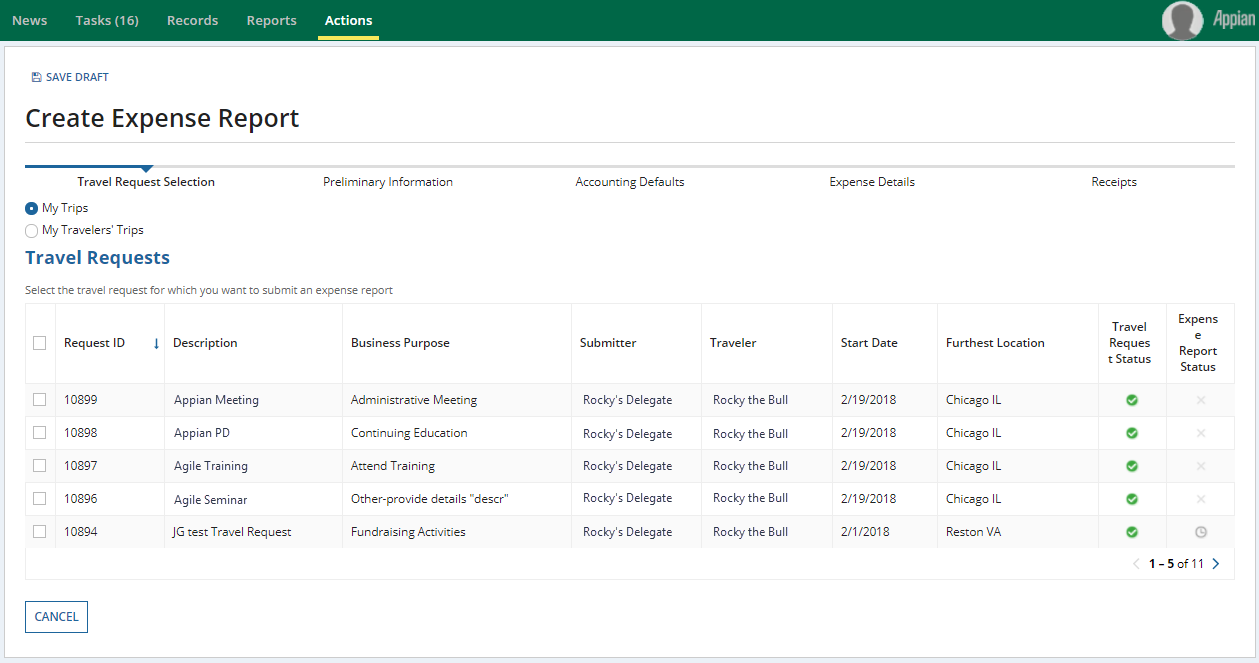
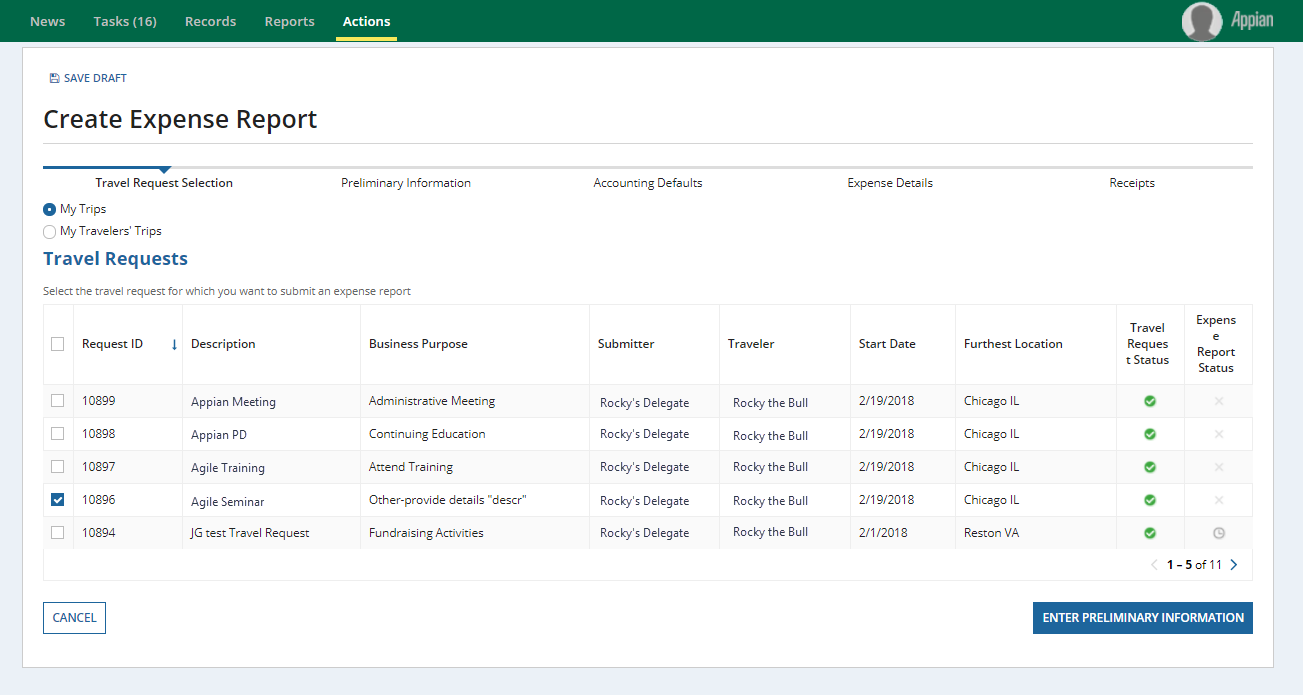
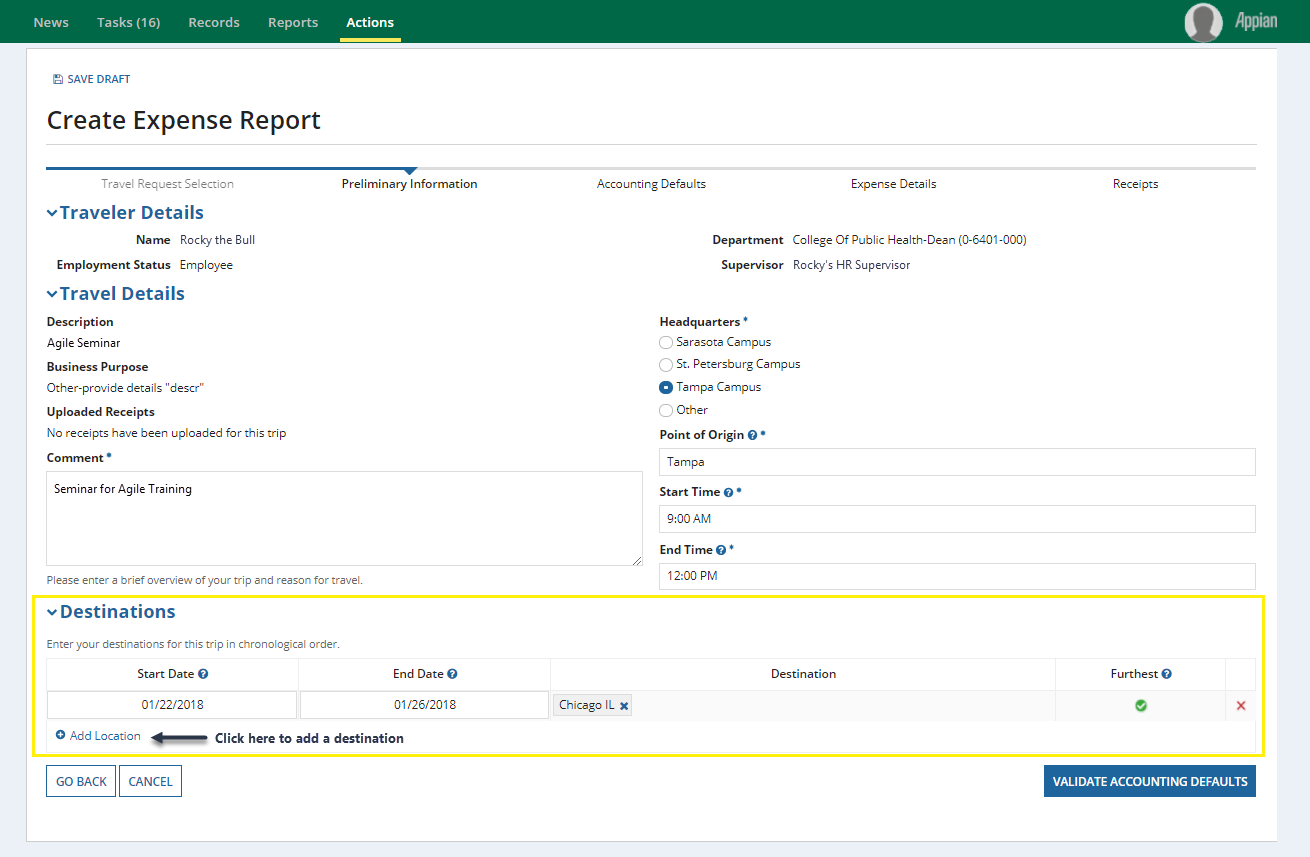
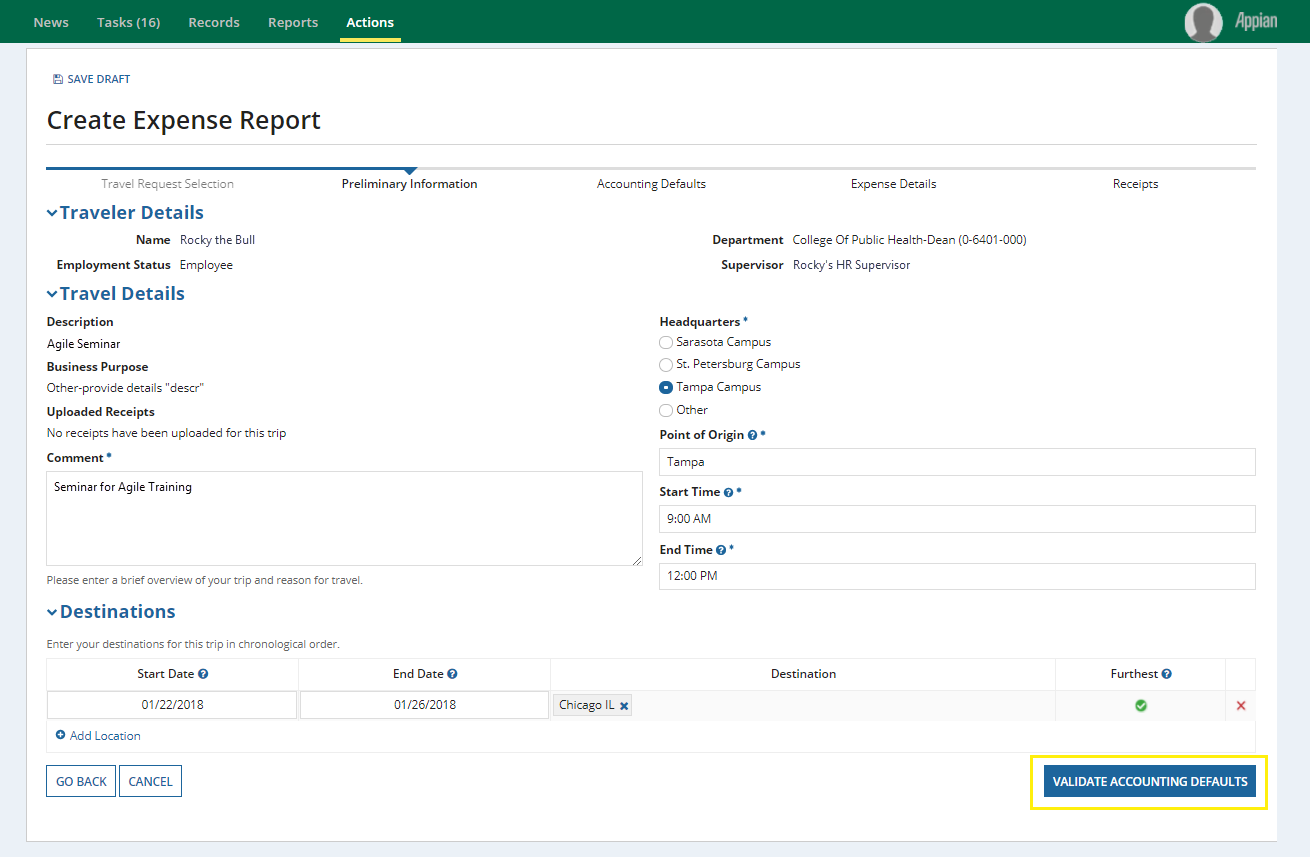
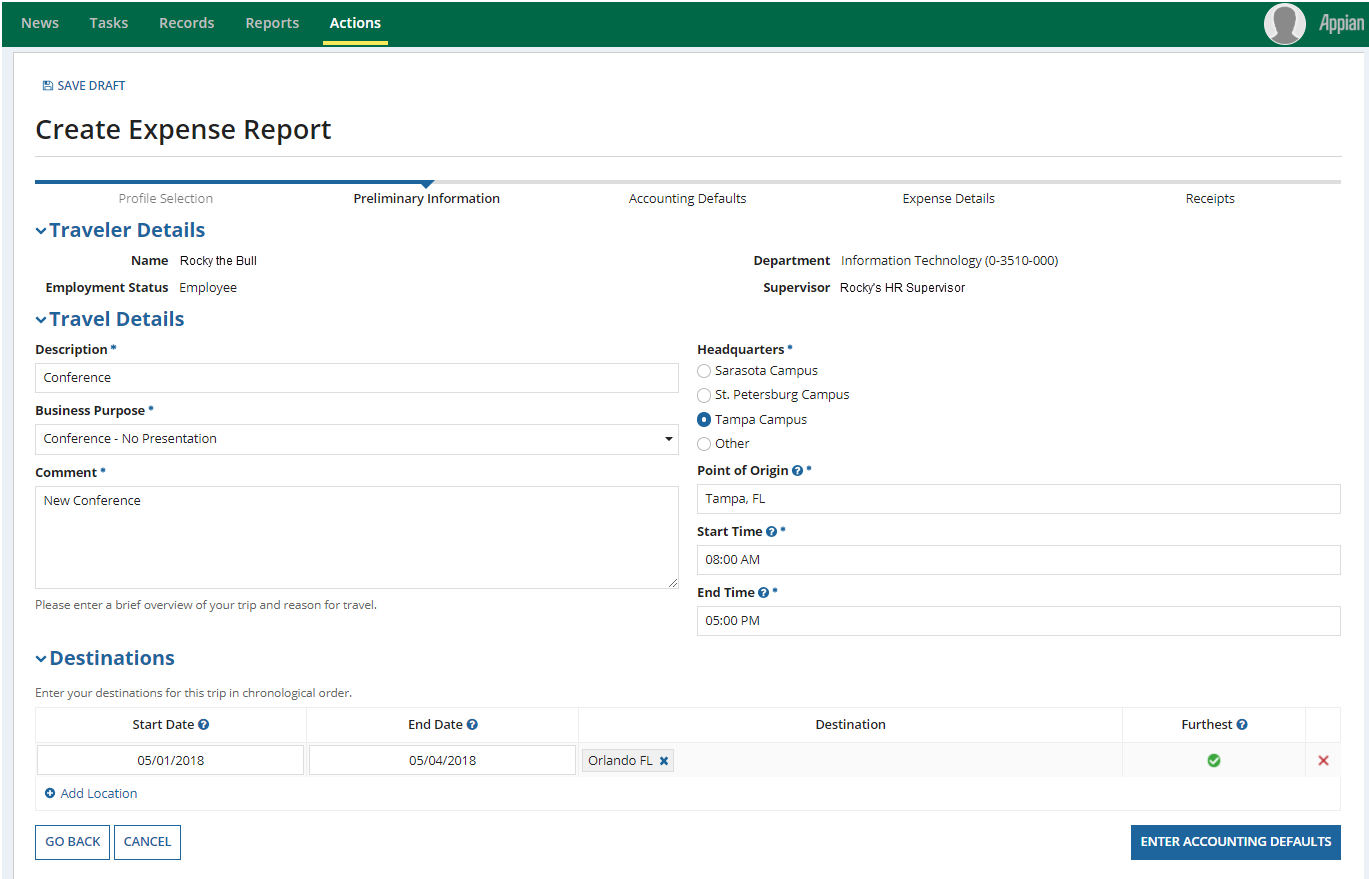
Step 2: Expense Report from a Travel Request/Post-Travel Authorization
| Expand | |||||||||||||||
|---|---|---|---|---|---|---|---|---|---|---|---|---|---|---|---|
|
| Anchor | ||||
|---|---|---|---|---|
|
Step 3: Expense Report for Mileage/Incidentals Only
| Expand |
|---|
|

| Anchor | ||||
|---|---|---|---|---|
|
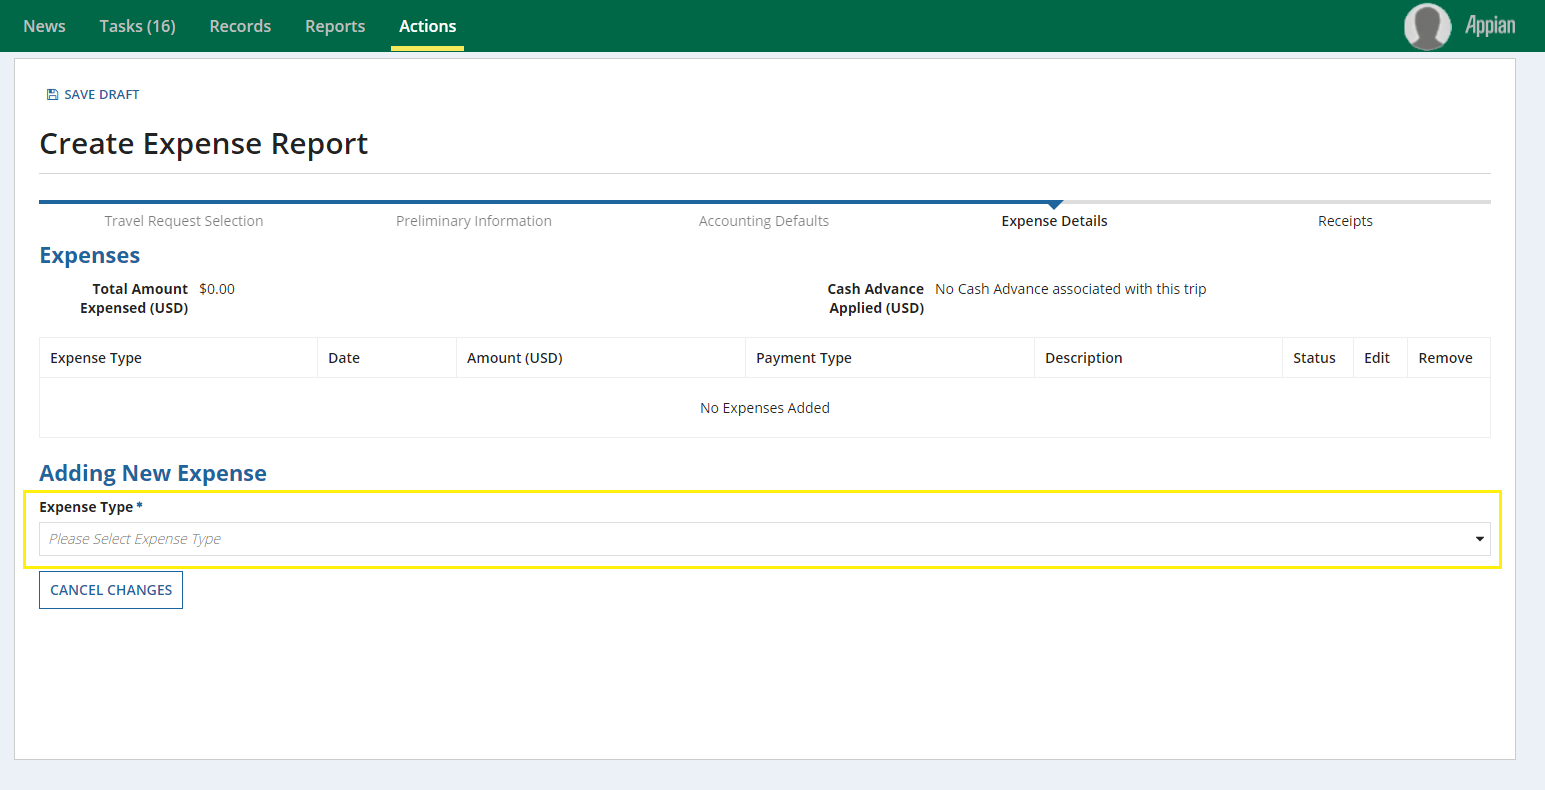
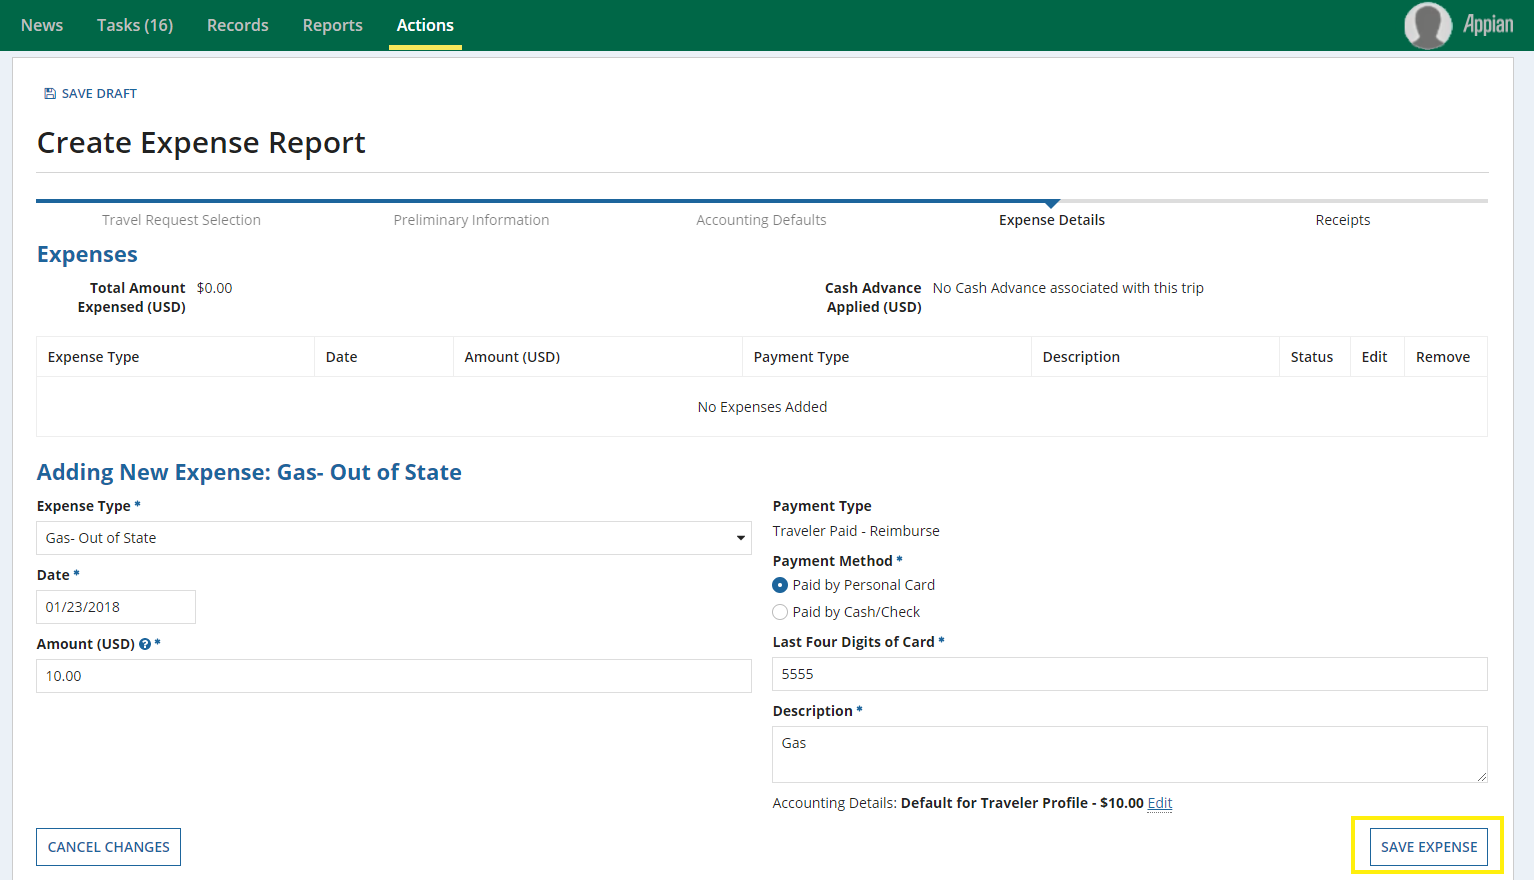
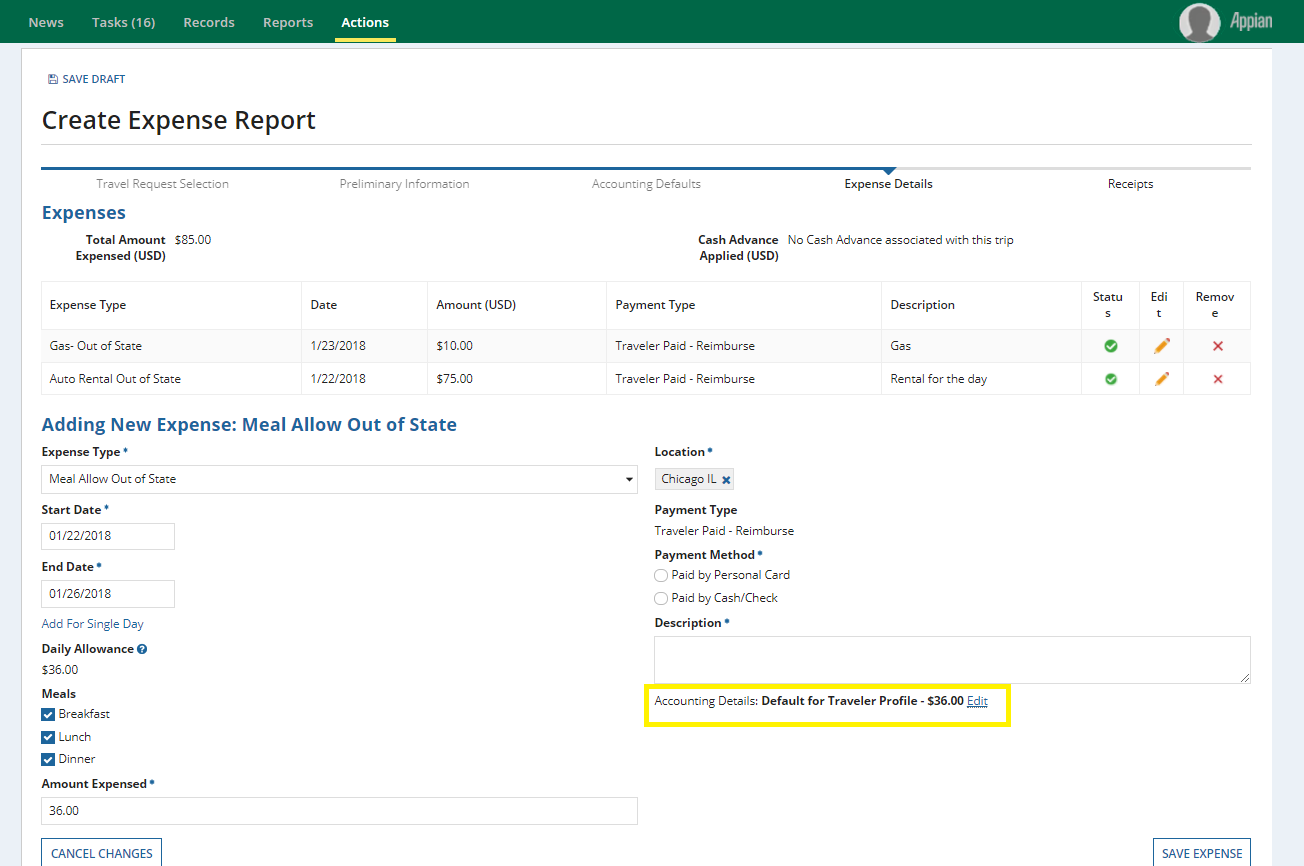
Step 4: Add or Edit Expenses
| Expand | ||||||||||||
|---|---|---|---|---|---|---|---|---|---|---|---|---|
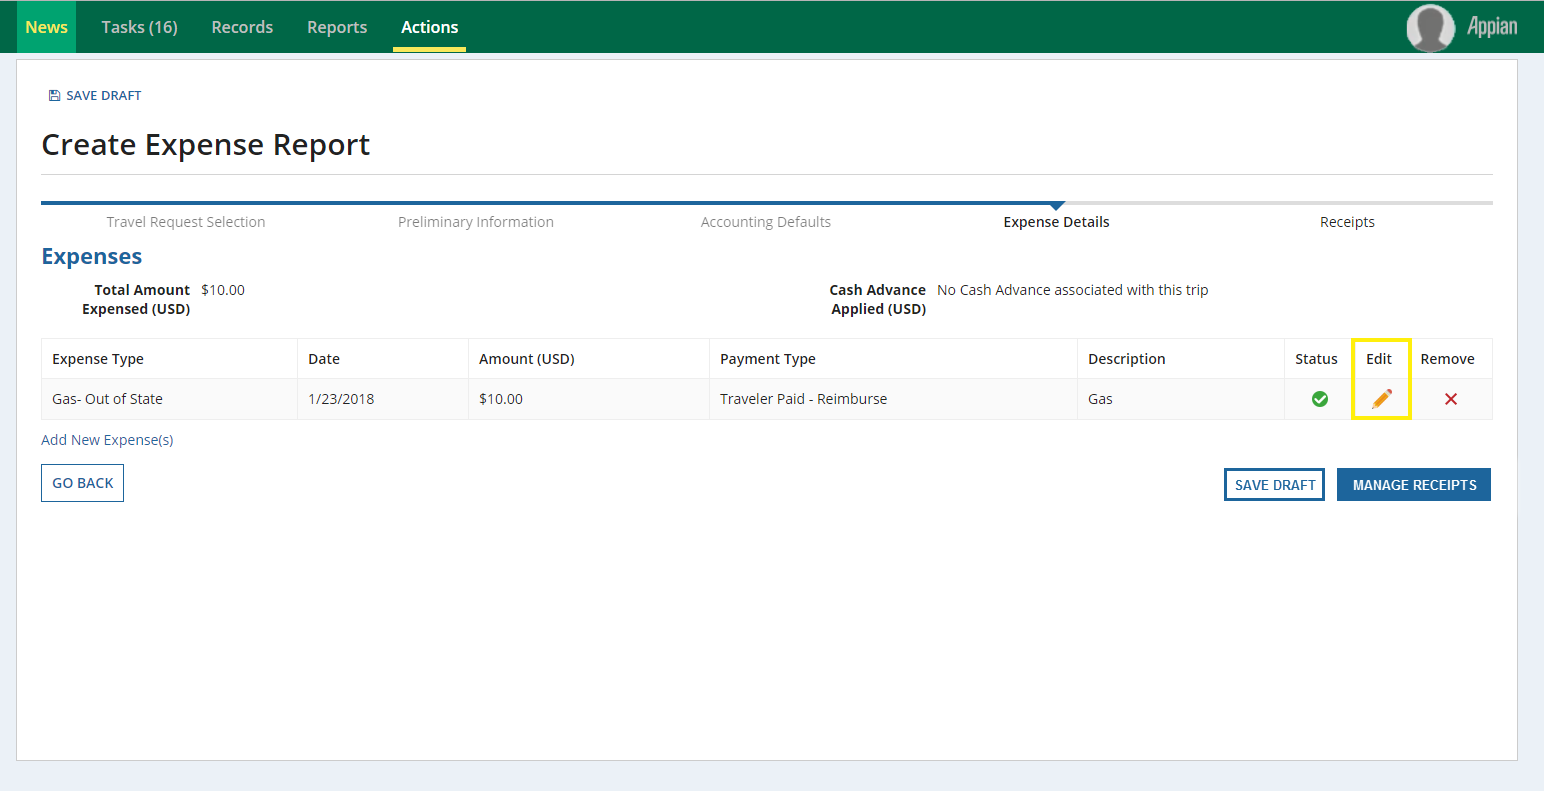
The expense details will show detailed dollar amounts and the status of the expense.
To Add an Expense:
To Edit existing expenses:
|

| Anchor | ||||
|---|---|---|---|---|
|
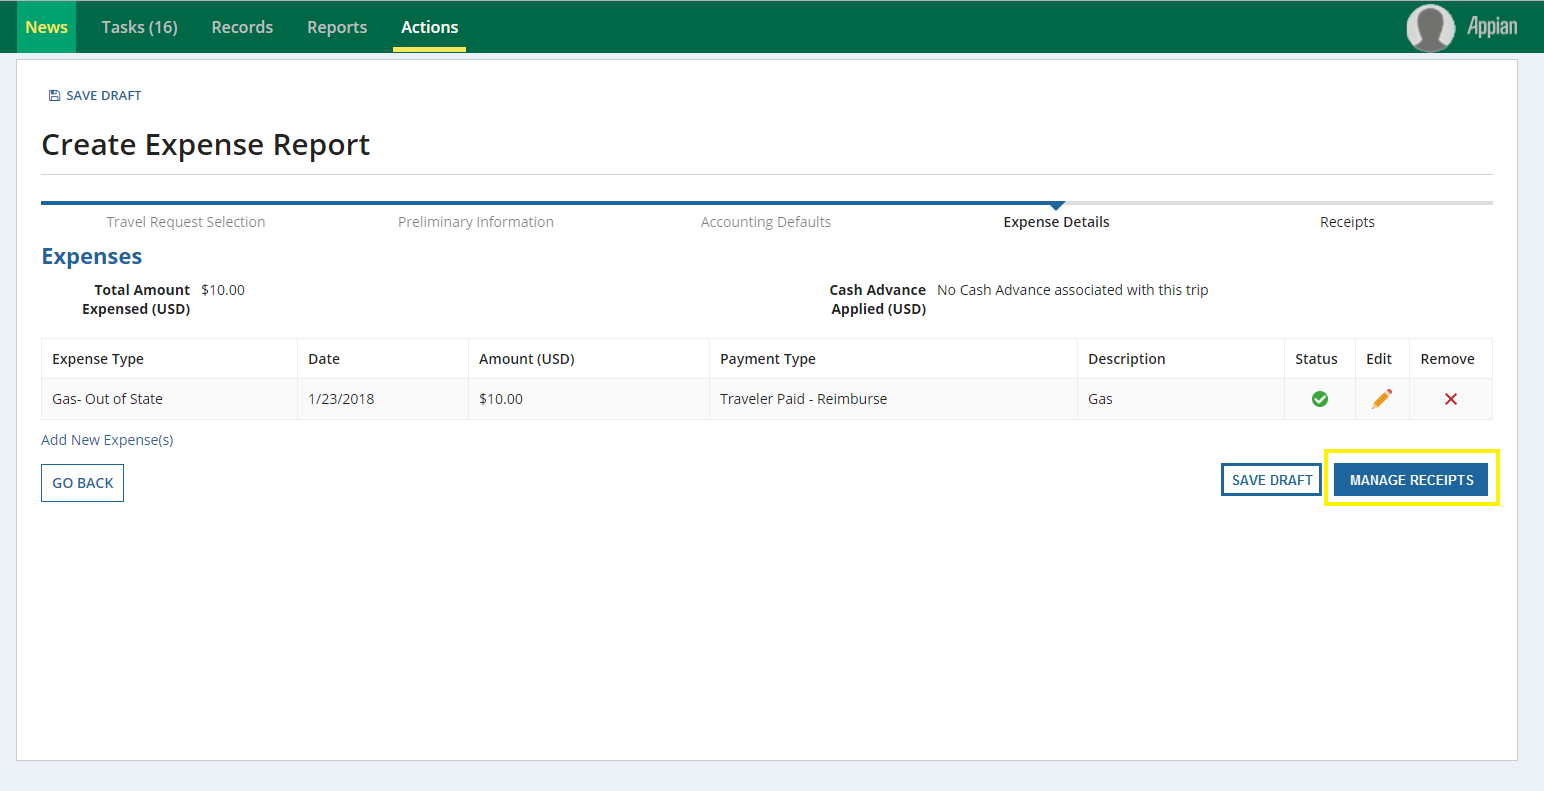
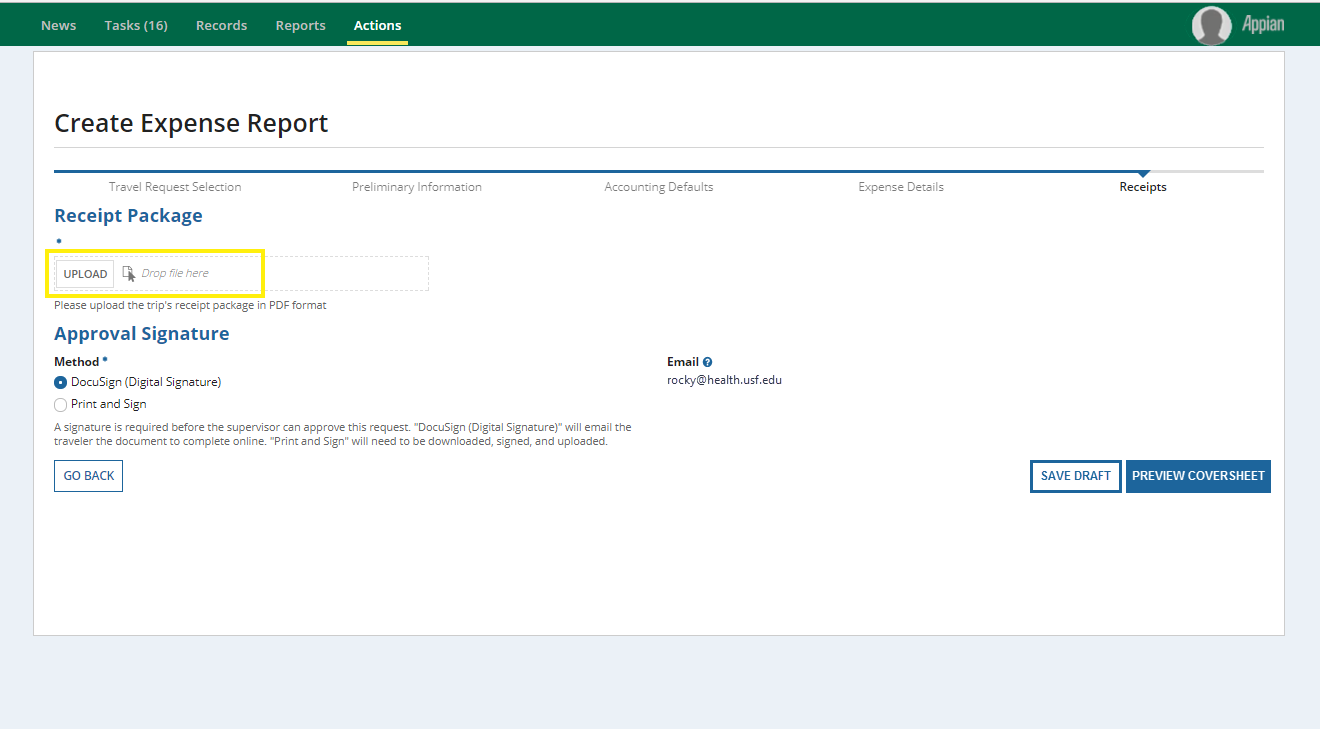
Step 5: Receipts
| Expand | ||||
|---|---|---|---|---|
When all Expenses are marked complete you must reconcile your receipts. Watch Manage Receipts or follow the directions below, ensure that all expenses are supported by receipts. To Manage Receipts:
Managing Receipts on the Go
|


| Anchor | ||||
|---|---|---|---|---|
|
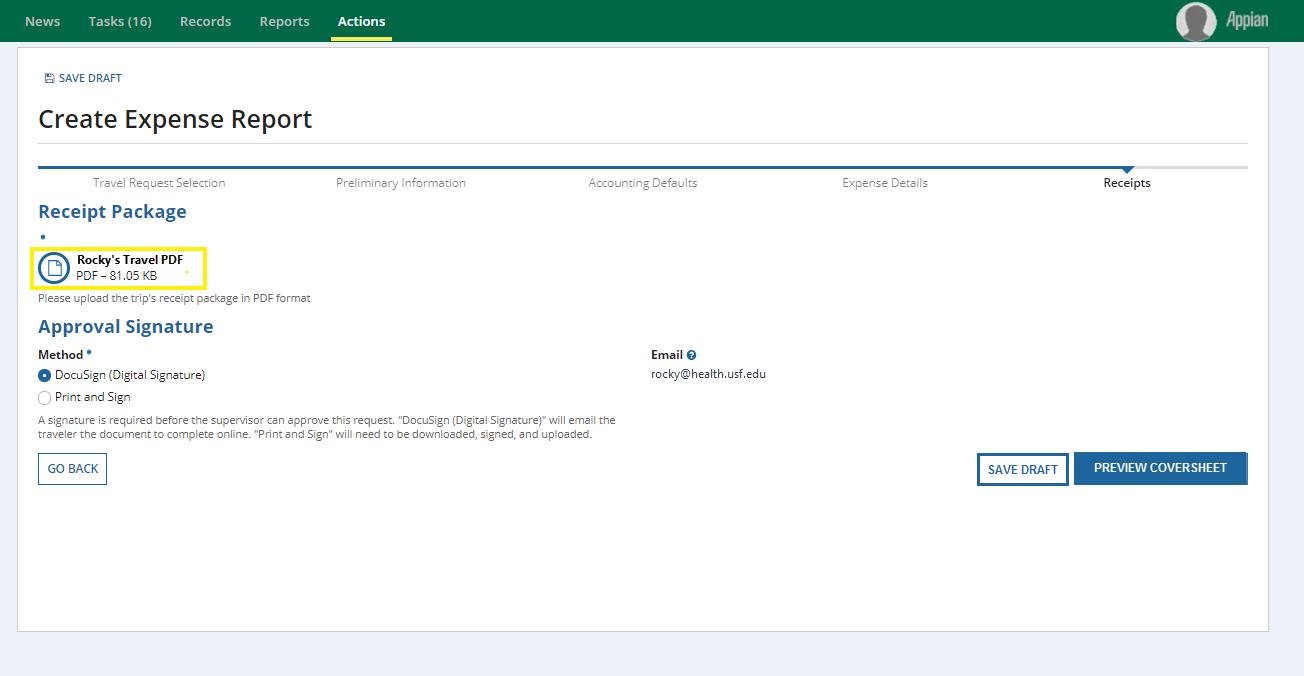
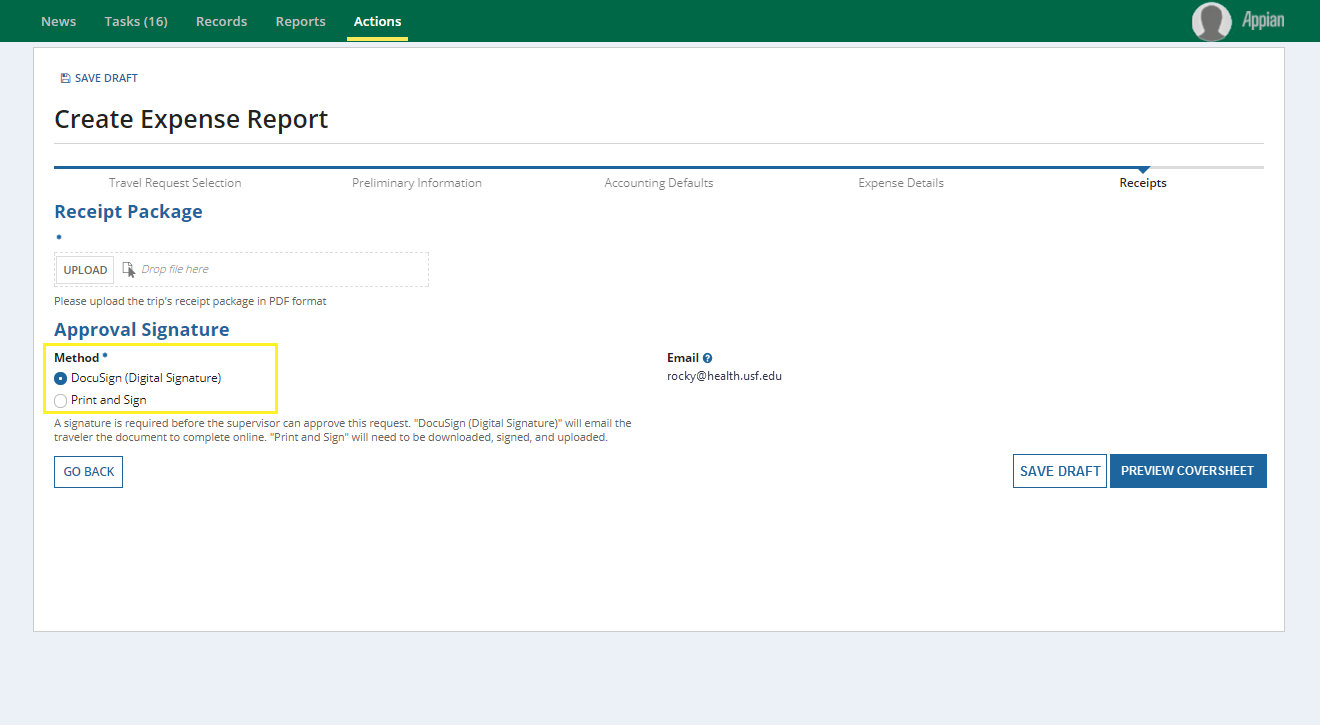
Step 6: Approval Signatures
| Expand | ||||
|---|---|---|---|---|
Select a method of approval signature.
Print and SignPrint and Sign can be used by anyone but is the only option for non-USF travelers.
|
| Note |
|---|
It may take up to 35 minutes to minutes after DocuSign signature for the request to show up as signed in Archivum. To check the status of the signature process, or the status of the overall Expense Report, go to the “Request History” section of My Travel Dashboard. |
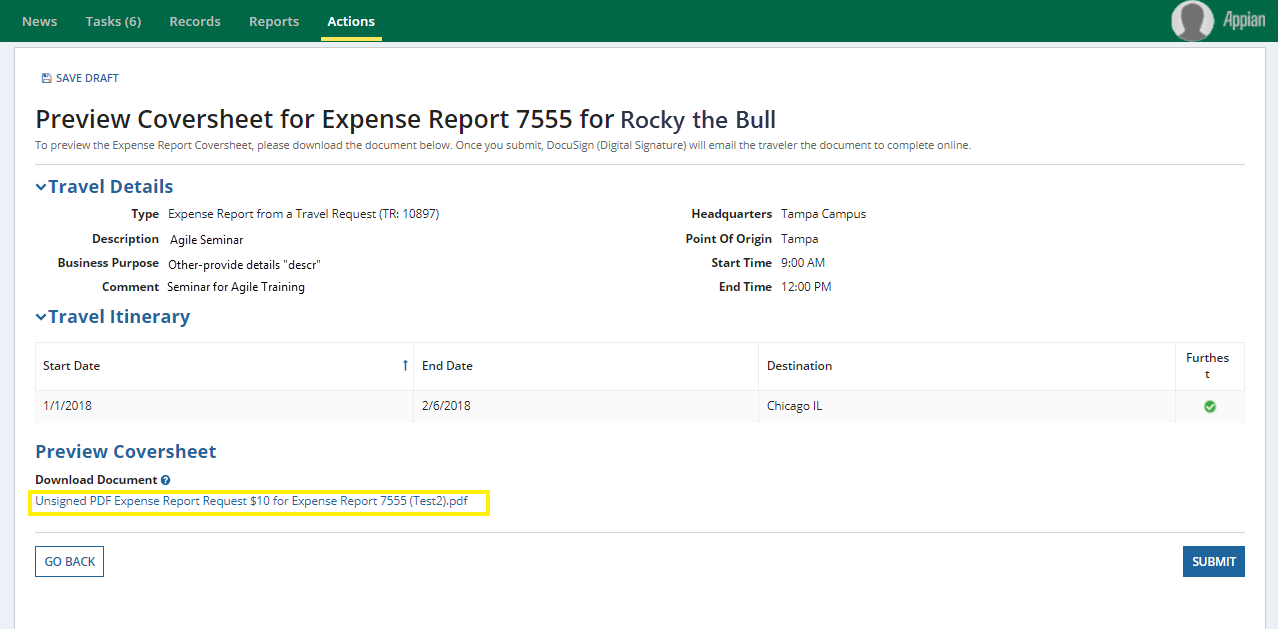
Completed Travel Expense Report
| Expand | ||||||
|---|---|---|---|---|---|---|
To complete a Travel Expense Report: Click the Preview Coversheet linkClick image to enlarge. 
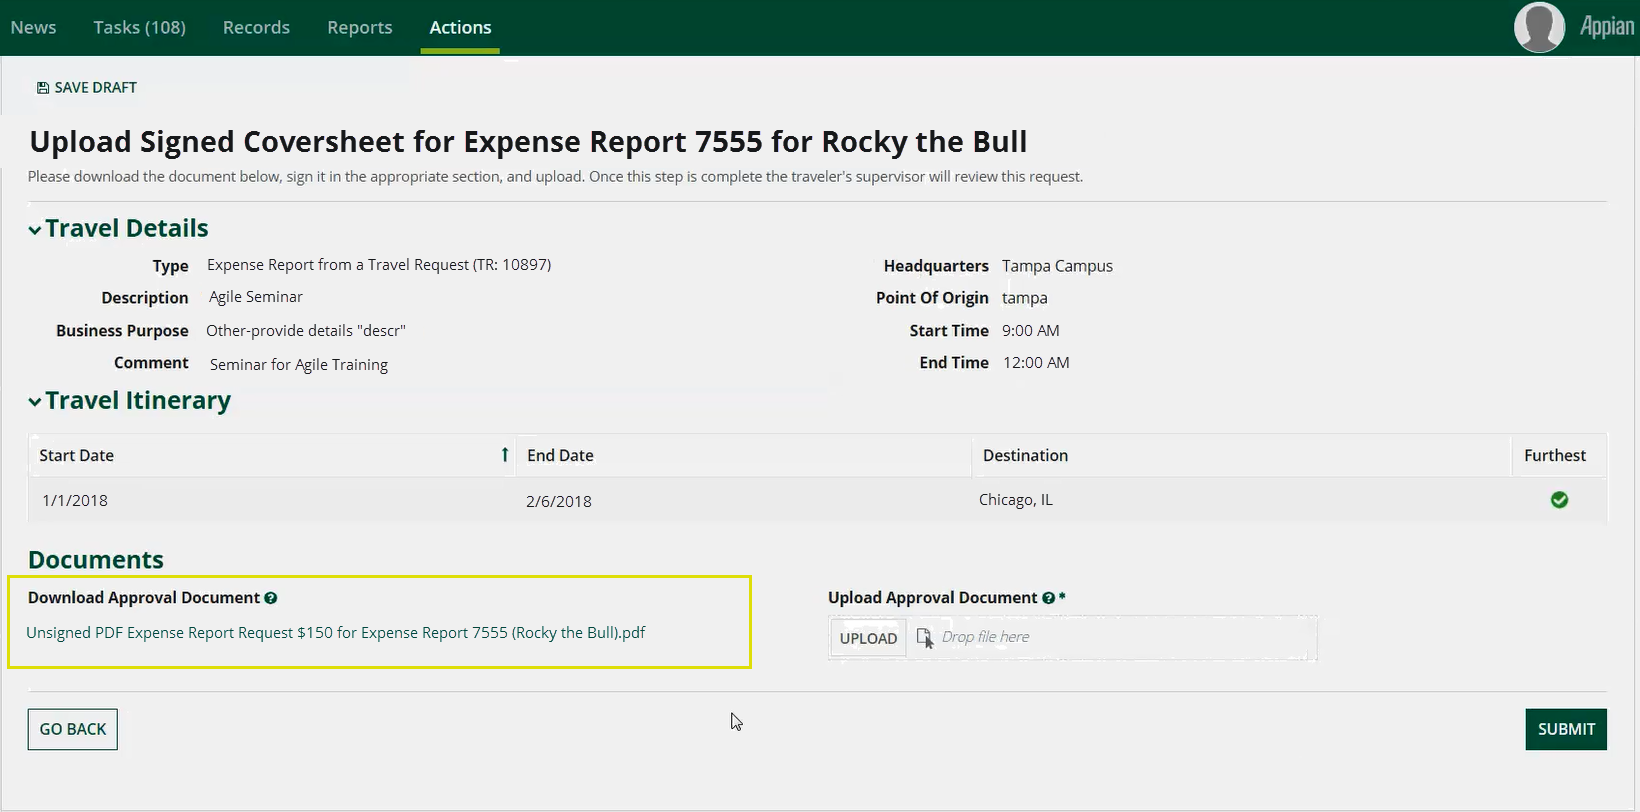
Print and SignPrint and Sign can be used by anyone but is the only option for non-USF travelers. To create a Print and Sign Signature Approval:
|
| Anchor | ||||
|---|---|---|---|---|
|
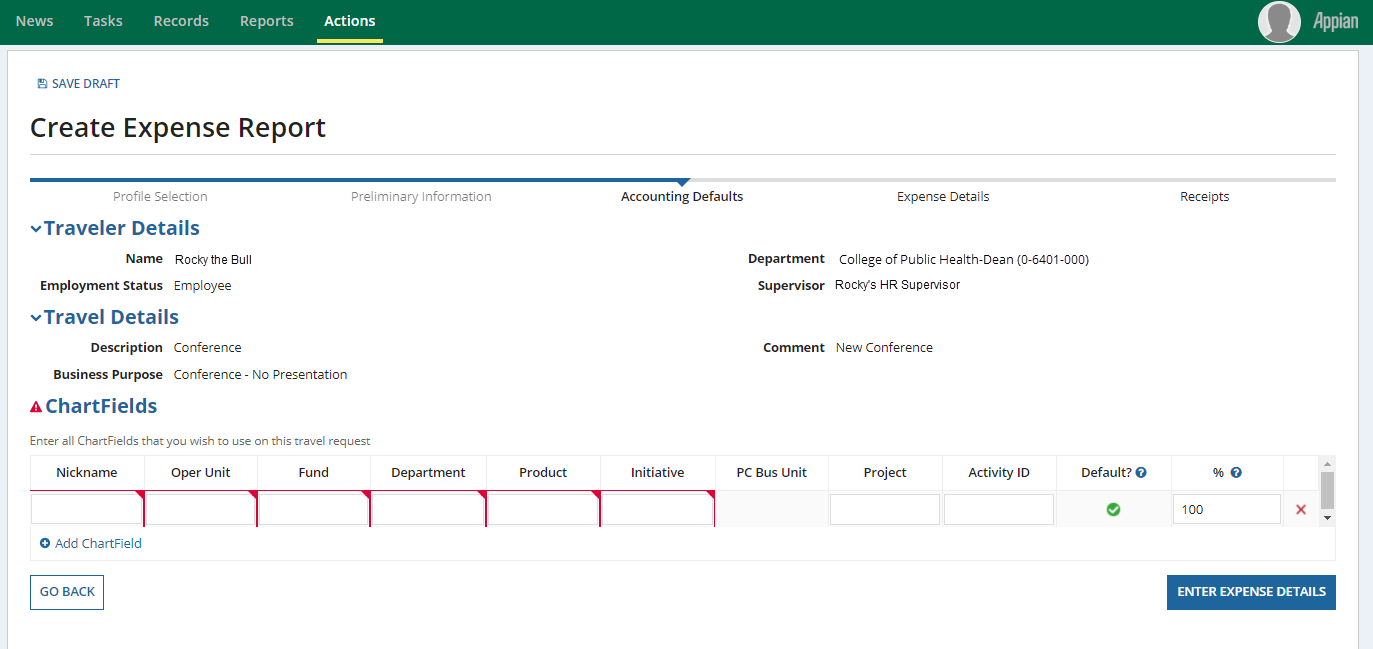
Step 7: Completion of Your Travel Expense Report
| Expand | ||
|---|---|---|
Chartfields are determined by department. If you do not have access to chartfields your approver or manager will be able to supply them. To Add Chartfields:
To edit Chartfields:
Once all needed chartfields are entered, click the Enter Expense Details button.
|
| Expand |
|---|
After selecting Submit on the Preview Coversheet Page, a pop-up window will display notifying you that the Expense Report has been submitted. To view the status of your Expense Report and other related Travel actions such as Travel Requests and Cash Advances:
Click image to enlarge. To log out of Archivum:
If you have any questions, please contact travelhelp@usf.edu. |

PCard Charges
| Expand |
|---|
|