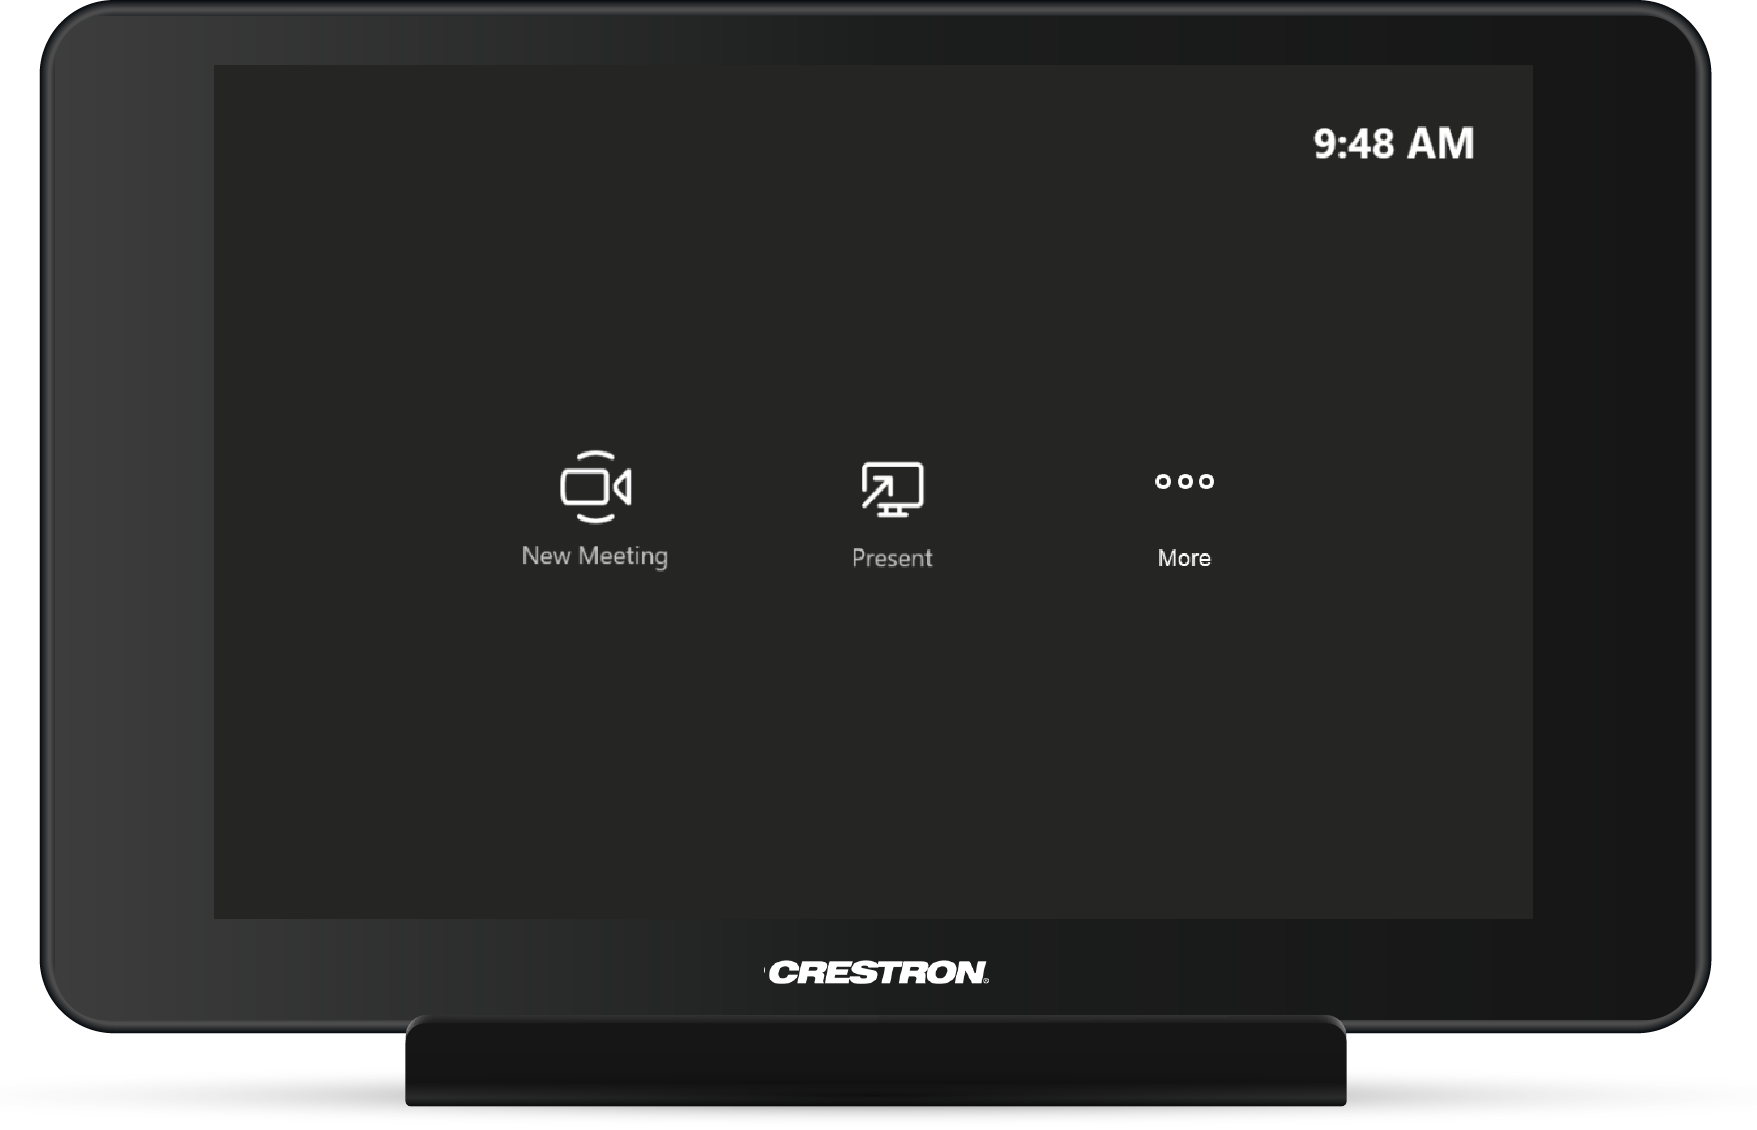
When you walk into a Small Groups room, locate the Crestron panel, which resembles a tablet on a stand. (see image below)
Joining a Meeting
A. Joining a Scheduled Meeting
If you have already scheduled a meeting taking place in a Small Groups Room:
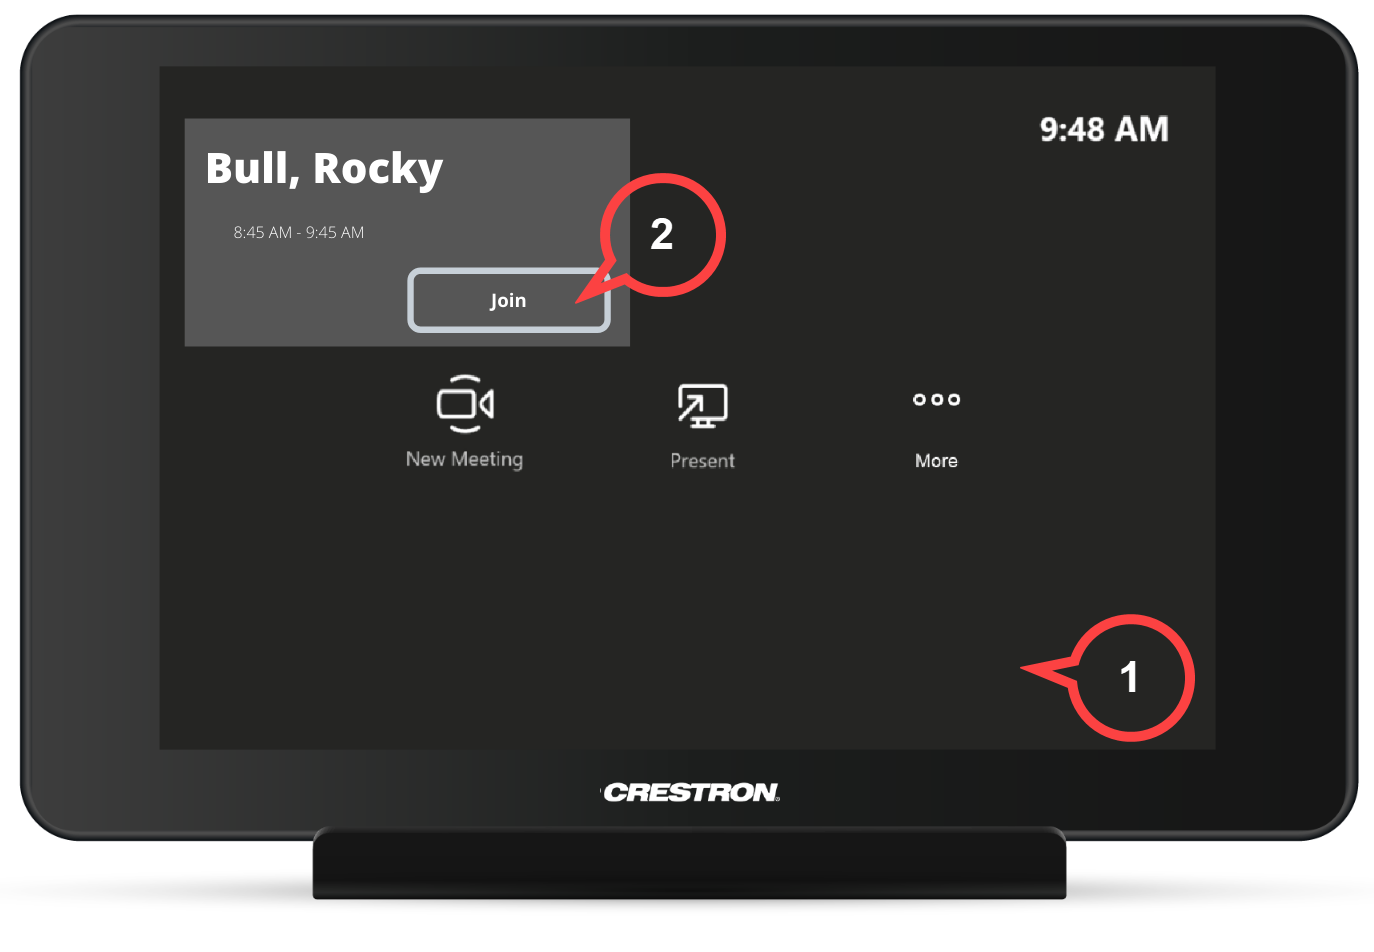
1. Tap the Crestron panel (see image above)
Your scheduled meeting will appear in the top left corner.
2. Tap Join (see image above)
The meeting attendees who have joined the meeting will be displayed.
| Warning |
|---|
If you are presenting in the Small Groups room with your own device, please mute the audio on your device. Otherwise, feedback may occur. |
3. Click to leave the meeting.
B. Joining an Ad-Hoc Meeting
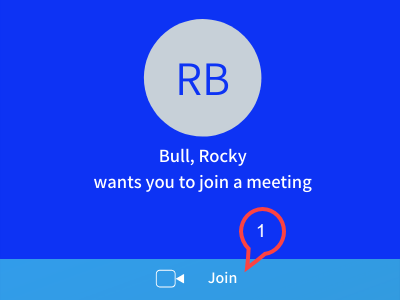
Once remote participants have initiated a meeting, you will see this display on the panel (see image below)
- Tap Join to enter the meeting with your remote participants.
Creating an Ad-Hoc Meeting (New Meeting)
To schedule an ad-hoc meeting with the panel:
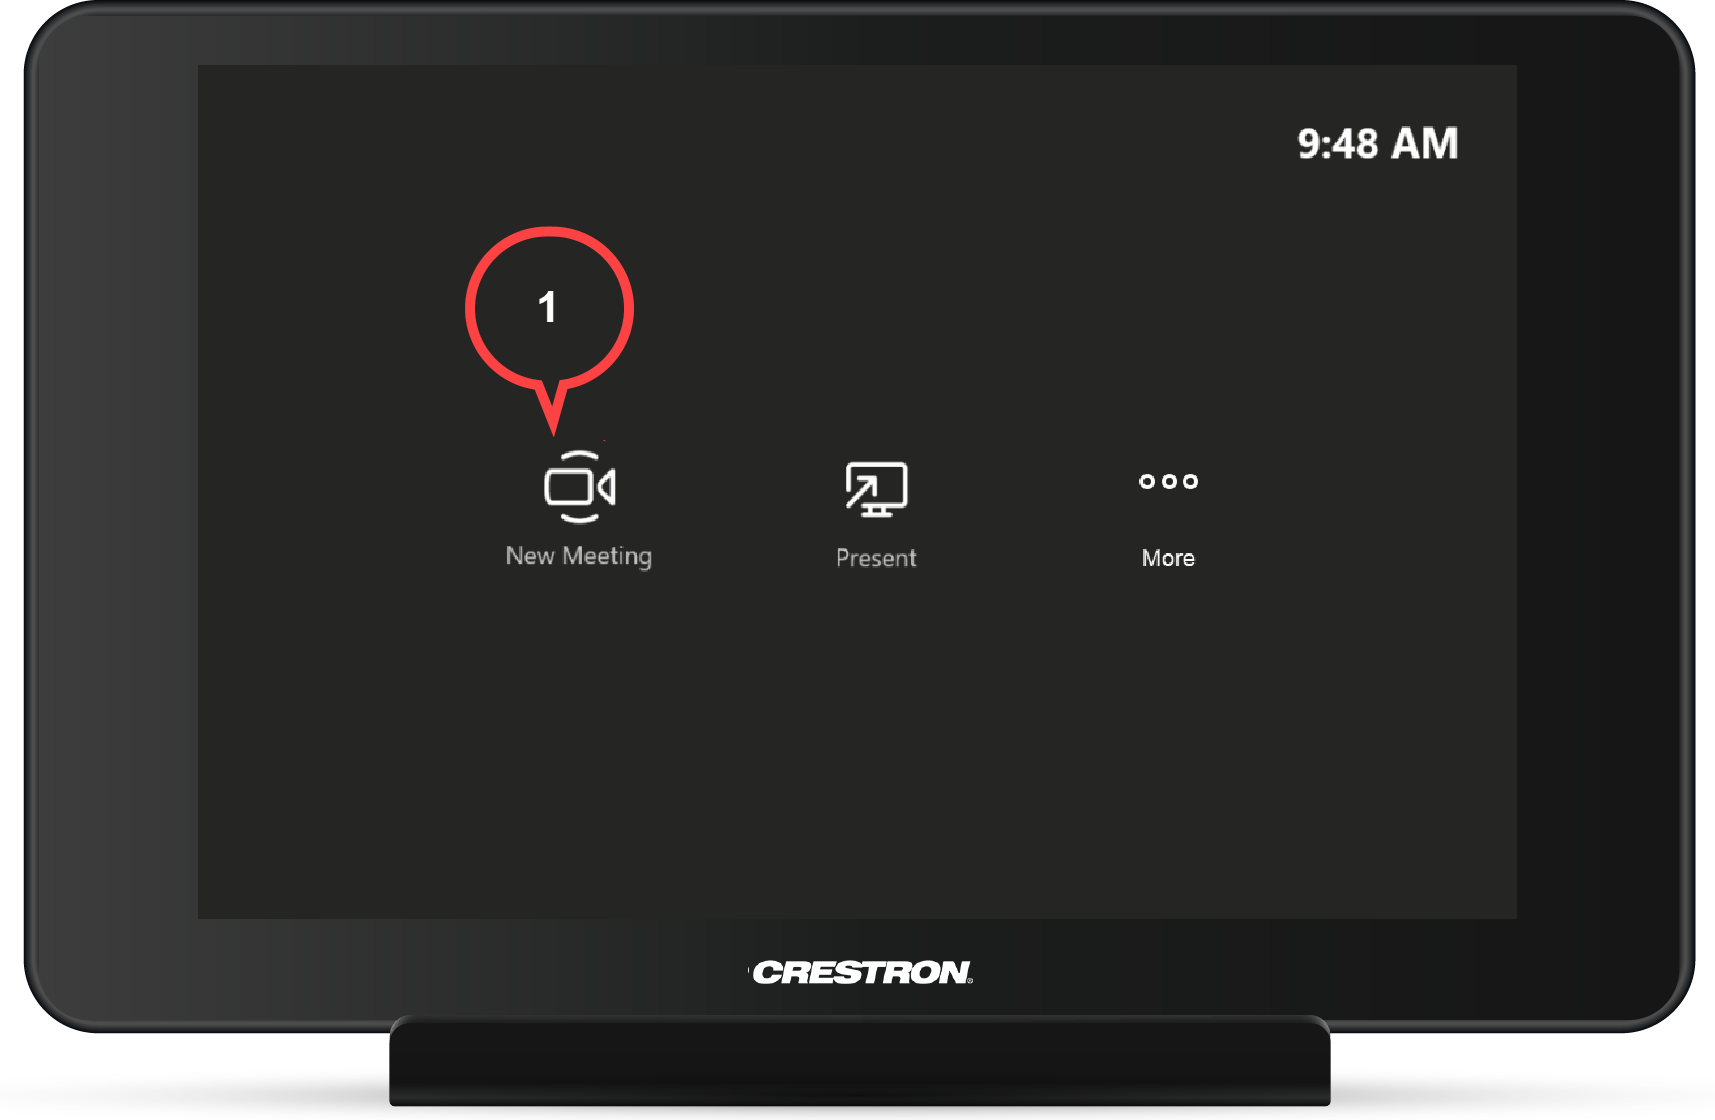
1. Tap New Meeting (see image below)
2. Tap Add Participants (see image below)
An invitation screen will appear.
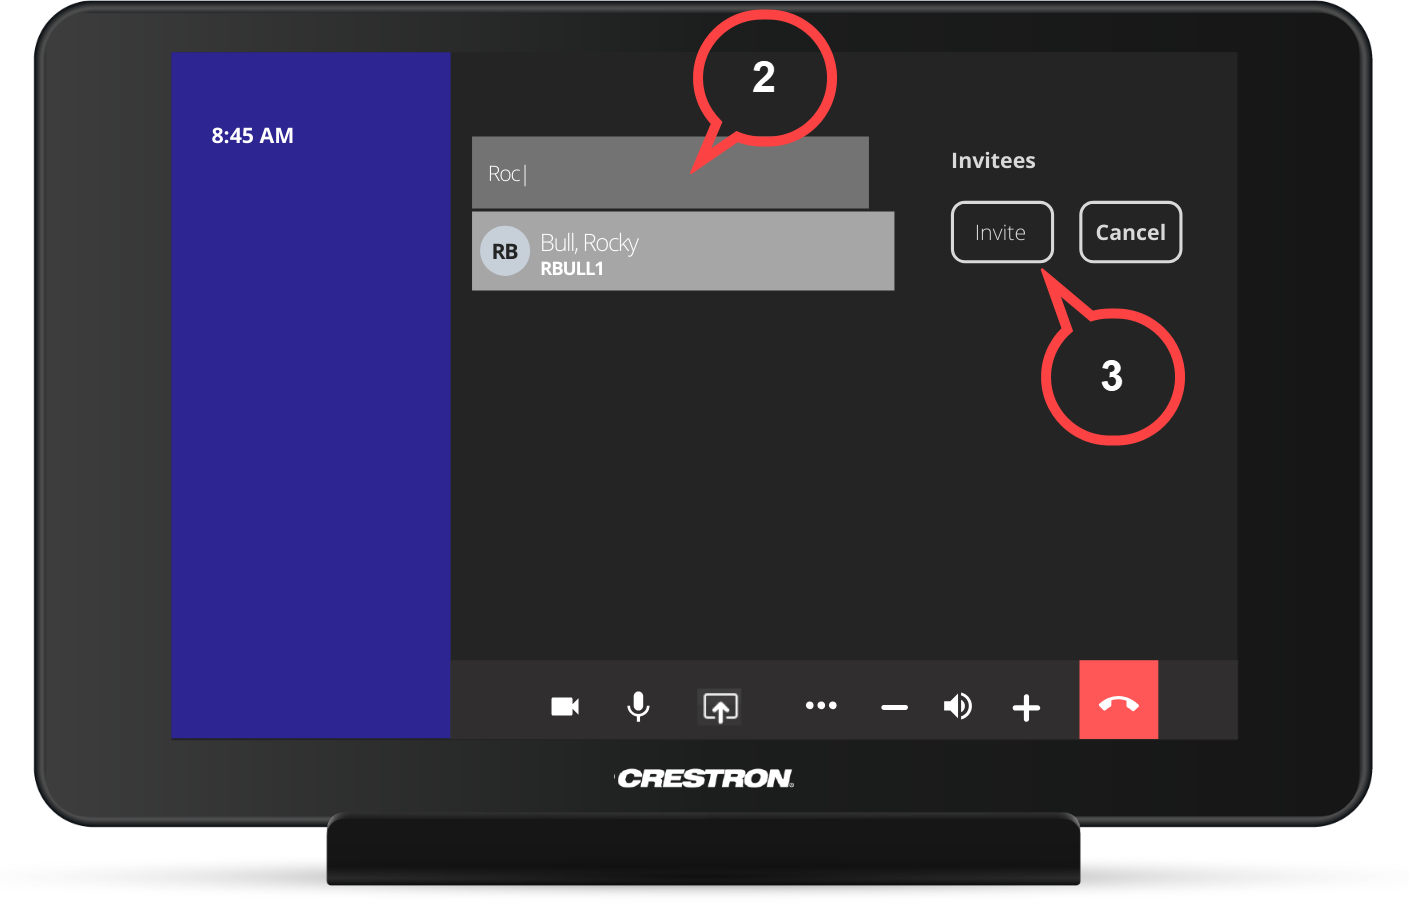
2. Begin typing the name(s) of the invitee(s) (see image above)
3. Tap Invite (see image above)
Invitees will be listed as Participants once they join.
4. Click to leave the meeting.
Meeting Dashboard Features
| Expand | ||
|---|---|---|
| ||
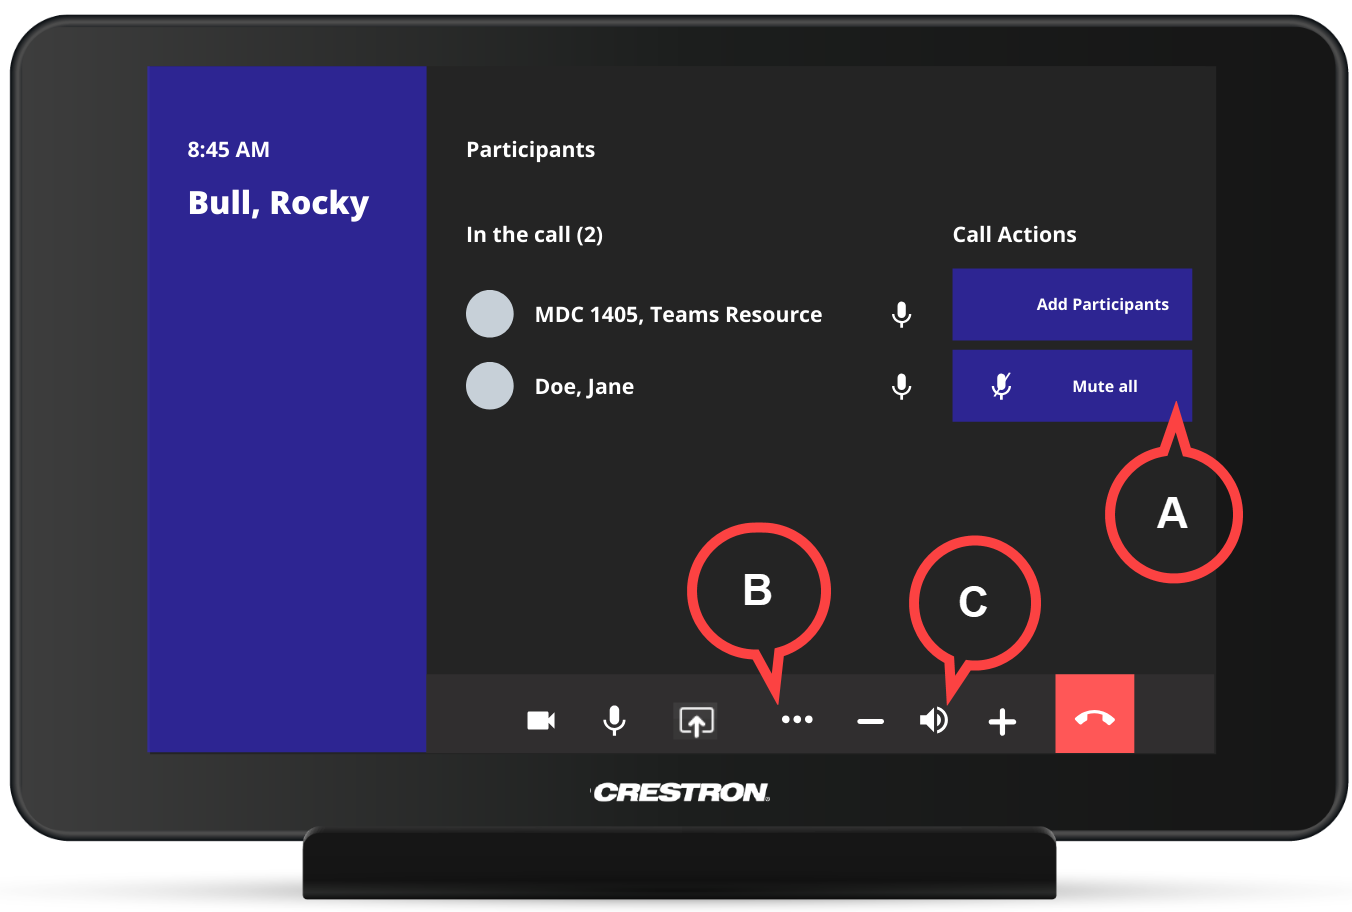
Tap Mute All to mute remote participants (see image above) Once Mute All is enabled, participants will need to individually unmute themselves on their own devices, as seen below: |
| Expand | ||
|---|---|---|
| ||
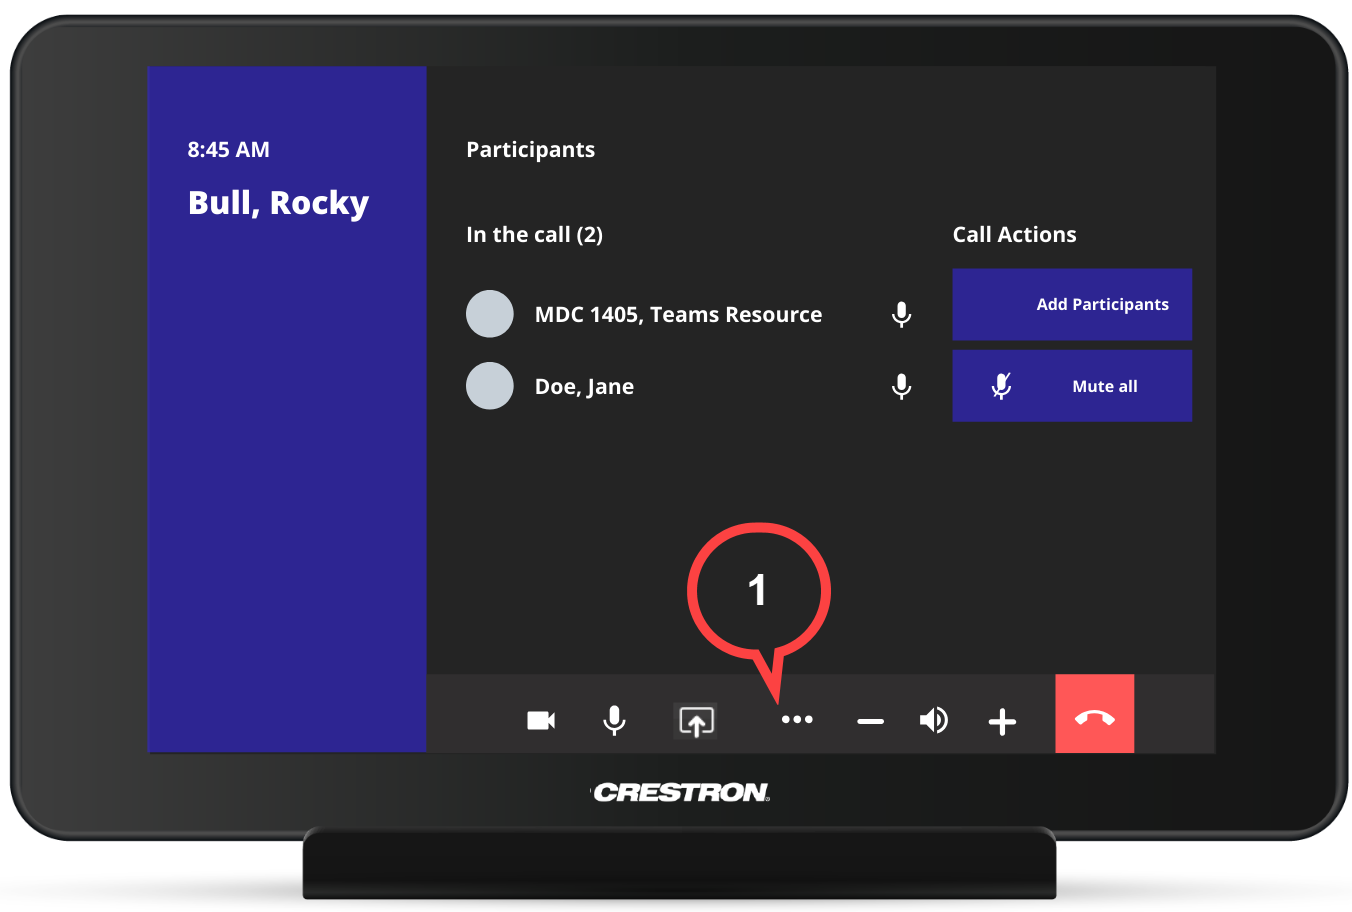
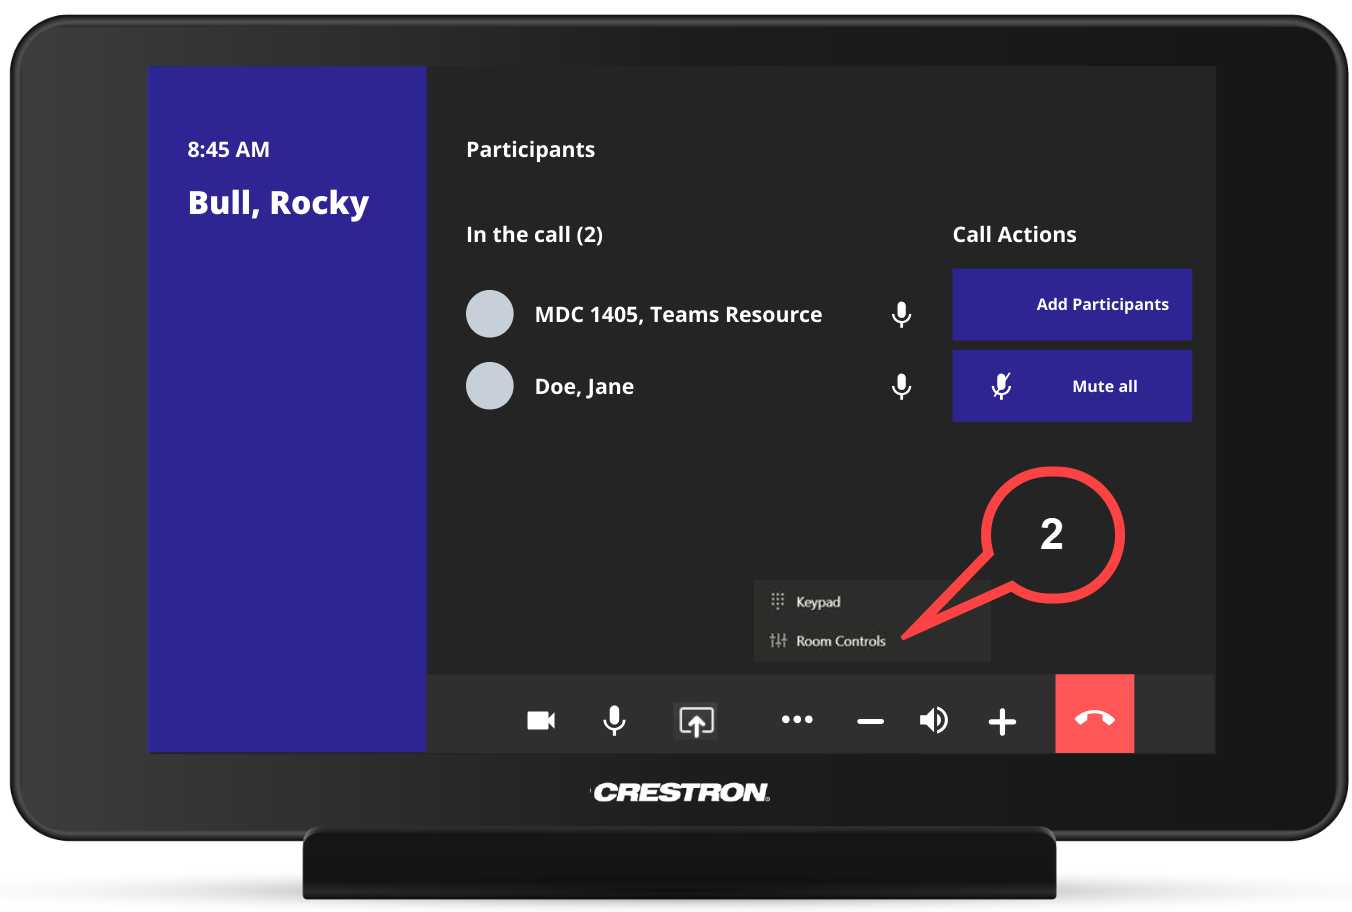
With this feature, you can access the room controls. Turn Display On
Help Button (see last section on this page) |
| Expand | ||
|---|---|---|
| ||
Audio Controls You can use the + and - icons to increase/decrease the room volume. Tapping the speaker icon mutes the sound coming from the room. |
Help Button
| Note | ||
|---|---|---|
| ||
If you are actively in a meeting, use the following steps. Otherwise, click the following link to find the help button from the home screen.
|
From the Home screen
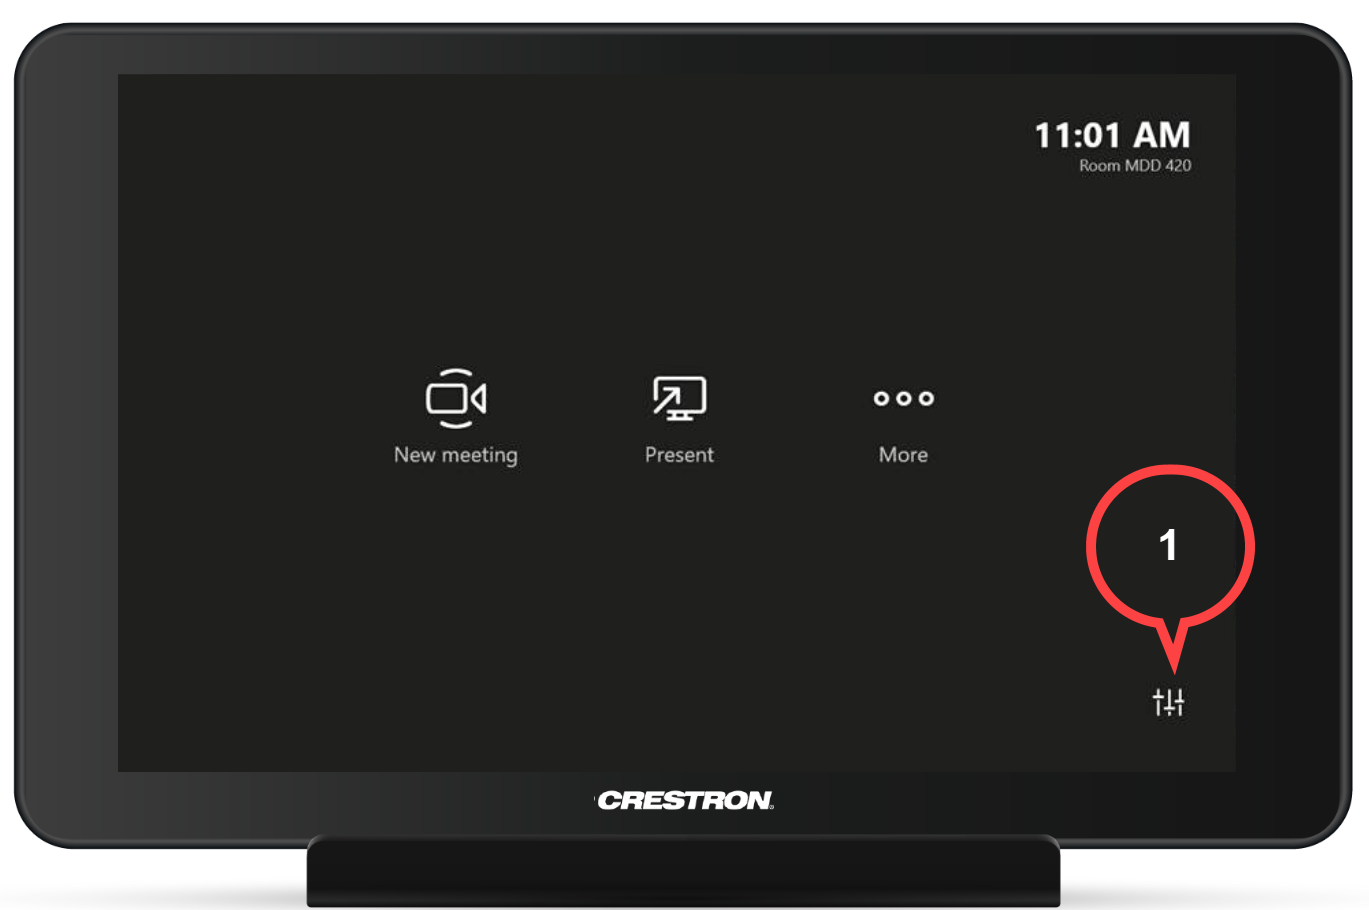
Tap the Slider icon on the lower right hand side of the screen (see image below)Anchor HomeScreen HomeScreen
Tap Press to Start (see image below)Anchor HelpStep2 HelpStep2
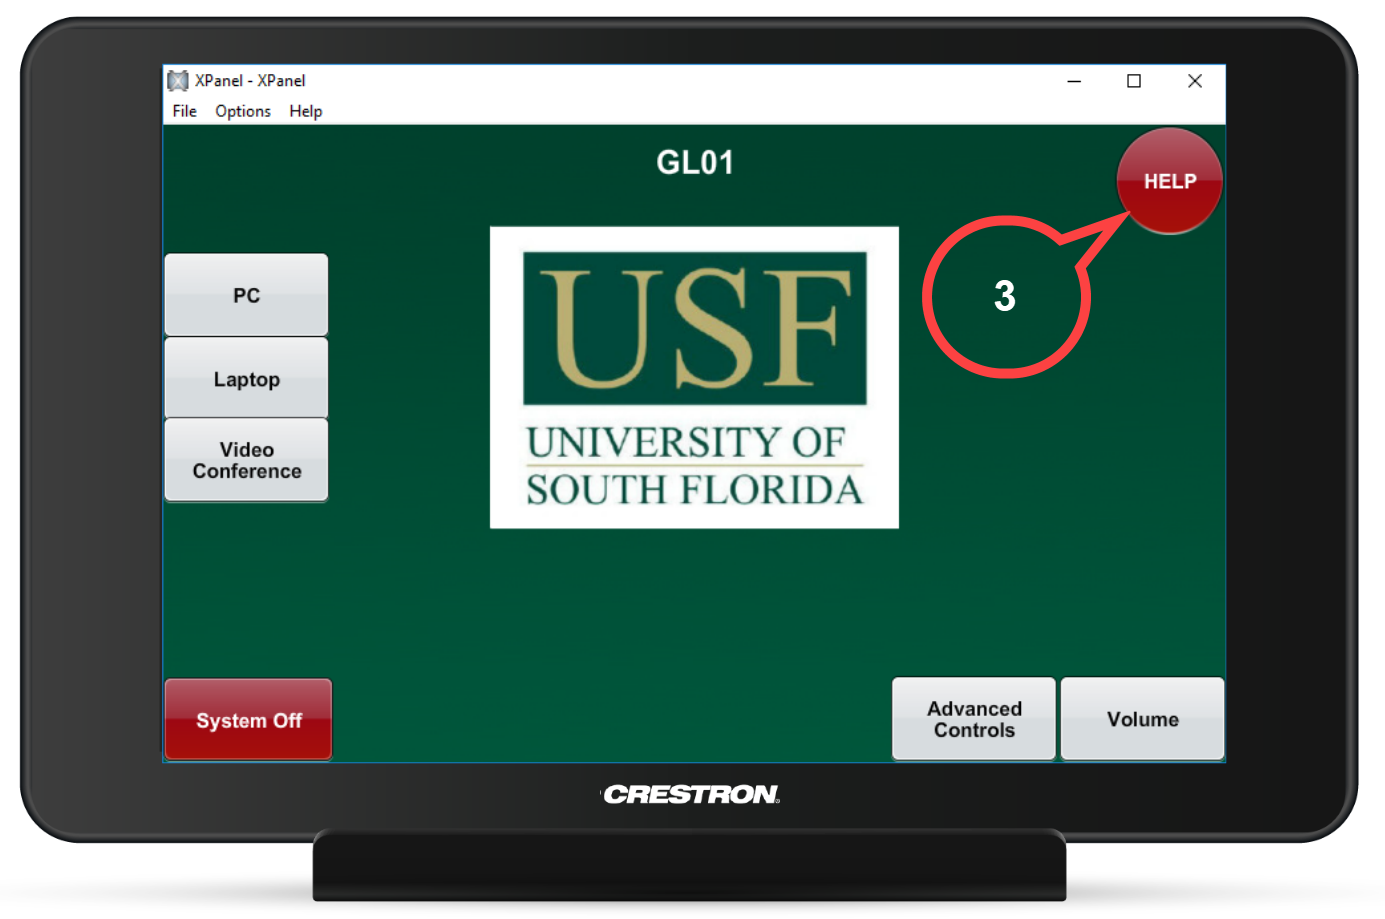
- Tap Help button (see image below)
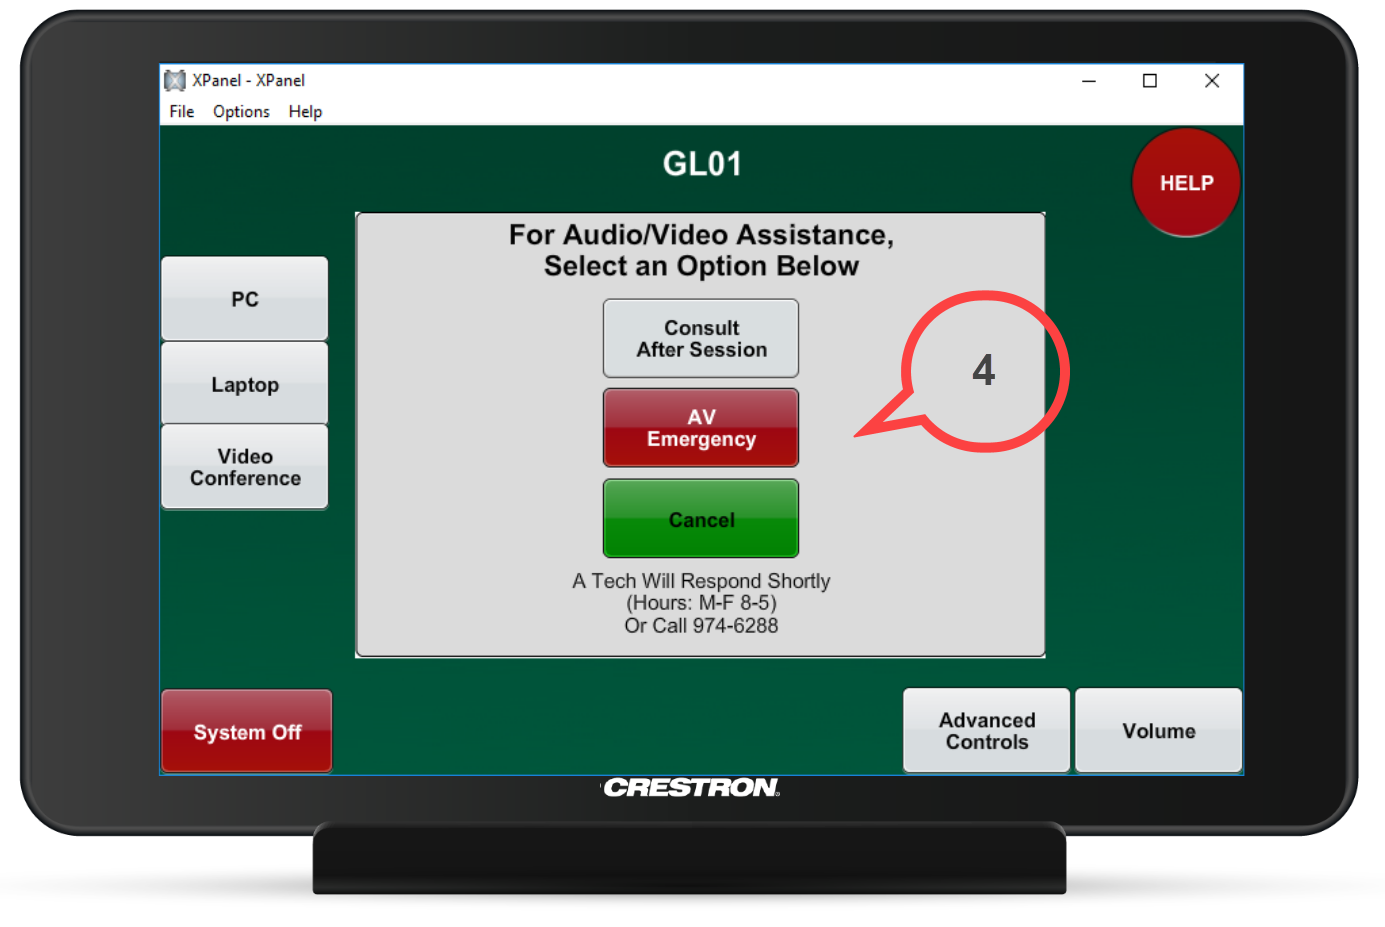
Tap AV Emergency if you need help right away (see image below)
| Note |
|---|
You can also tap Consult After Session (to get help after a meeting) or Cancel |
