Overview
This page goes over how customers can submit tickets to the Service Desk through the Customer Portal in JSM.
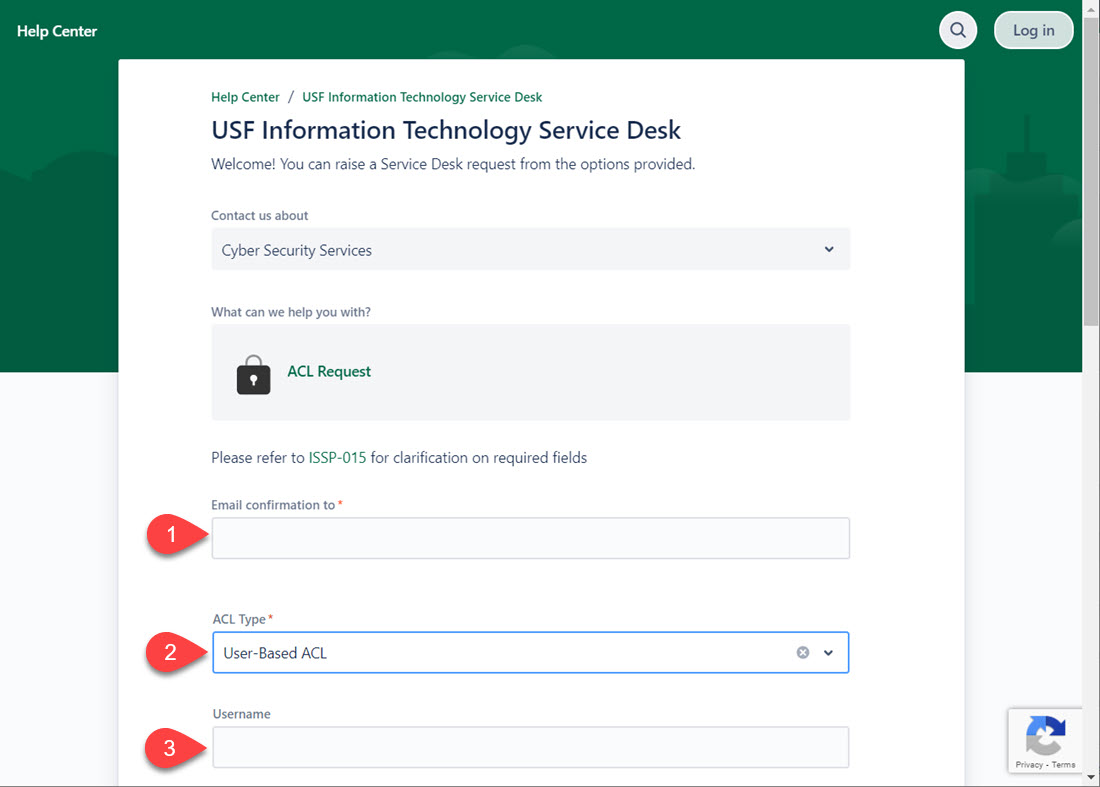
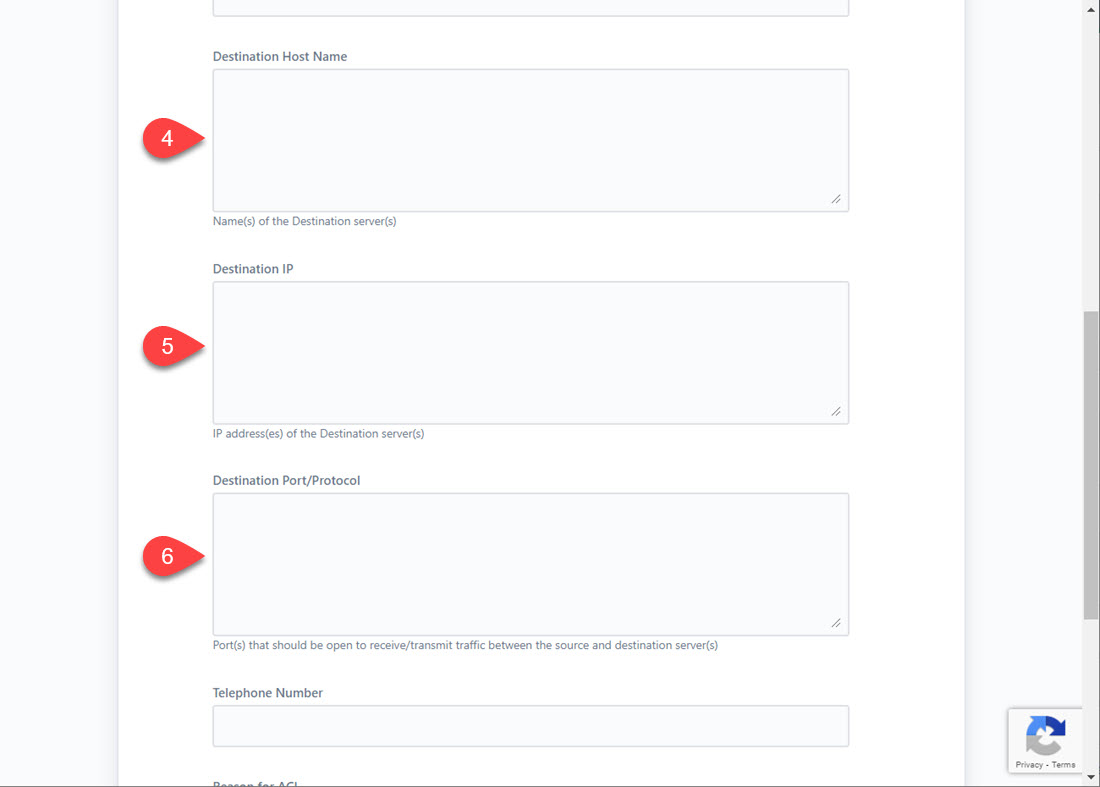
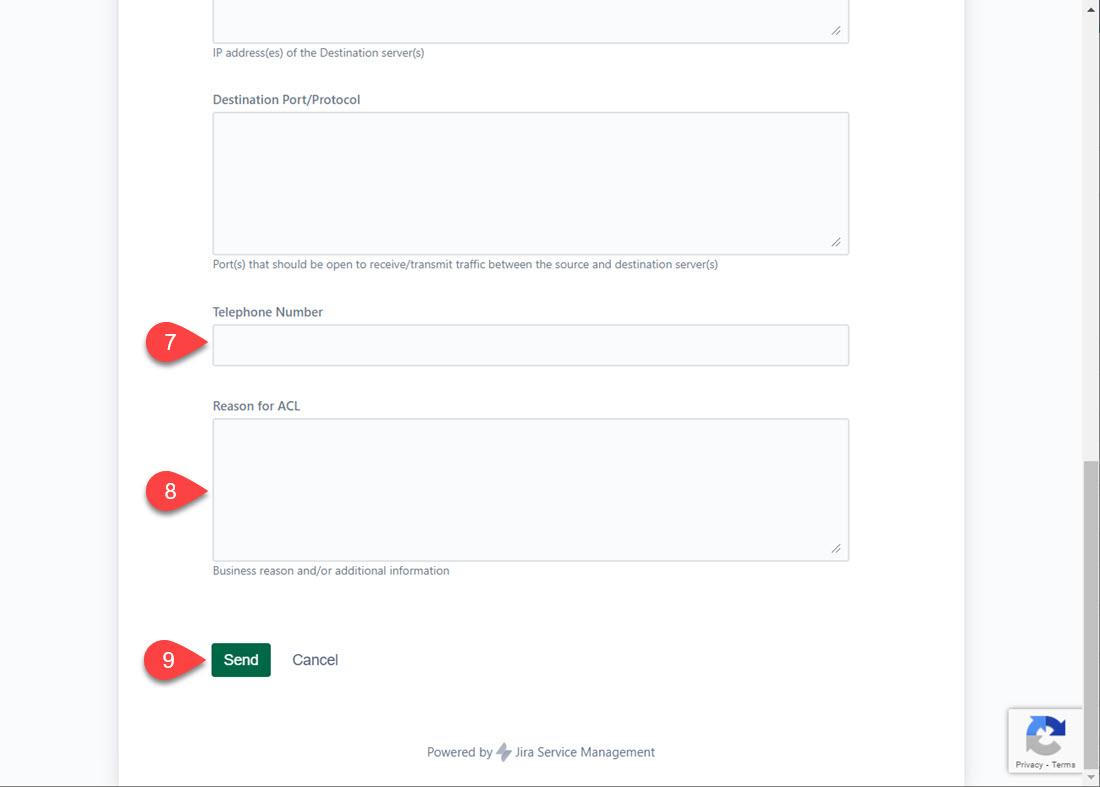
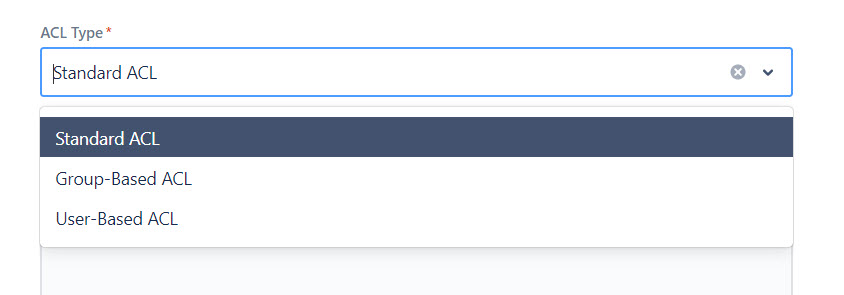
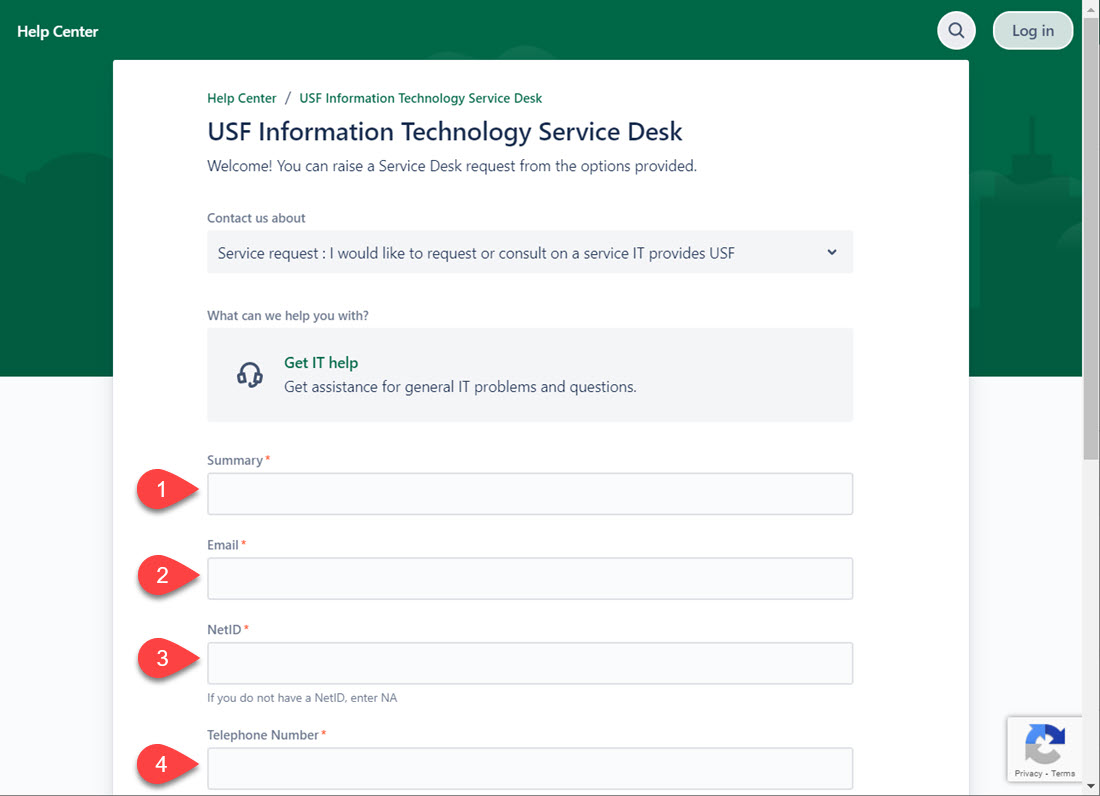
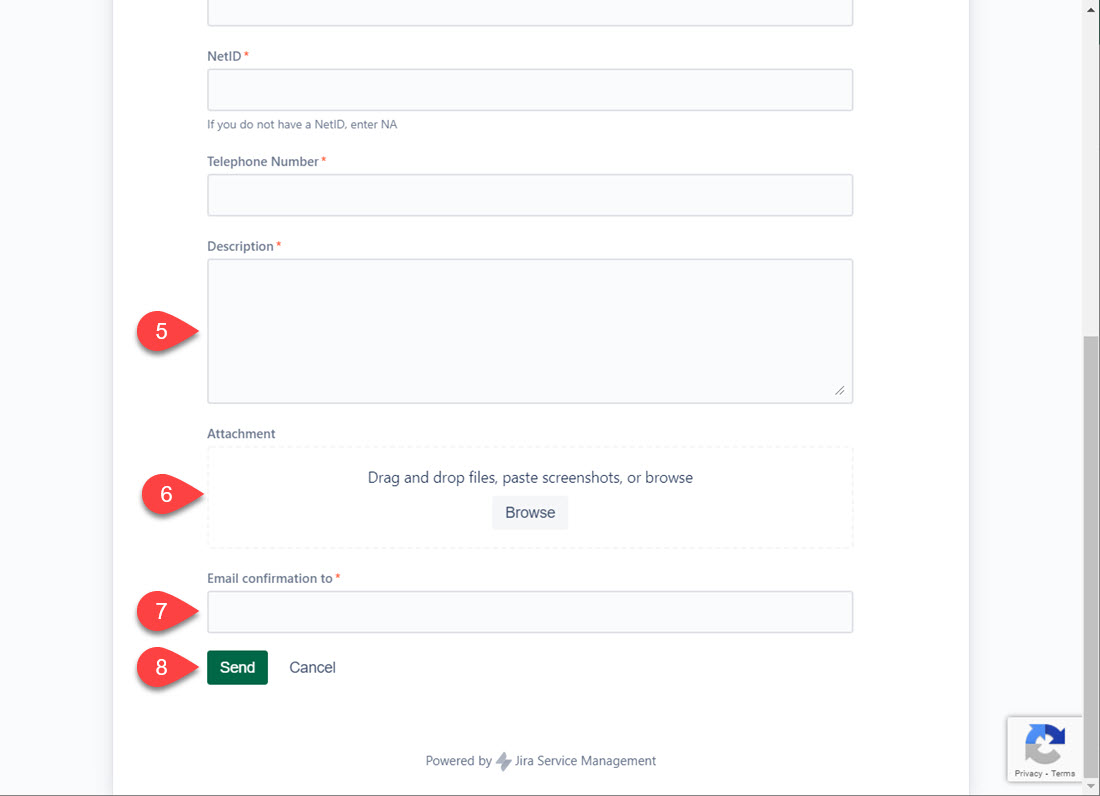
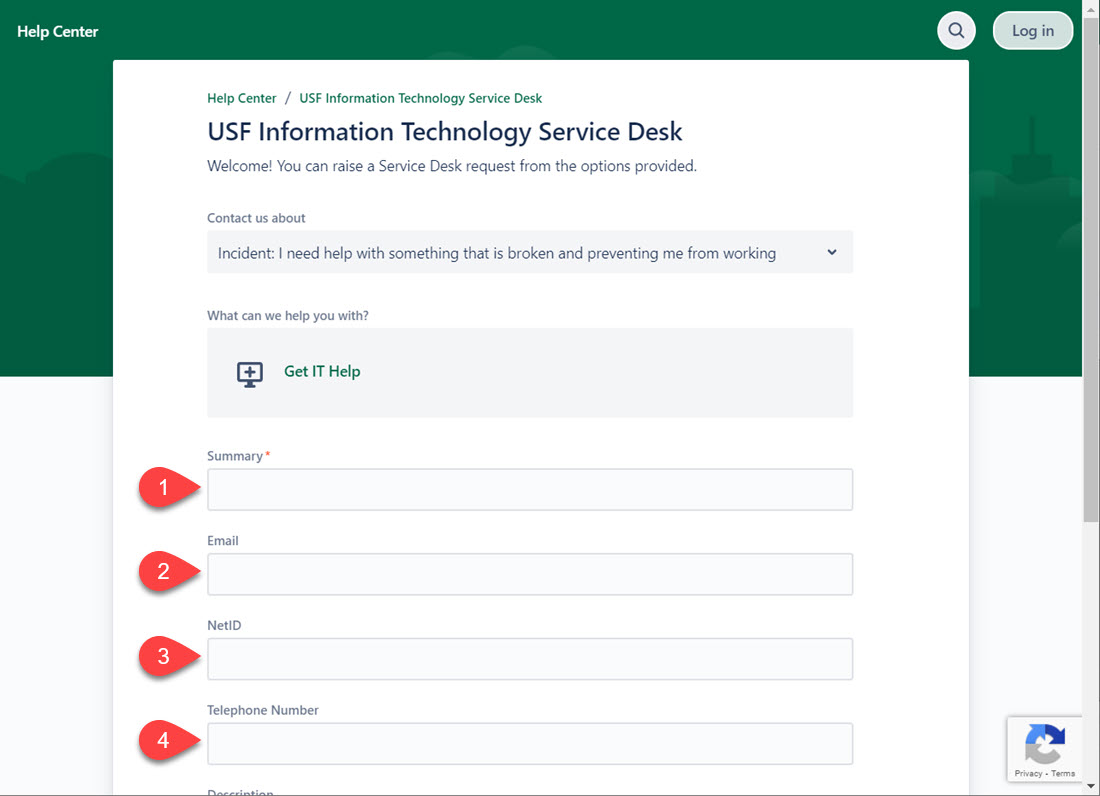
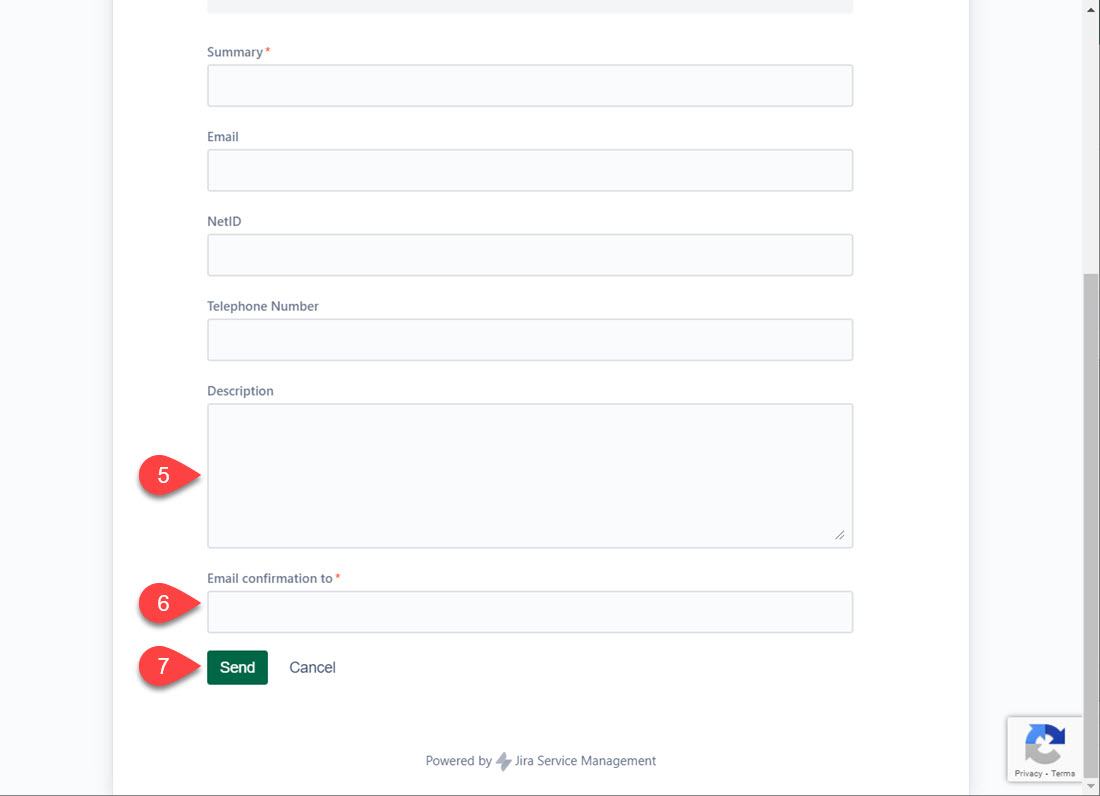
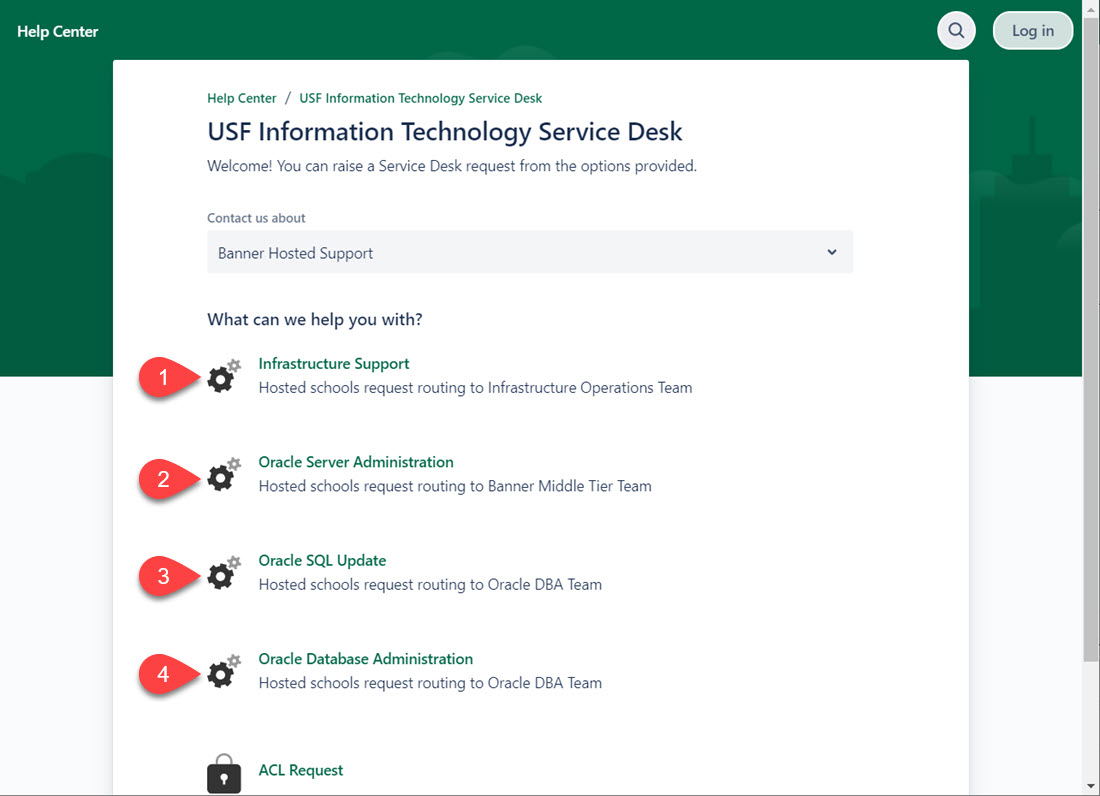
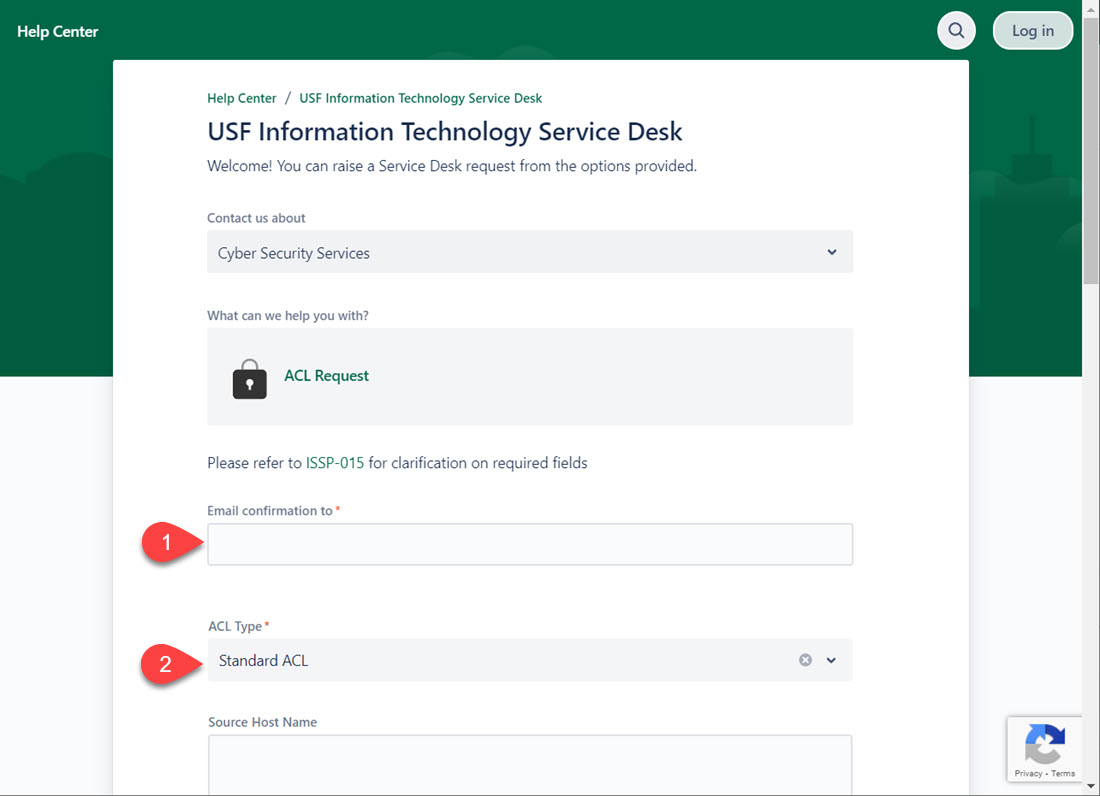
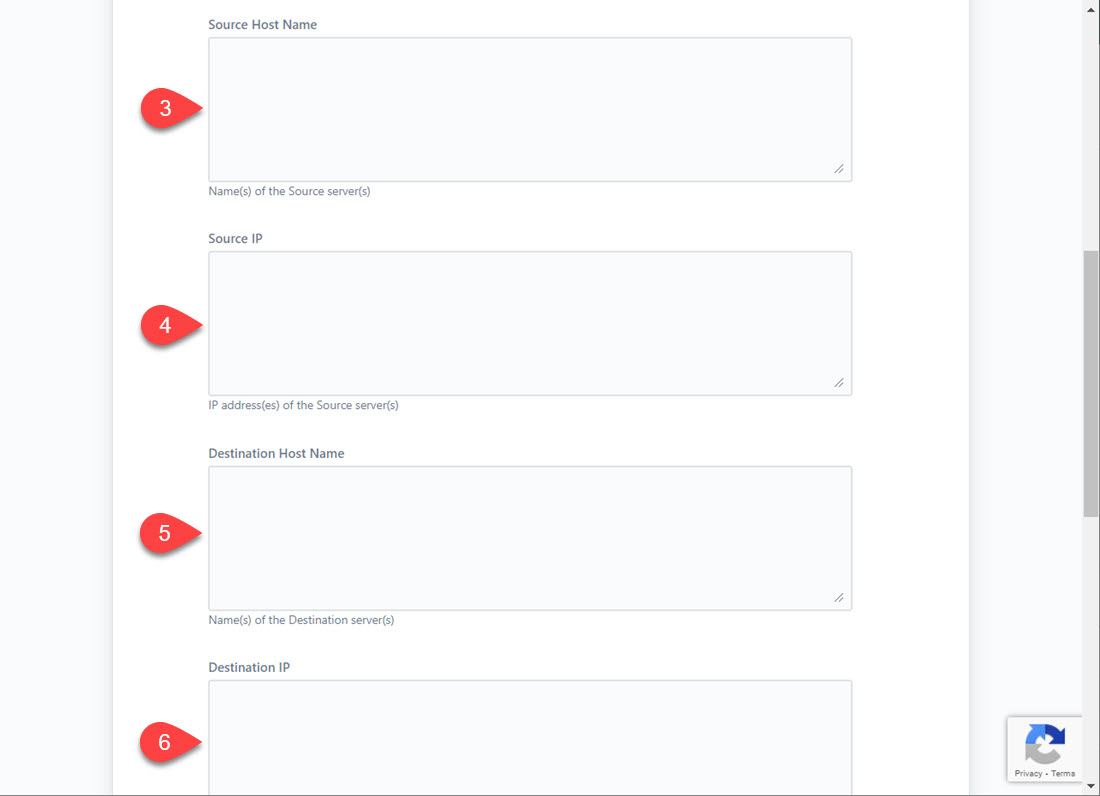
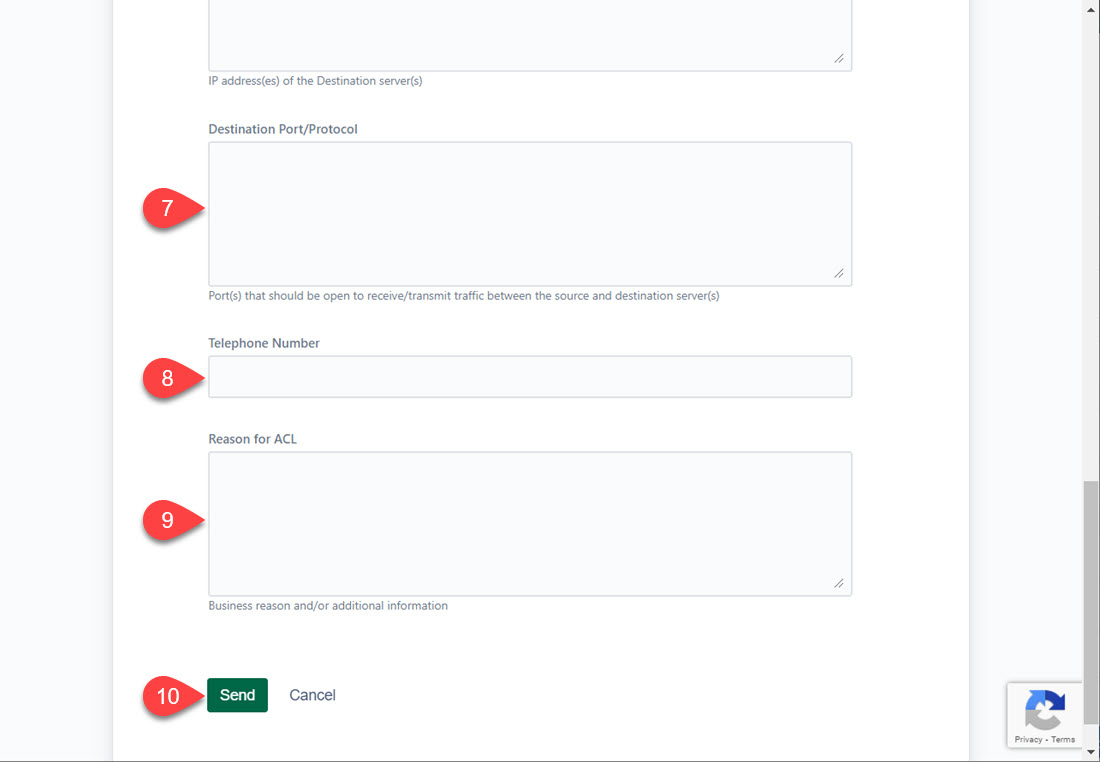
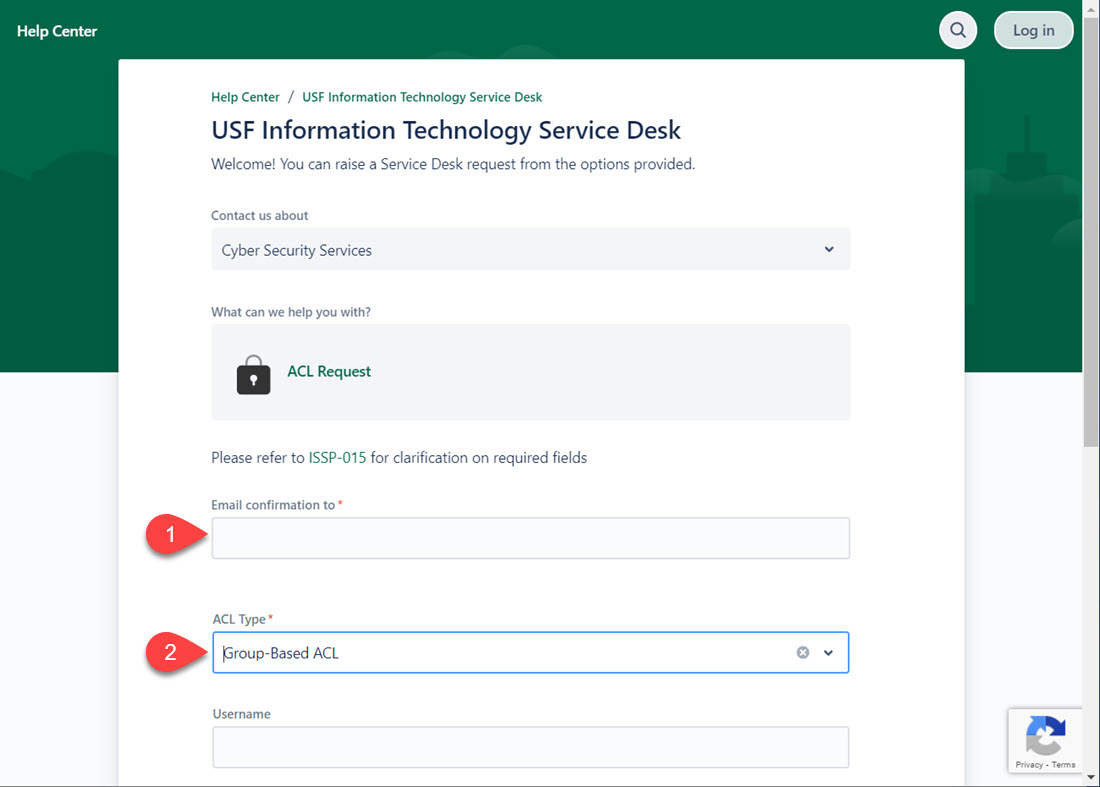
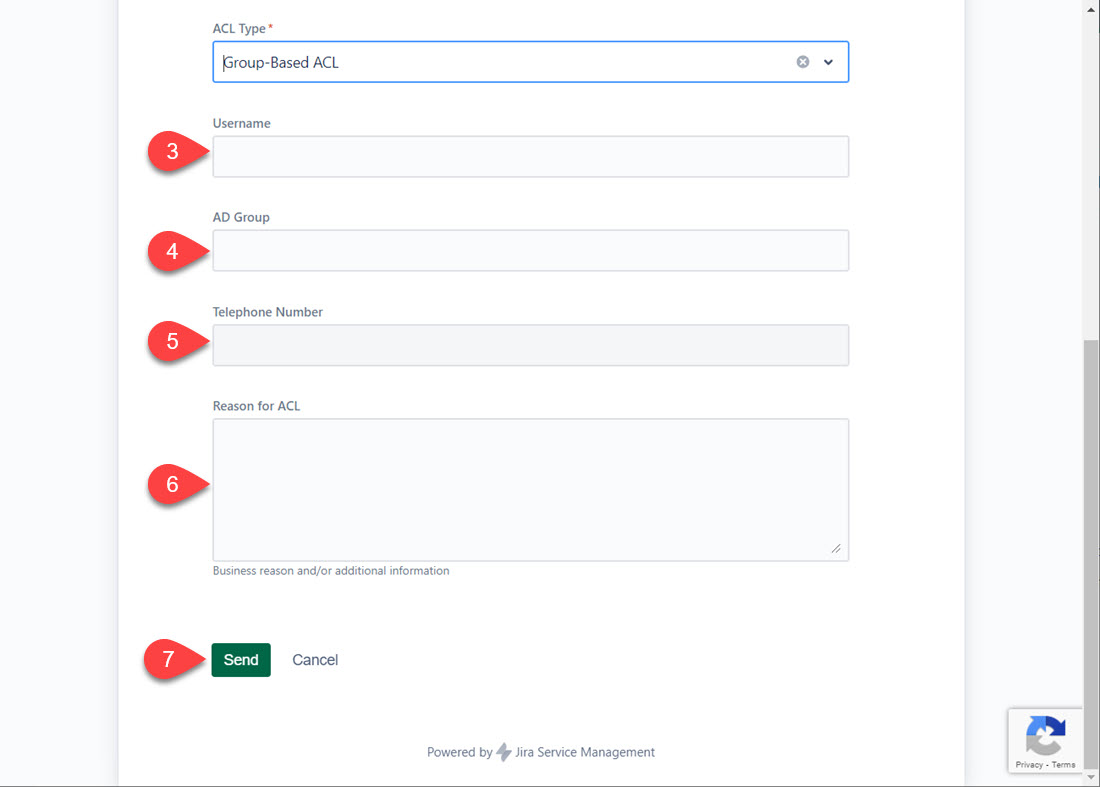
Tickets can be submitted via the Customer Portal website by visiting https://usfjira.atlassian.net/servicedesk/customer/portal/4. From here, you will received a list of options to select from. Each to assist with routing the ticket to the correct teams. This request type is used to obtain information, advice, or access to an IT service. Examples include, but are not limited to, password resets and computer installations. To begin this type of request, select Get IT Help. The following are required fields and what they are asking for: 1. Summary: This is the main subject line for the ticket. 2. Email: This is your USF email address (NetID@usf.edu) 3. NetID: If applicable. If you do not have a NetID, type NA in the field. 4. Telephone Number: Number used in case an IT member needs to call regarding your request. 5. Description: Explanation of what the request is regarding 6. Attachment: Any screenshots or other documents that might be related to the request 7. Email confirmation to: This is the email address you wish to receive a confirmation email to. This should be your USF email address. If you are unable to access your USF email address, enter a secondary email address. 8. Send: To submit the ticket to the Service Desk This request type is used when an unplanned interruption to an IT service occurs, or reduction in the quality of an IT Service. Examples include, but are not limited to, hardware issues or unexpected system errors. To submit an incident ticket, select Get IT Help. The following are required fields and what they are asking for: 1. Summary: This is the main subject line for the ticket. 2. Email: This is your USF email address (NetID@usf.edu) 3. NetID: If applicable. If you do not have a NetID, type NA in the field. 4. Telephone Number: Number used in case an IT member needs to call regarding your request. 5. Description: Explanation of what the request is regarding 6. Email confirmation to: This is the email address you wish to receive a confirmation email to. This should be your USF email address. If you are unable to access your USF email address, enter a secondary email address. 8. Send: To submit the ticket to the Service Desk 1. Infrastructure Support: Hosted schools request routing to Infrastructure Operations Team 2. Oracle Server Administration: For issues regarding Oracle Servers 3. Oracle SQL Update: For issues with any Oracle SQL updates 4. Oracle Database Administration: For issues with any Oracle Database These requests are to submit access to databases and other tools that require an ACL to be in place. To submit a ticket for ACLs, select ACL Request. Select the drop down under ACL Type to see the list of different ACLs that can be submitted. If you do not know which one to select, please contact your ADR. The ACL type requested will determine what information will be required. 1. Email confirmation to: Enter your USF email address. 2. ACL Type: This is the type of ACL you wish to submit. 3. Source Host Name: This is the computer's name that will be connecting to the destination. 4. Source IP: The computer's IP address that will be connecting to the destination. 5. Destination Host Name: The name of what you want to connect to (Examples are DWHouse, PROD_RO, etc.) 6. Destination IP: The IP address of what you will be connecting to. 7. Destination Port/Protocol: The port for the destination you will be connecting to. 8. Telephone Number: A phone number in case a member of IT needs to contact someone about request. 9. Reason for ACL: What is the purpose of the request. 10. Send: The button to sent the request. 1. Email confirmation to: Enter your USF email address. 2. ACL Type: This is the type of ACL you wish to submit. 3. Username: NetID 4. AD Group: Active Directory Group you wish to access. 5. Telephone Number: A phone number in case a member of IT needs to contact someone about request. 6. Reason for ACL: What is the purpose of the request. 7. Send: The button to sent the request. 1. Email confirmation to: Enter your USF email address. 2. ACL Type: This is the type of ACL you wish to submit. 3. Username: NetID 4. Destination Host Name: The name of what you want to connect to (Examples are DWHouse, PROD_RO, etc.) 5. Destination IP: The IP address of what you will be connecting to 6. Destination Port/Protocol: The port for the destination you will be connecting to. 7. Telephone Number: A phone number in case a member of IT needs to contact someone about request. 8. Reason for ACL: What is the purpose of the request. 9. Send: The button to sent the request.
Service Request
Incident

Banner Hosted Support
Cyber Security Services

Standard ACL
Group-Based ACL
User-Based ACL