Overview
NetID is the handle of your email address, for example, your netid will be "rockythebull" if your email address is rockythebull@usf.edu. NetID and USF Email Activation is a process that you choose and created your
NetID and email at USF. Once you chose and create a NetID and email, they will be yours forever.
Go to URL https://netid.usf.edu/activate to start your NetID and USF email activation.
Click Activate NetID and USF Email (see image below)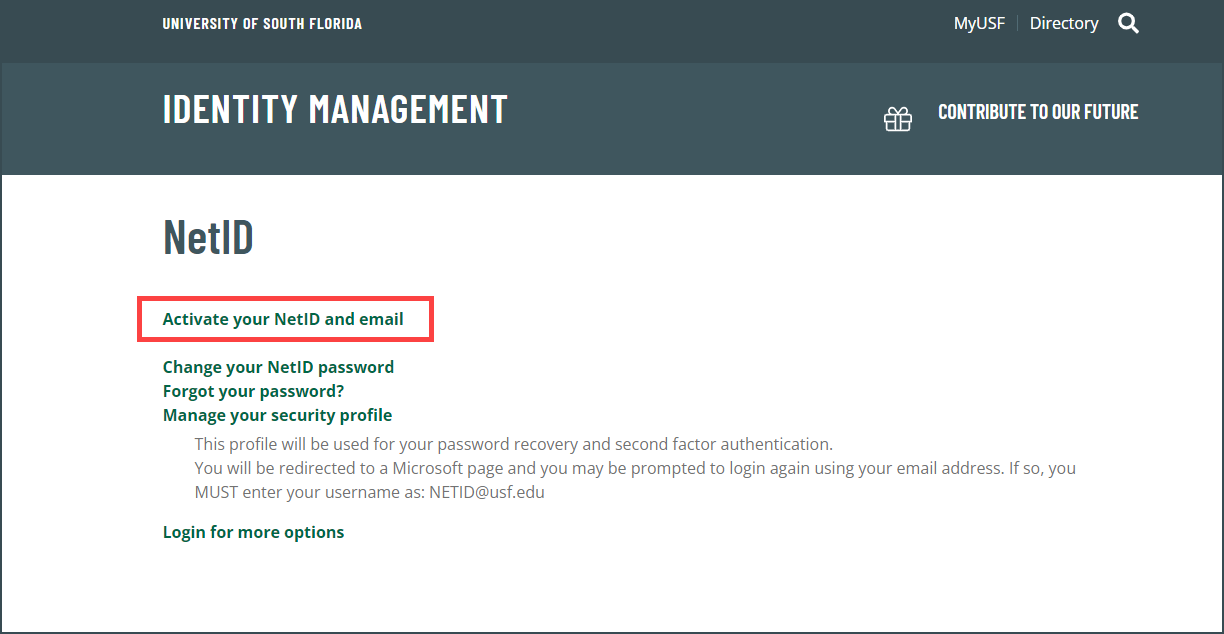
1. Choose either Use Your U# or Use Personal Email option to start the process.
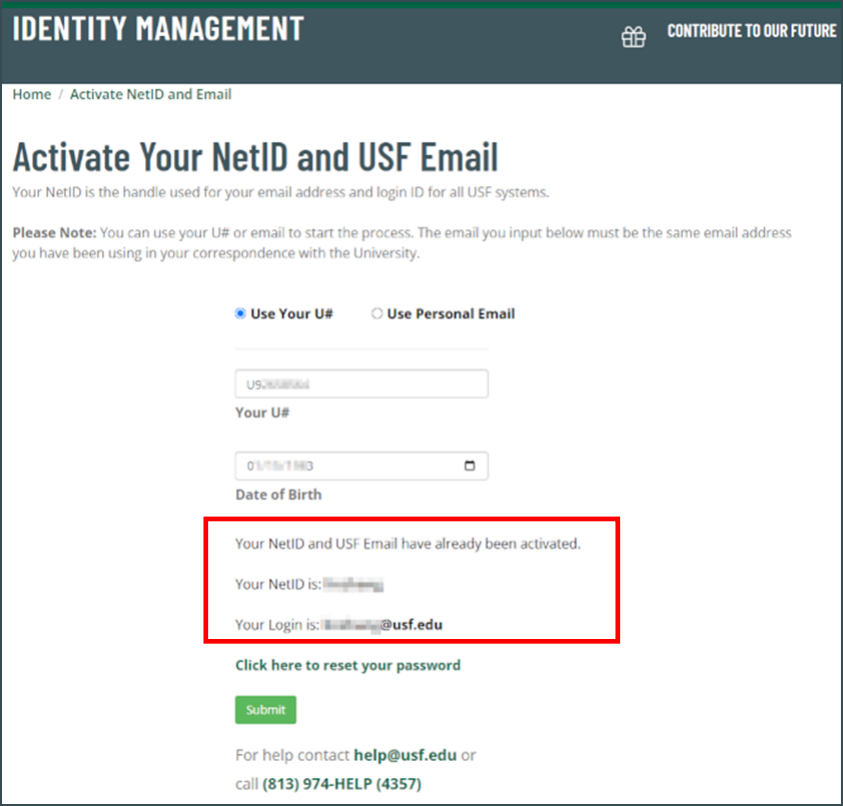
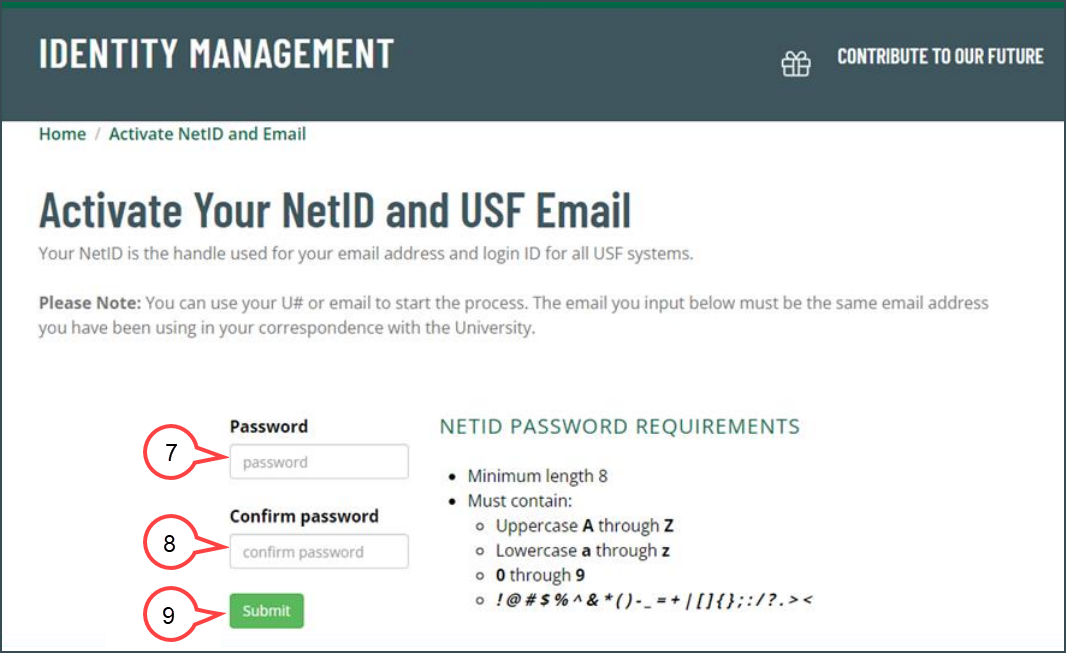
a. Enter your U# and date of birth. (see image below)
b. Check the Captcha box (see image above)
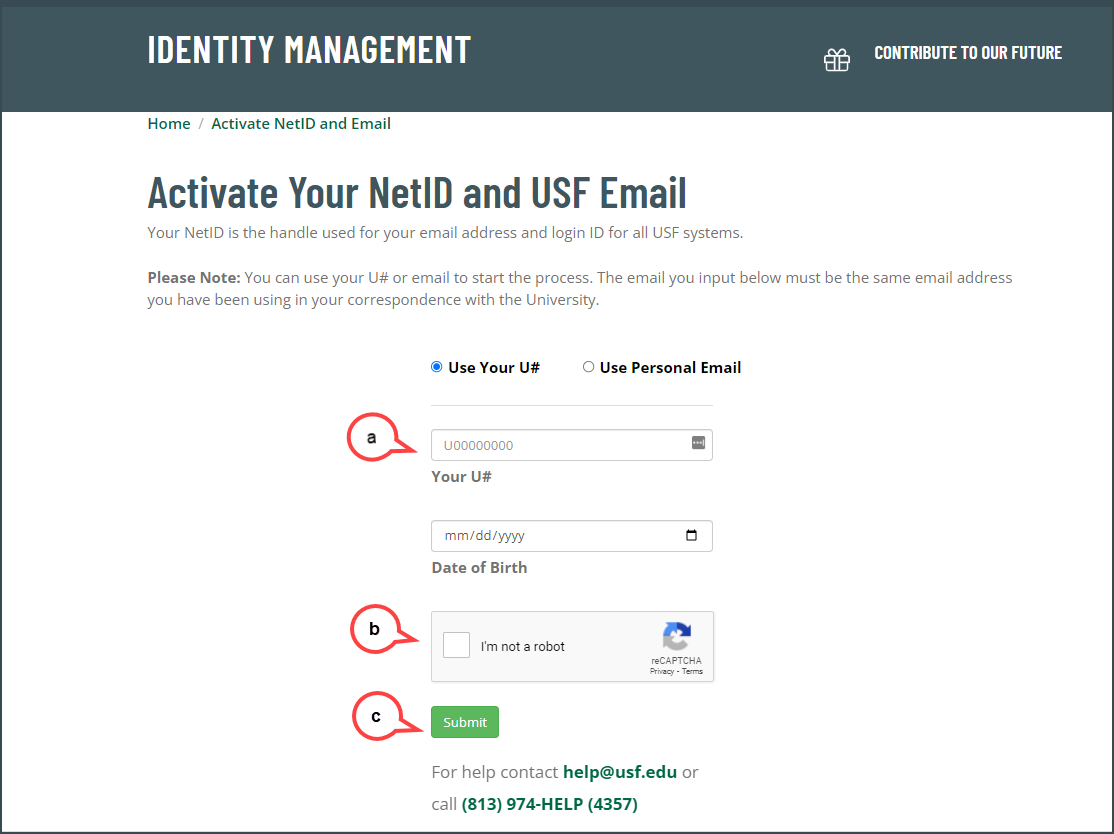
c. Click Submit (see image above)
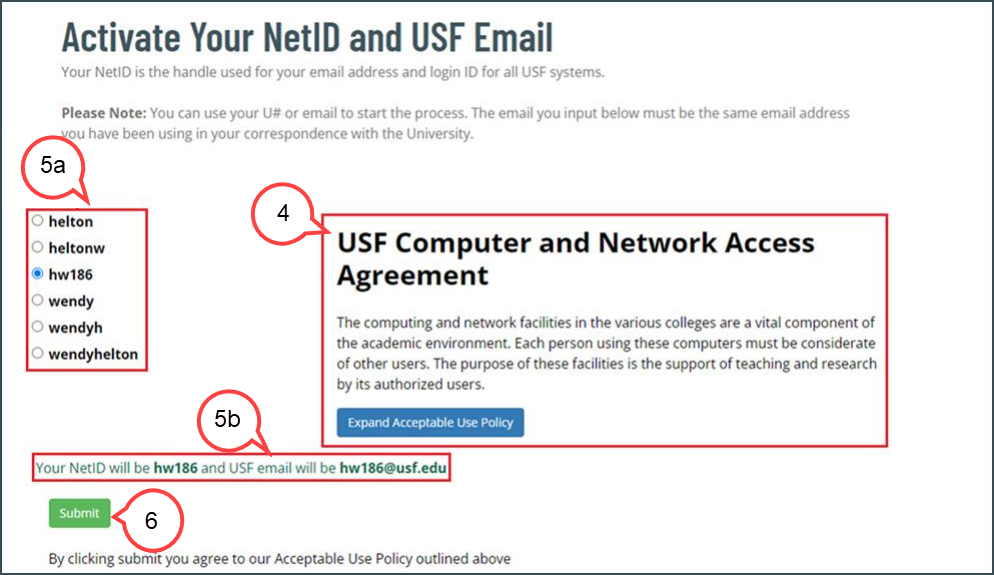
a. Enter your email address. This is the email that was initially provided when
corresponding with the University. For OASIS applicants, this email address is
identified as "Primary Email Address" in Oasis. This can be any email system (e.g.
Gmail, Yahoo, Hotmail, AOL) but the user MUST be able to access this email
account. (see image below)
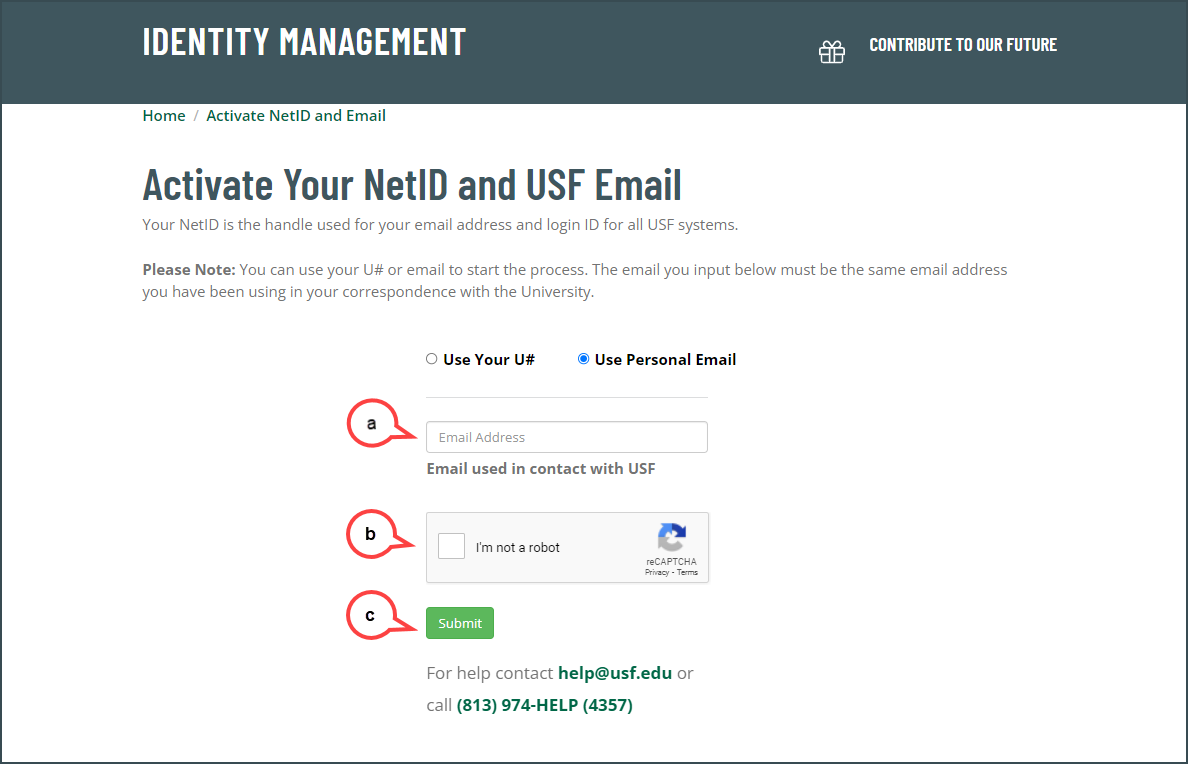
b. Check the Captcha box (see image above)
c. Click Submit (see image above)
d. Check your email for the confirmation code
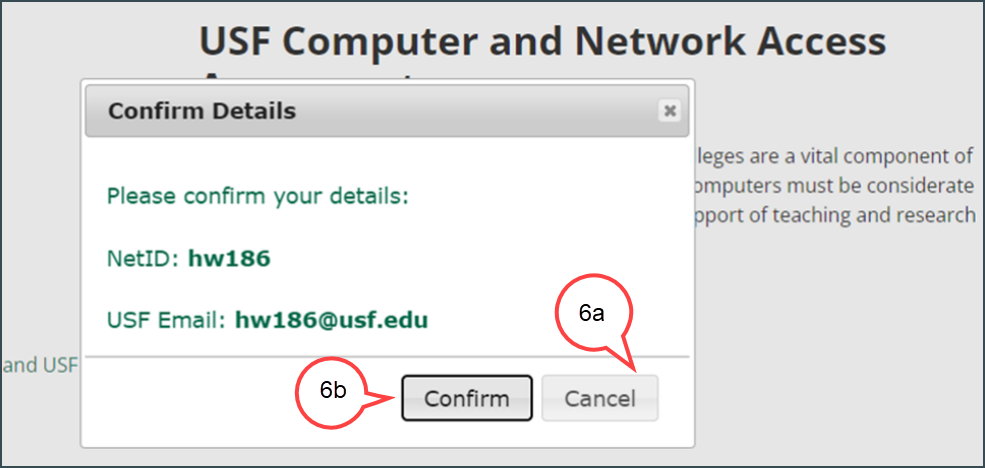
e. Enter the confirmation code (see image below)
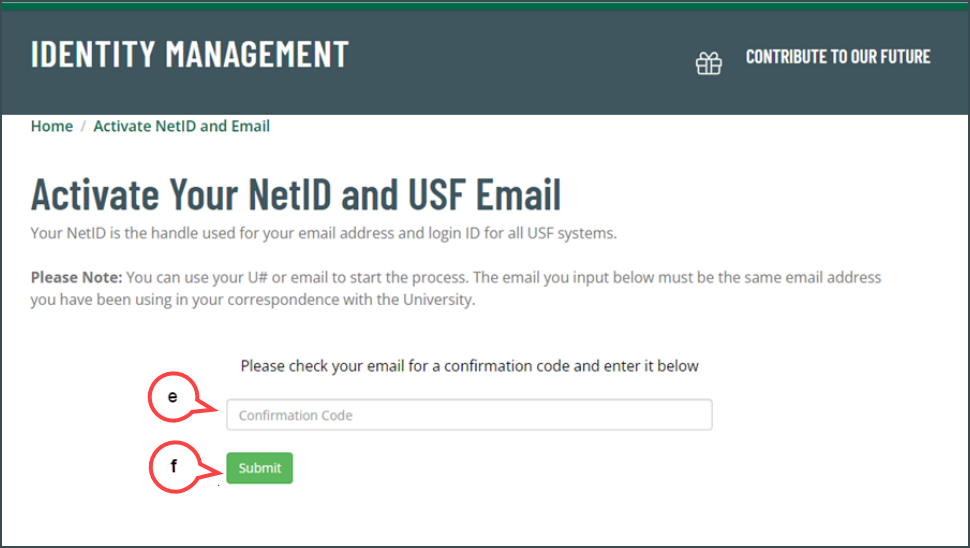
f. Click Submit (see image above)
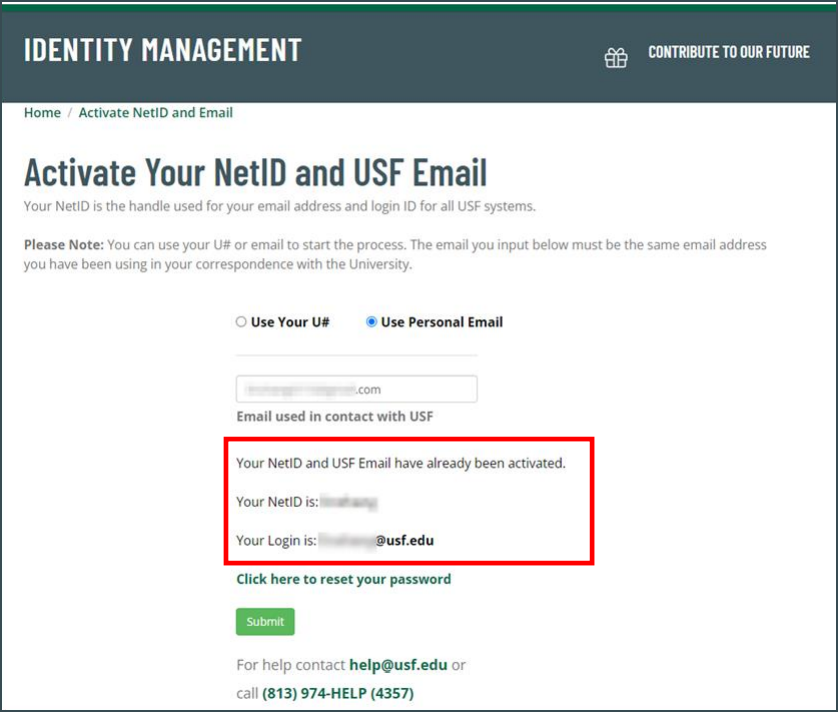
If Your NetID Already Exists
If you have an existing NetID, it will display on the page. (see images below)
If you've forgotten your password, select Click here to reset your password. You will not need to finish steps 2 - 7.