Using the Outlook Calendar to Schedule Meetings
This is a quick guide
on how to schedule meetings
in Outlook.
Anchor SchedulingWeb SchedulingWeb
Scheduling Assistant for Web
| SchedulingWeb | |
| SchedulingWeb |
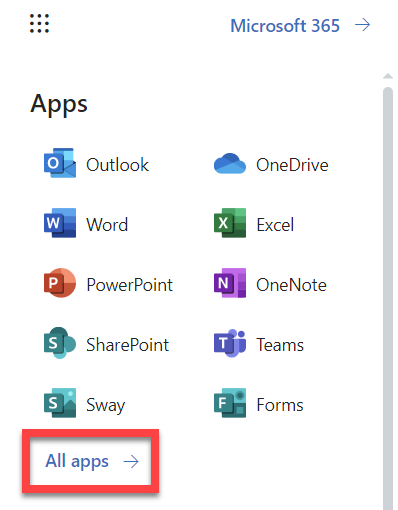
Click the App launcher icon located on the top left of Outlook email on the web.


Click All apps.

Click
Click (Click image to enlarge)
Calendar.
 (Click image to enlarge)
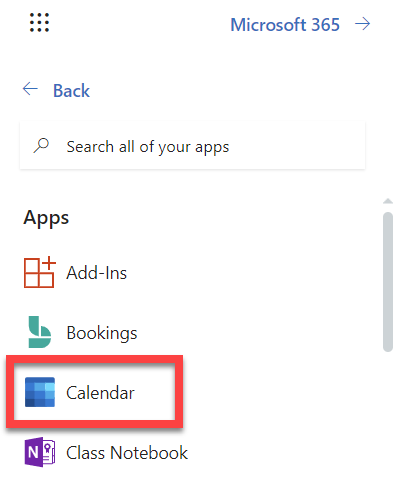
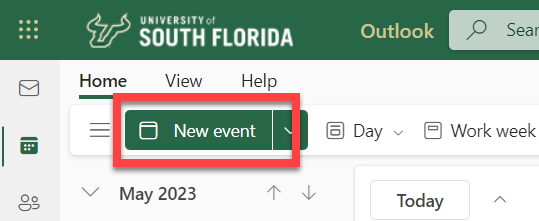
Click New event.

Fill in the fields

Select the date and time. The window will
. Make sure to have Teams Meeting turned on.
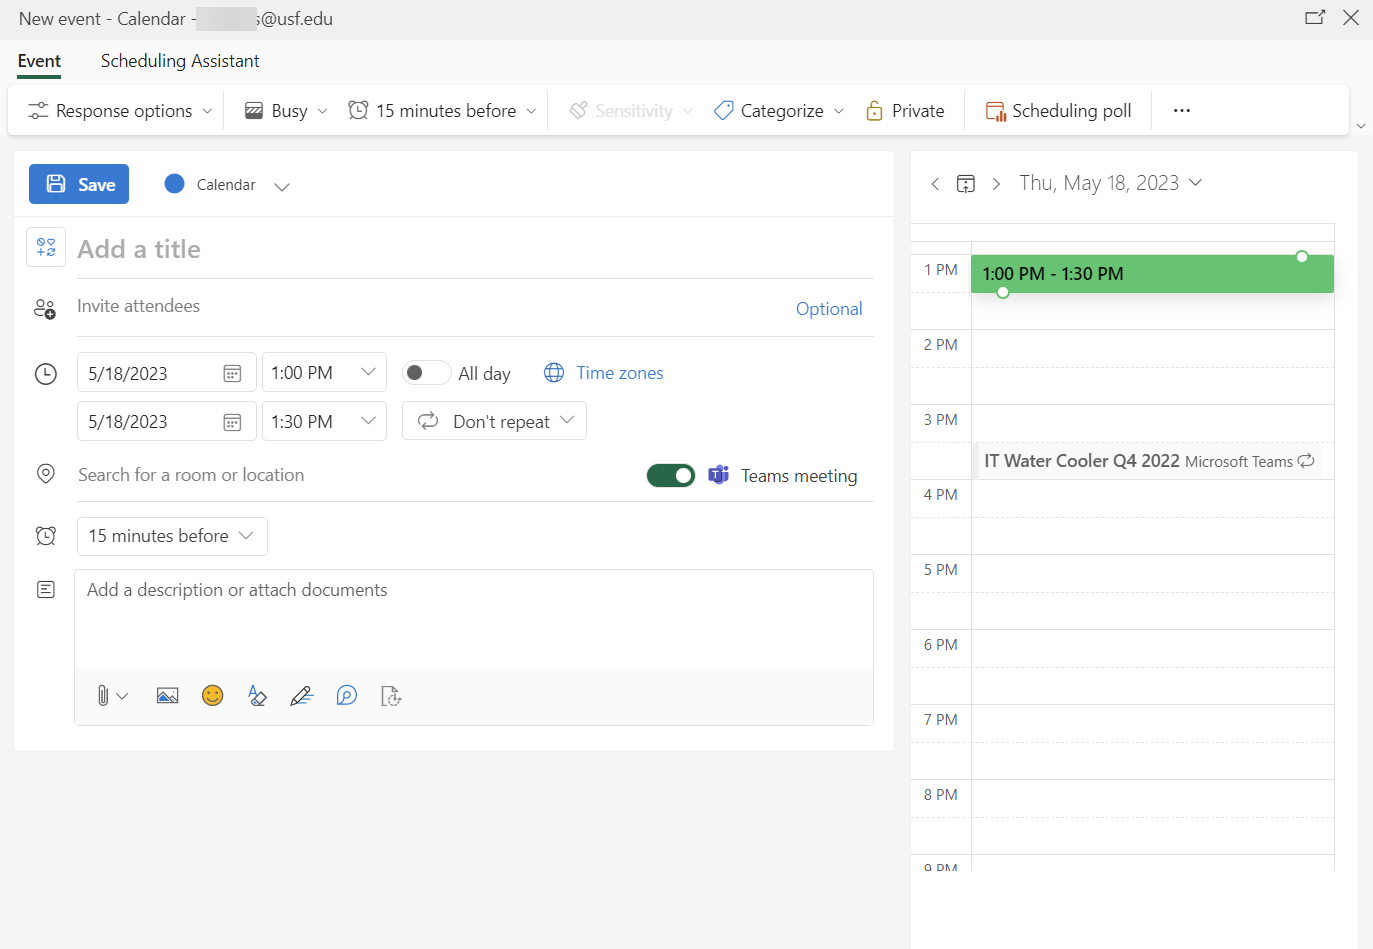
Note As you fill in the fields such as the date, time, and meeting attendees, the calendar grid on the right will change to indicate red if one of the attendees has a conflict and green
if everyone is available.
Click Send.
Click Scheduling Assistant located at the top of the
Click OK to save your changes or Discard to cancel.
You'll be returned to the new event window, where you can finish adding details to your meeting. When you've finished, click Send to send the invitation, or Discard to cancel all your changes.
window (shown in the screenshot above) if you need additional help finding an available meeting date and time.
Click Send.
| Anchor | ||||
|---|---|---|---|---|
|
For instructions on how to schedule meetings using the Outlook desktop Scheduling Assistant, view the video below or click here.
| Html bobswift |
|---|
<iframe src="https://www.microsoft.com/en-us/videoplayer/embed/RWelMN?pid=ocpVideo0-innerdiv-oneplayer&postJsllMsg=true&maskLevel=20&market=en-us" width="640" height="360" frameborder="0" webkitallowfullscreen mozallowfullscreen allowfullscreen></iframe> |