Versions Compared

Key

  • This line was added.
  • This line was removed.
  • Formatting was changed.

Anchor
top
top
Overview

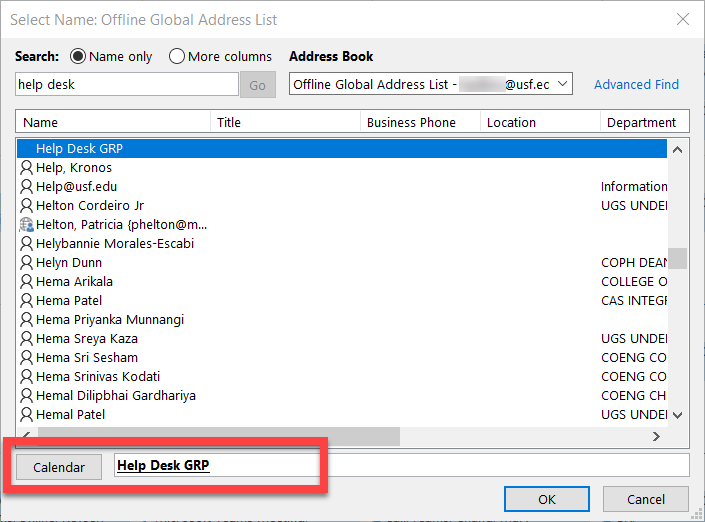
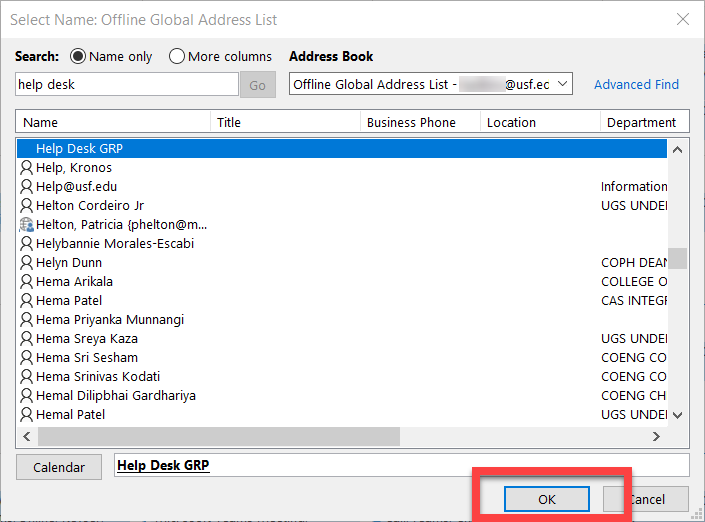
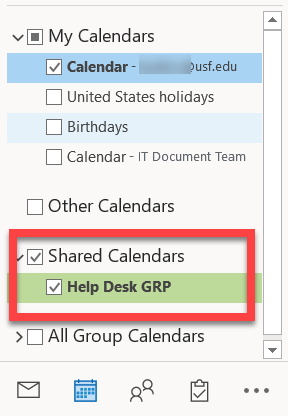
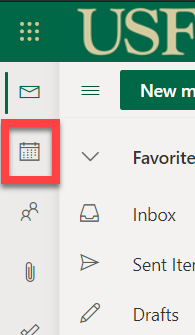
The following will guide you through adding a shared mailbox via the Outlook Desktop and Web applications.


Info
iconfalse
titleTable of Content


Excerpt

Anchor
Topic1
Topic1
Desktop Application

  1. With Outlook open, select the Calendar icon located at the bottom left.


  2. Select Add located at the top right of the Calendars.


  3. From the drop down, select From Address Book.


  4. Enter the name of the Shared Calendar you wish to add in the Search field and double click it.


  5. Once the calendar is selected, you will see it at the bottom.


  6. Select OK


  7. Once the calendar has been added successfully, it will appear on the left bar of your Calendars tab.

Back to top

Anchor
Topic2
Topic2
Web Application

  1. After accessing your email through either MyUSF or https://outlook.office365.com/mail/inbox. Select the Calendar icon located on the left. 


  2. Select Add calendar.


  3. Select Add from directory.


  4. Enter the name of the Shared Calendar you wish to add.


  5. Select Add.


  6. Once the calendar is added, it will appear under Shared Calendars in the left column.


Back to top

Info

If you are unable to solve your issue with this knowledge base article, please contact the USF IT Service Desk by calling (813) 974-HELP (4357) or emailing help@usf.edu. 

If you find any errors or omissions in any knowledge base article, please contact and inform the USF IT Service Desk by calling (813) 974-HELP (4357) or emailing help@usf.edu.


Insert excerpt
Doc Team Banner
Doc Team Banner
nopaneltrue