Overview
The Remote Desktop client for Windows Desktop allows users to access USF's Windows apps and desktops remotely from a different Windows device.
Download and Installation (Windows 10 Client)
- Navigate to the link below, then download the installer which best suits your system type.
(for most systems this will be Windows 64-bit)
Get started with the Windows Desktop client | Microsoft Docs
- Run RemoteDesktop.msi and complete the installation process.

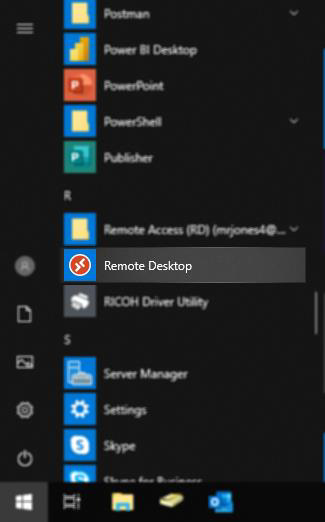
- After installation is complete, navigate to the Start Menu and open Remote Desktop.
Subscribe
- Within the Remote Desktop application, click Subscribe.

- When prompted, type your @usf.edu email address and click Next.

- Find your application from the list and double-click to launch. Enter your password when prompted.

Uploading and Downloading Files to Remote Session
- You will need to ensure your files are uploaded to OneDrive. Your OneDrive can be managed via a browser at https://usfedu-my.sharepoint.com/.
- Within an application, use the Open or Save prompt and click the OneDrive – University of South Florida shortcut to access files from OneDrive.

Web Client Access
- Navigate to the link below and sign in using your @usf.edu email address.
https://aka.ms/wvdarmweb
- Find your application from the list and left-click to launch.

- Choose the local resources to make accessible to the remote application session.

- Enter your password when prompted.

- The application will load within the current browser tab. To upload or download files to the remote application session, refer to the Uploading and Downloading files to remote session section above.
