Accessing Applications Gateway using Windows Remote Desktop
- Kimberly Adkins
- Patrick Kluge (Deactivated)
- Jessica Marshall
Overview
The Remote Desktop client for Windows Desktop allows users to access USF's Windows applications and desktops remotely from a different Windows device.
This program replaces the old Application Gateway accessed through Citrix.
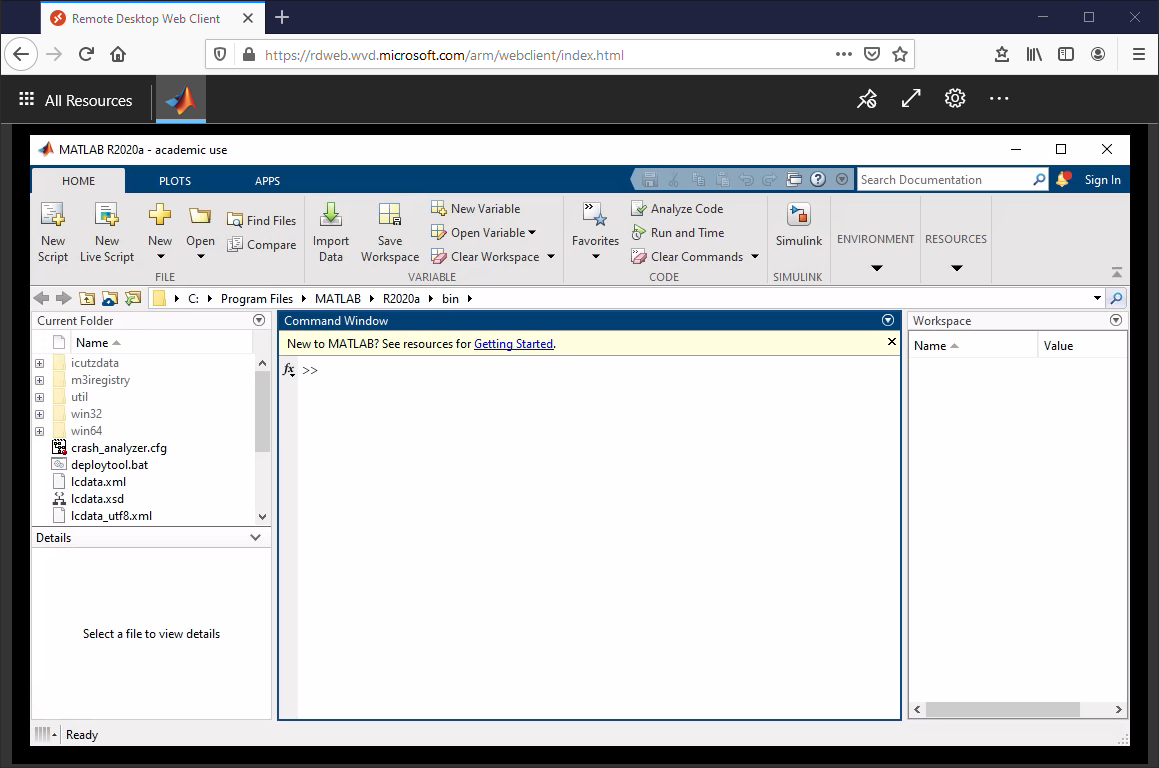
Web Client Access
- Navigate to the link below and sign in using your @usf.edu email address.
https://aka.ms/wvdarmweb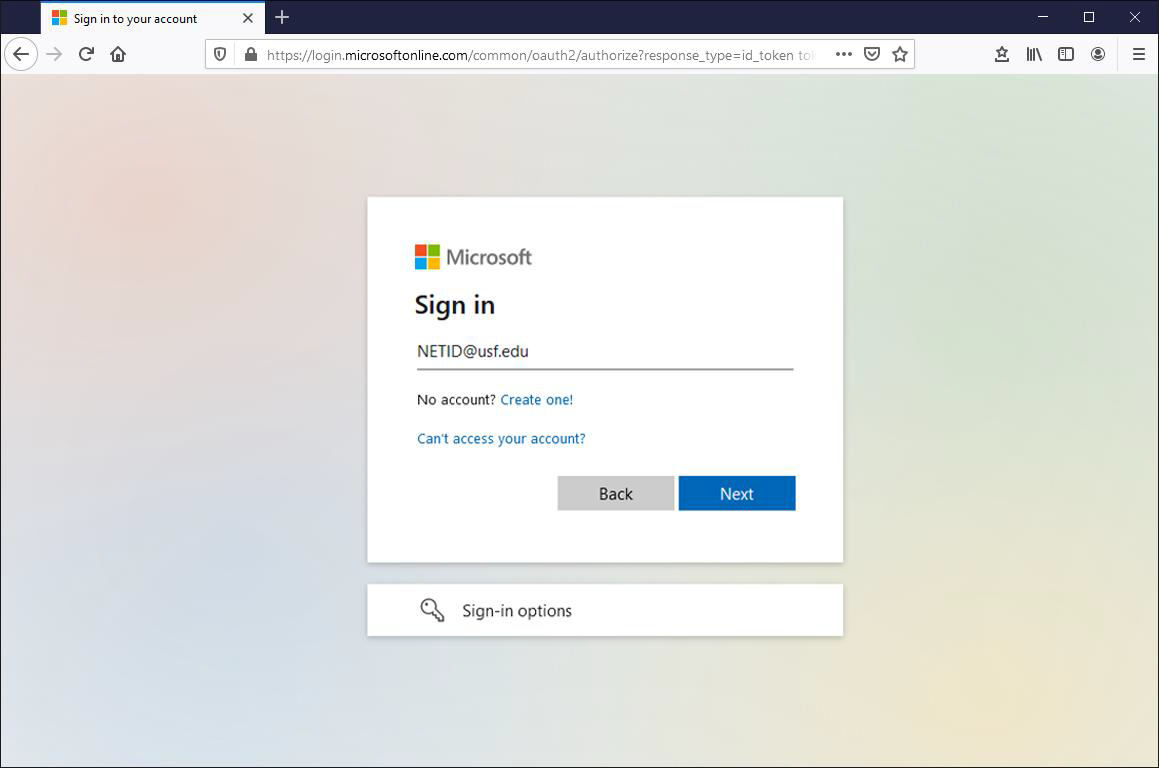
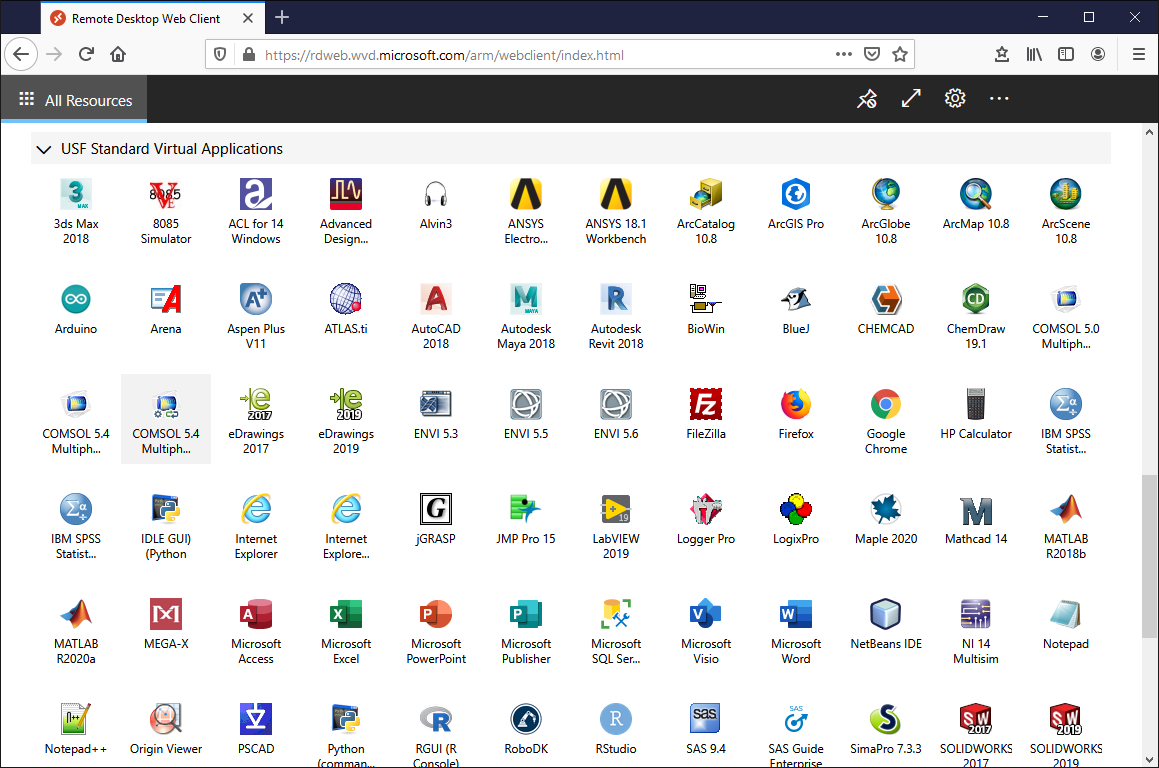
- Find your application from the list and left-click to launch.
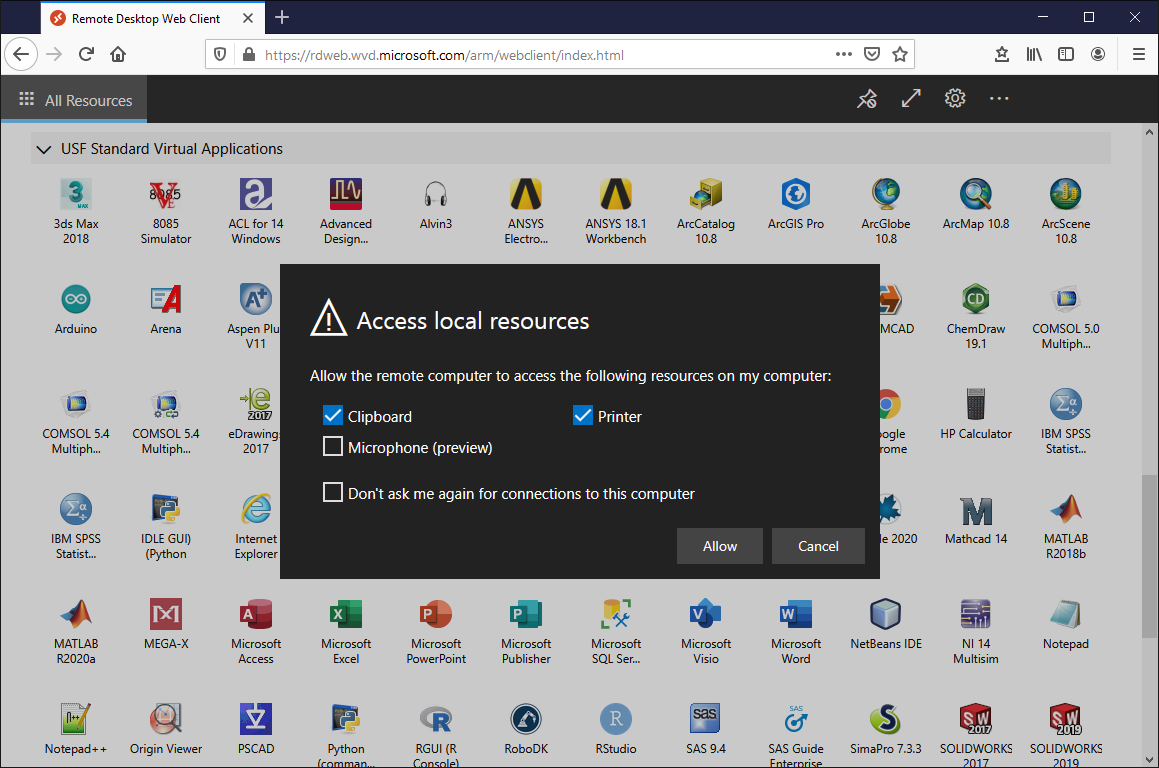
- Choose the local resources to make accessible to the remote application session.
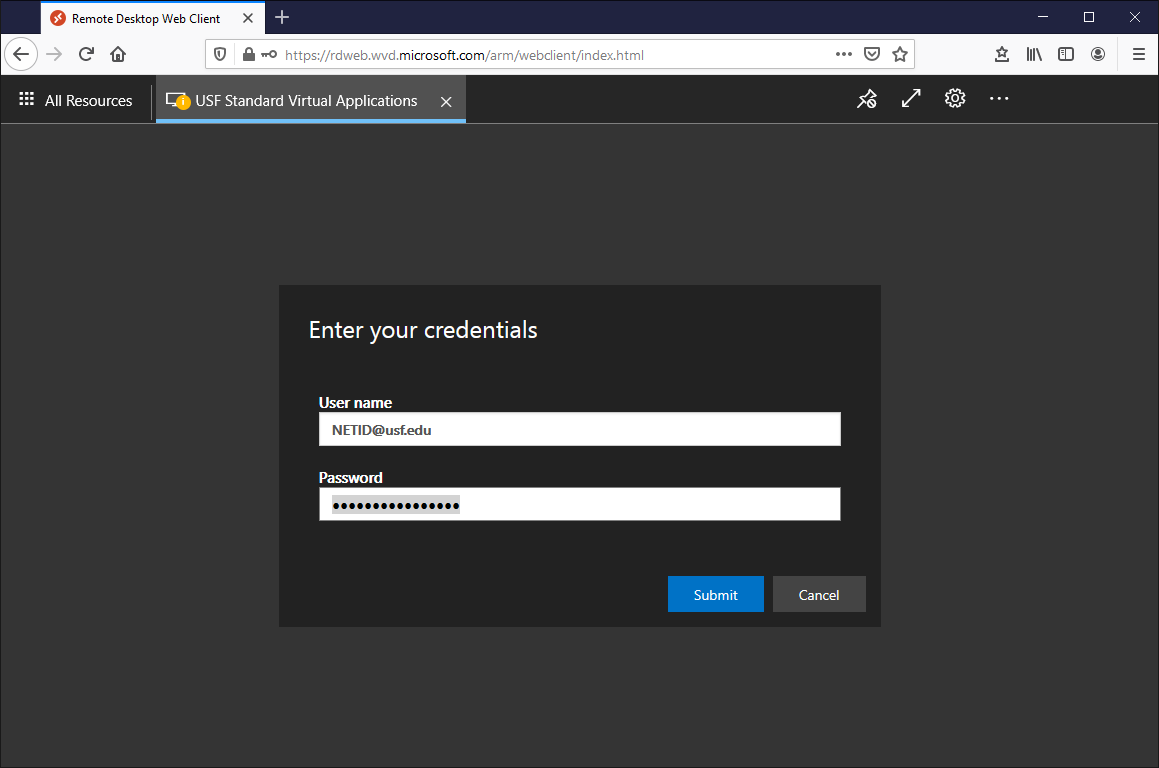
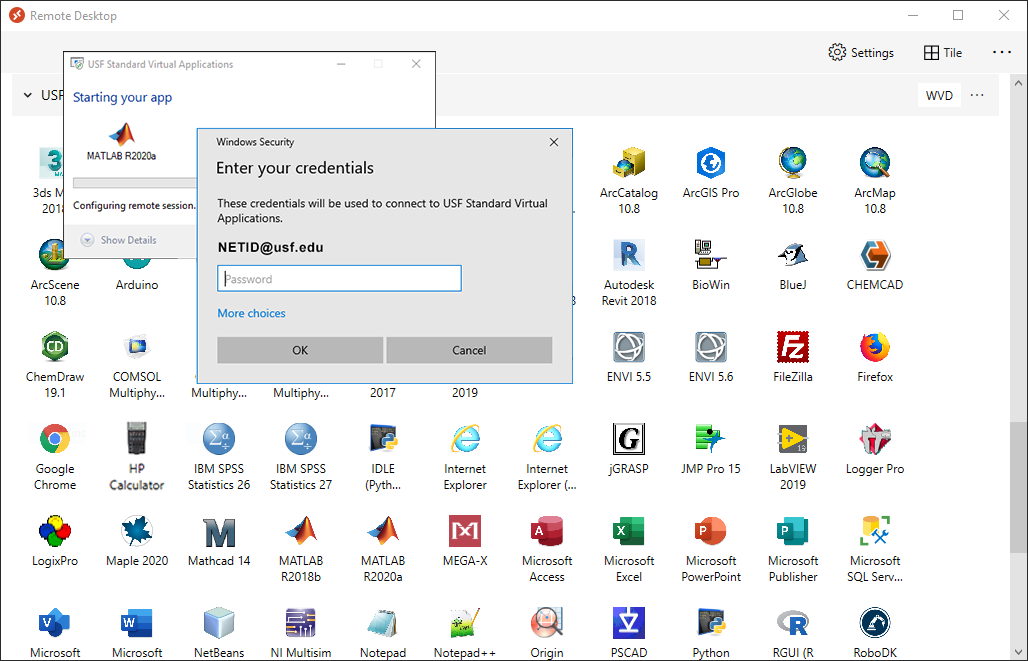
- Enter your password when prompted.
- The application will load within the current browser tab. To upload or download files to the remote application session, refer to the Uploading and Downloading files to remote session section.
Uploading and Downloading Files to Remote Session
If you do not have OneDrive installed on the computer you are currently on, download and installation instructions can be found on OneDrive - Download and Installation of Desktop App.
- You will need to ensure your files are uploaded to OneDrive. Your OneDrive can be managed via a browser at https://usfedu-my.sharepoint.com/.
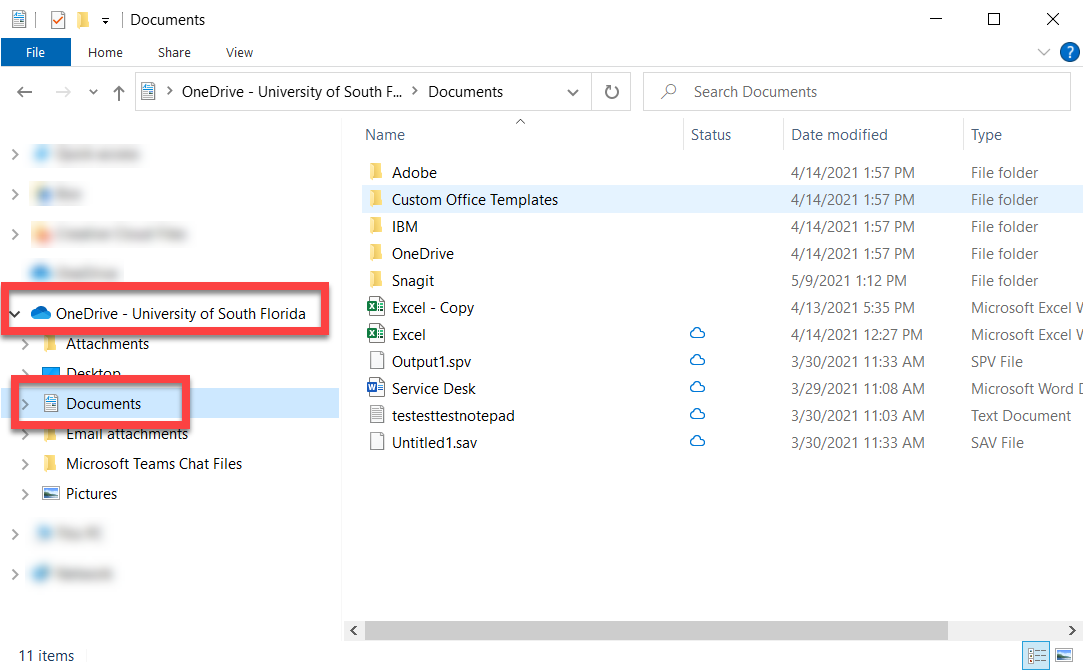
Within an application, use the Open or Save prompt and click the OneDrive – University of South Florida shortcut to access files from OneDrive.
OneDrive Documents Folder
Make sure that any and all files are saved to the Documents folder on your OneDrive - University of South Florida. If the files are not saved to this location, they could be lost for good.
Download and Installation of the Windows Remote Desktop Client
Mac OS
In order to be able to access the Application Gateway on Mac devices, download the Microsoft Remote Desktop application from the App Store. App version must be Version 10 or newer.
Windows OS
In some instances, you will be required to install and use the Windows Remote Desktop client to utilize some program's functionality. If needed, follow the directions below.
- Navigate to the link below, then download the installer which best suits your system type. (for most systems this will be Windows 64-bit)
Get started with the Windows Desktop client | Microsoft Docs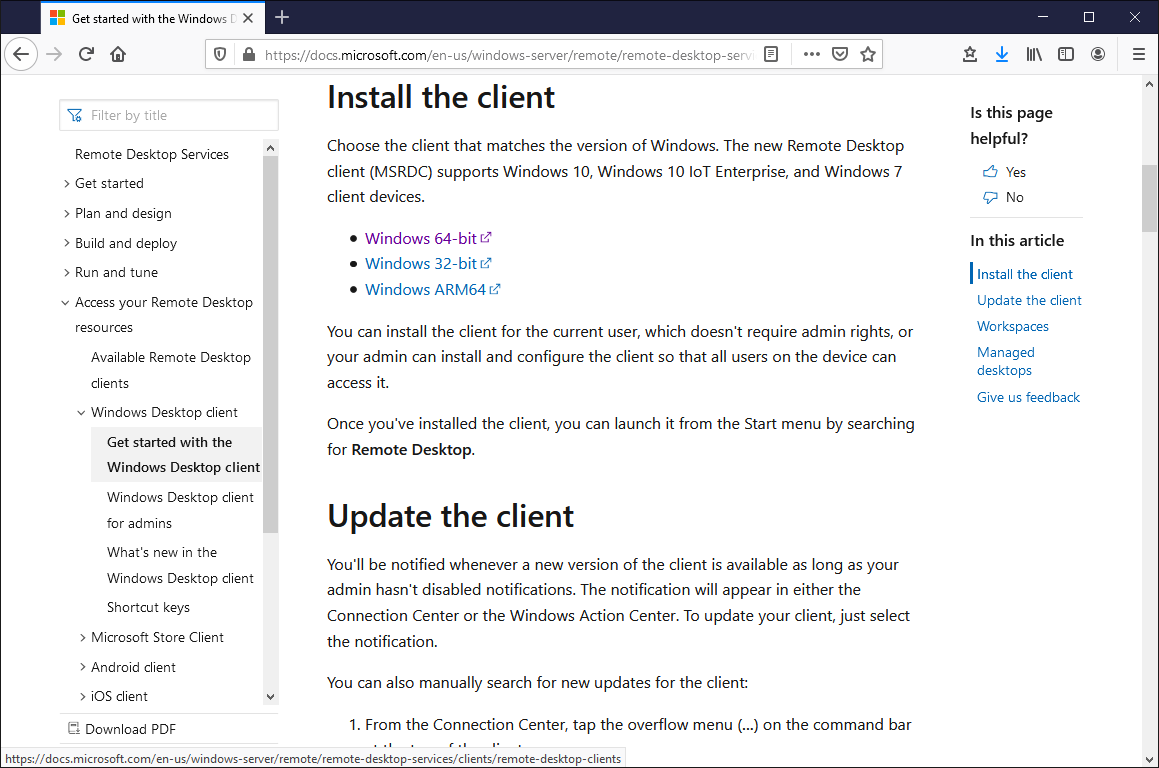
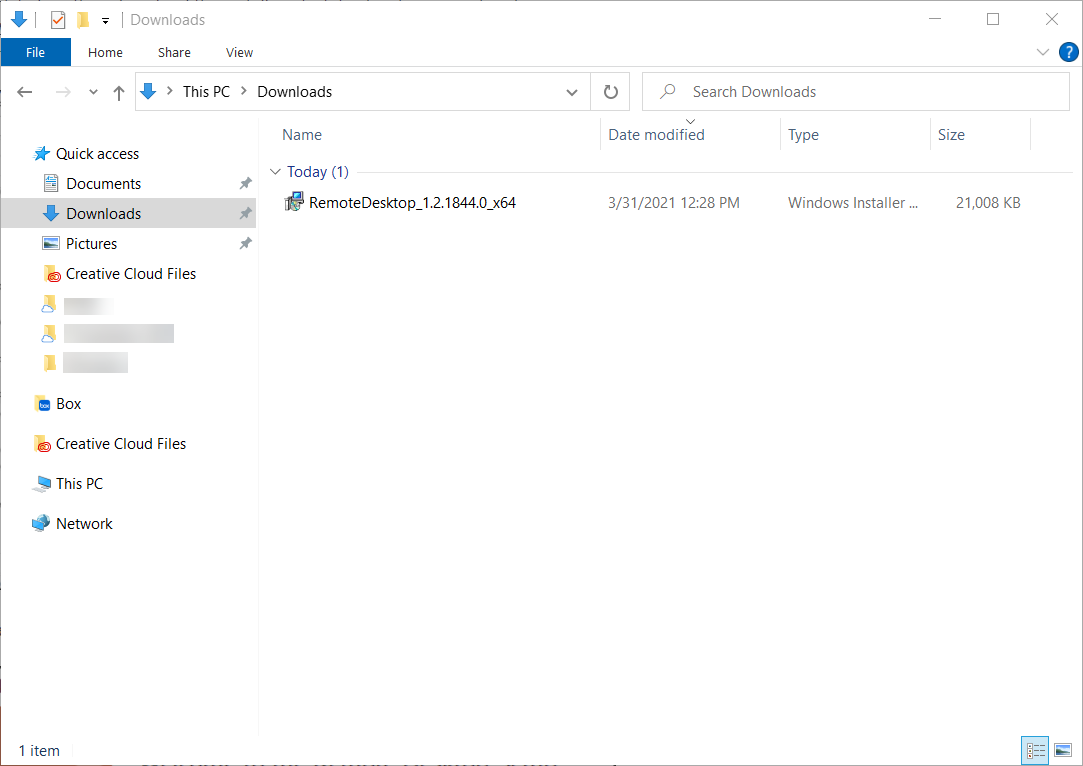
- Once the download is complete, double-click the RemoteDesktop.msi to launch the installer. This downloaded file can be located in the Download folder on your local computer.
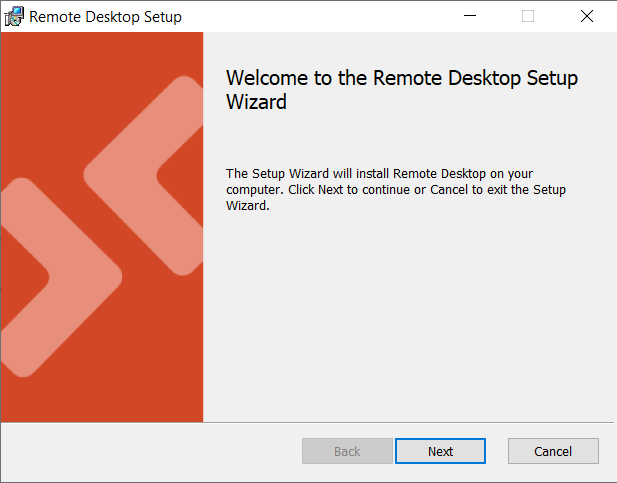
- Once the installer has opened, click on Next.
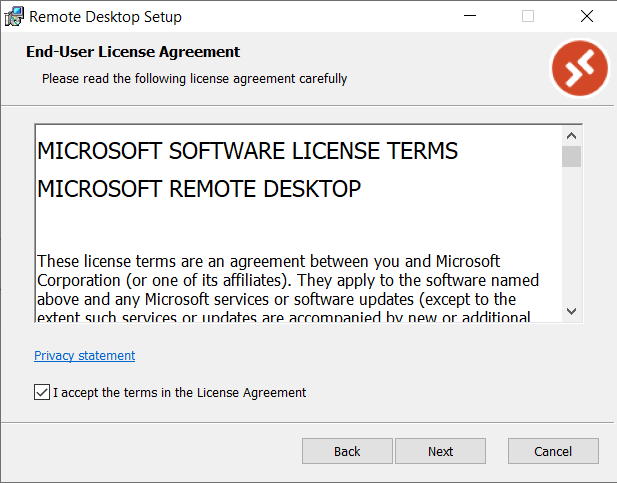
- Place a checkmark next to I accept the terms in the License Agreement and then click Next.
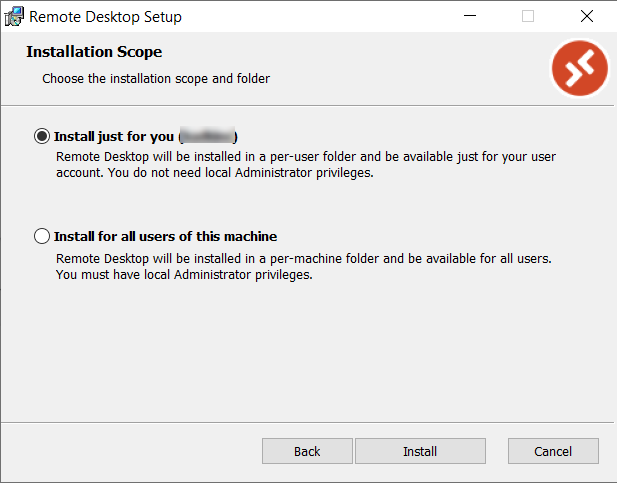
- Make sure that Install just for you is selected and then click Install.
- Once the installation has been completed, click Finish.

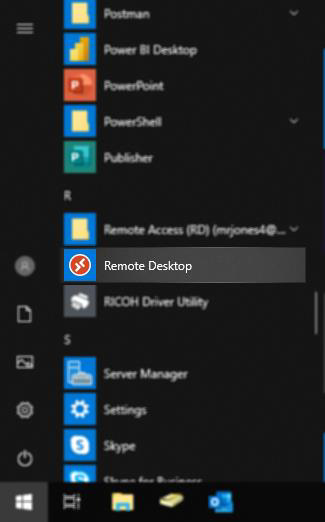
After installation is complete, the program will launch. If it does not, navigate to the Start Menu and open Remote Desktop.
If you have 2 Remote Desktops showing with your Start Menu after installation, this is normal. One of the programs will be the Remote Desktop to remote into another computer and one will be to the new Application Gateway.
- Once the application has launched for the first time, you will need to follow the step under Subscribe.
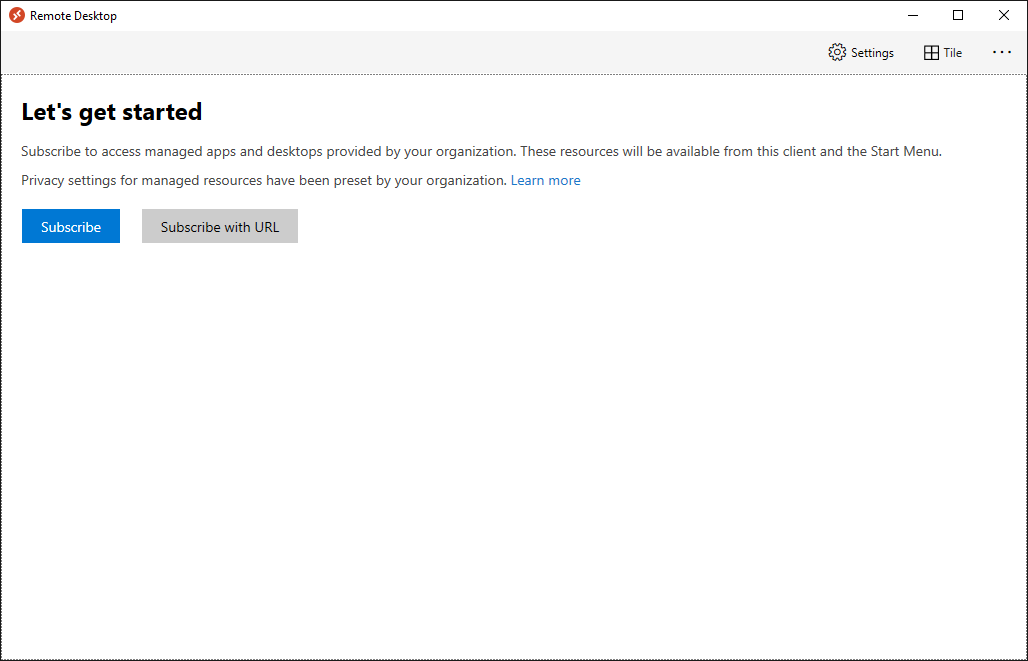
Subscribe
You will need to have your designated MFA device on hand during sign in process.
Windows
- When Remote Desktop application is launched for the first time, you will need to click Subscribe to be able to use the program. This is only required the first time the application is launched.
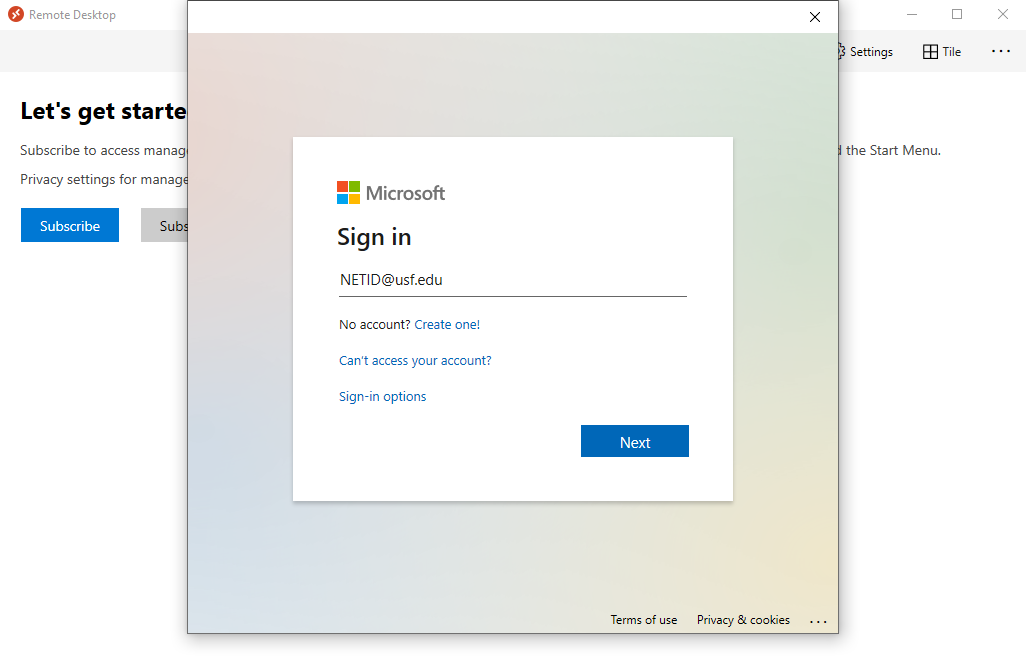
- When prompted, type your @usf.edu email address and click Next.
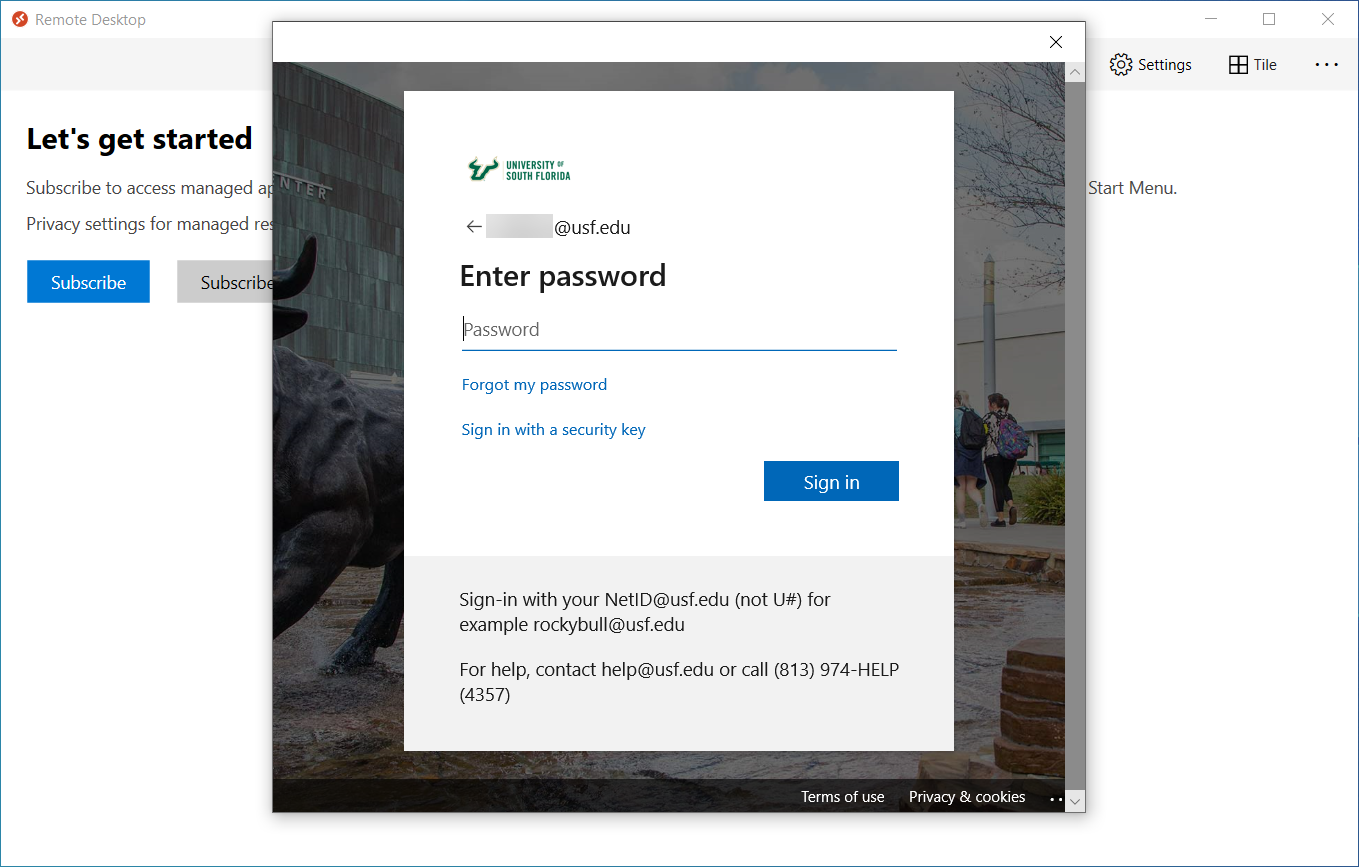
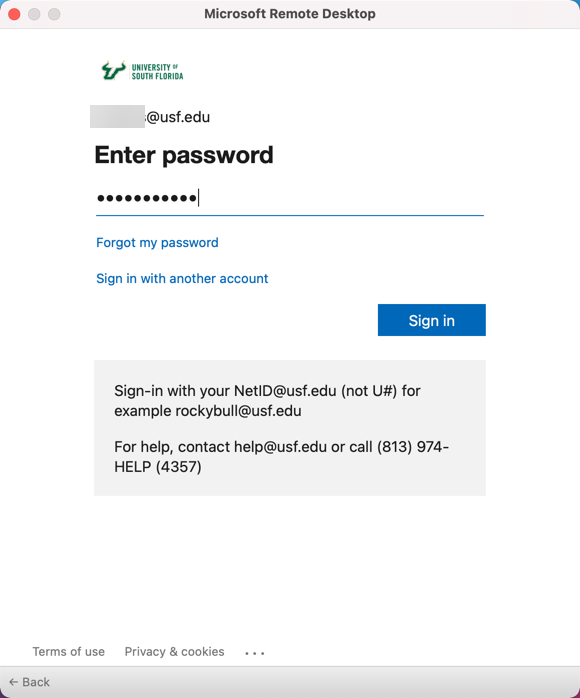
- Enter your NetID Password and click Sign in
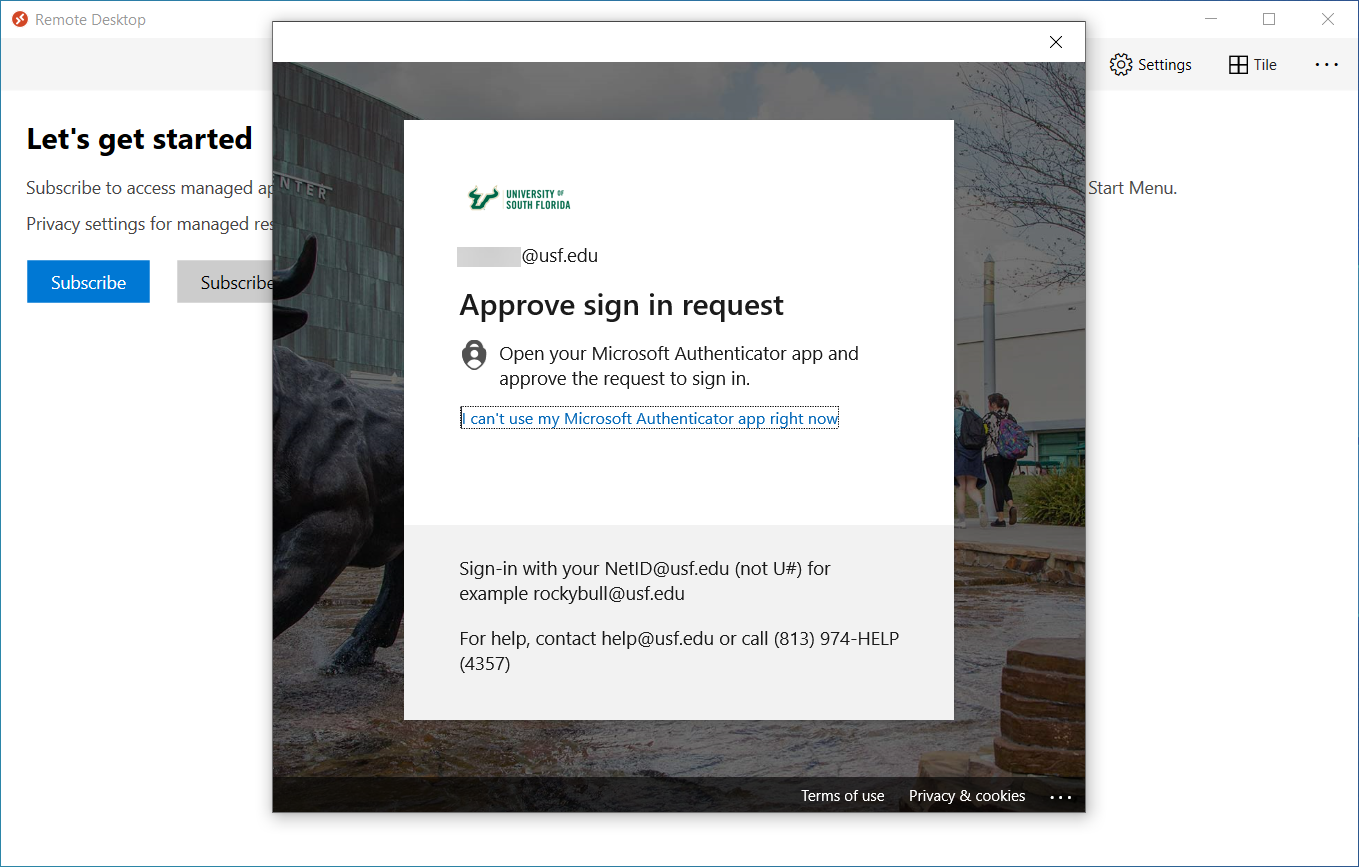
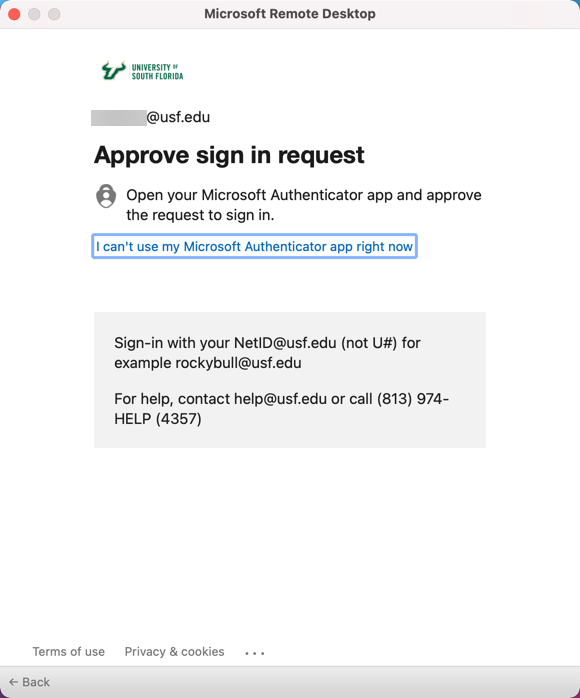
- Approve your sign in on your designated MFA device.
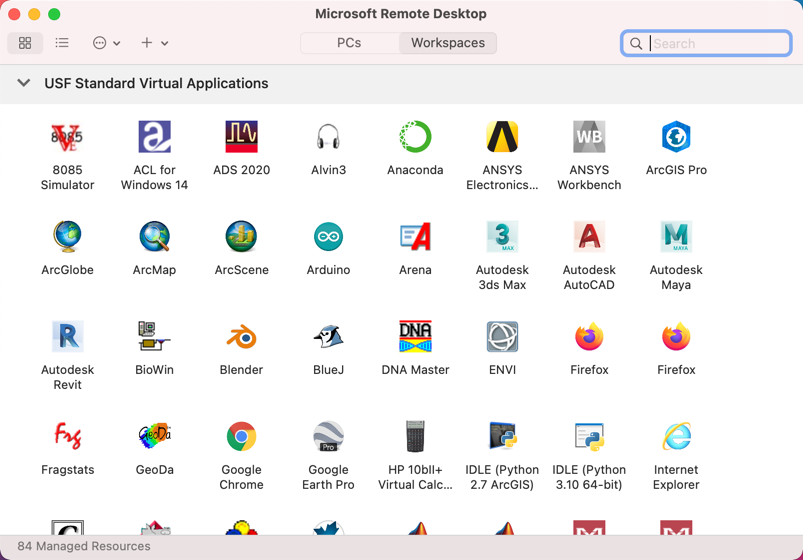
- Find your application from the list and double-click to launch. Enter your password when prompted.
Mac
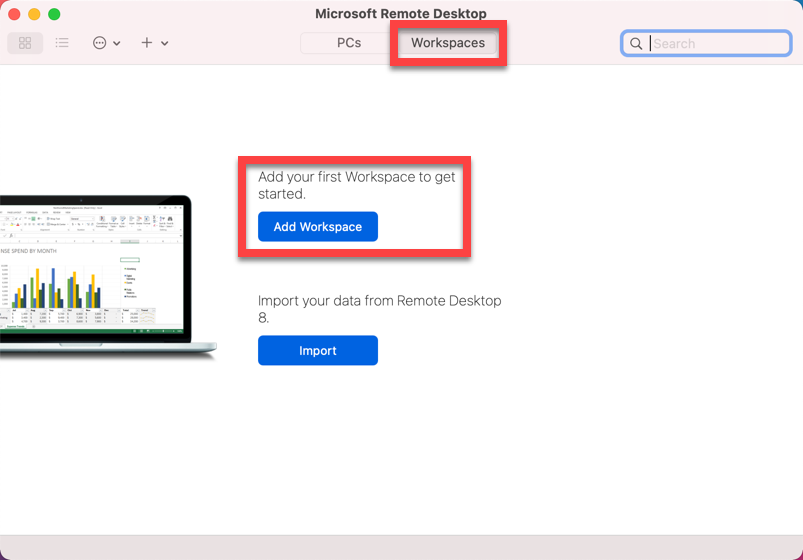
- When Microsoft Remote Desktop is opened, under Workspaces, select Add Workspace.
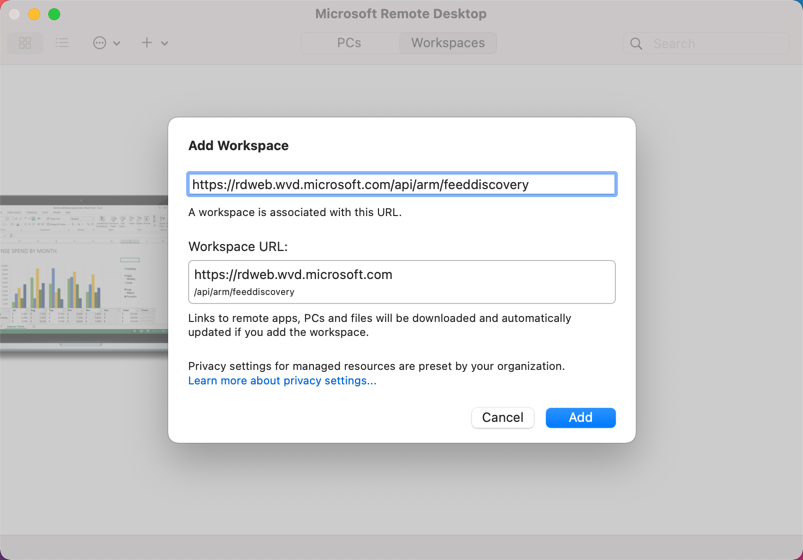
- Enter https://rdweb.wvd.microsoft.com/api/arm/feeddiscovery and select Add.
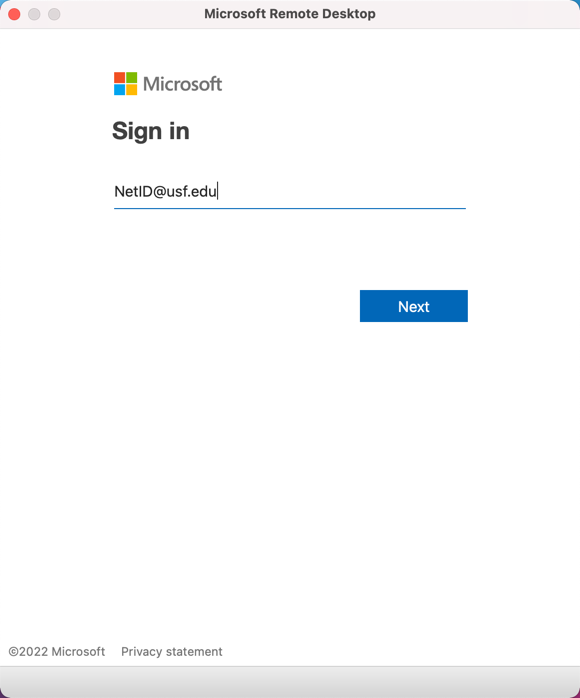
- When prompted, type your @usf.edu email address and click Next.
- Enter your NetID Password and click Sign in.
- Approve your sign in on your designated MFA device.
- Once sign in and setup is completed, you will be logged into the Gateway.
If you are unable to solve your issue with this knowledge base article, please contact the USF IT Service Desk by using Chat at itchat.usf.edu, calling (813) 974-HELP (4357) or emailing help@usf.edu.
If you find any errors or omissions in any knowledge base article, please contact and inform the USF IT Service Desk by calling (813) 974-HELP (4357) or emailing help@usf.edu.