Travel Expense Report User Guide
- Jessica Marshall
- Christina Freeman
- Lani Boothman-Carpenter (Deactivated)
Step 1: Traveler and Trip Details
To create an Expense Report:
- Log in to my.usf.edu.
- Click Archivum in the Business Systems menu.
- Click Reports at the top of the screen.
- Click “My Travel Dashboard.”
- Click “Create Expense Report” in the Actions & Tasks section.
Click GIF below to view steps.
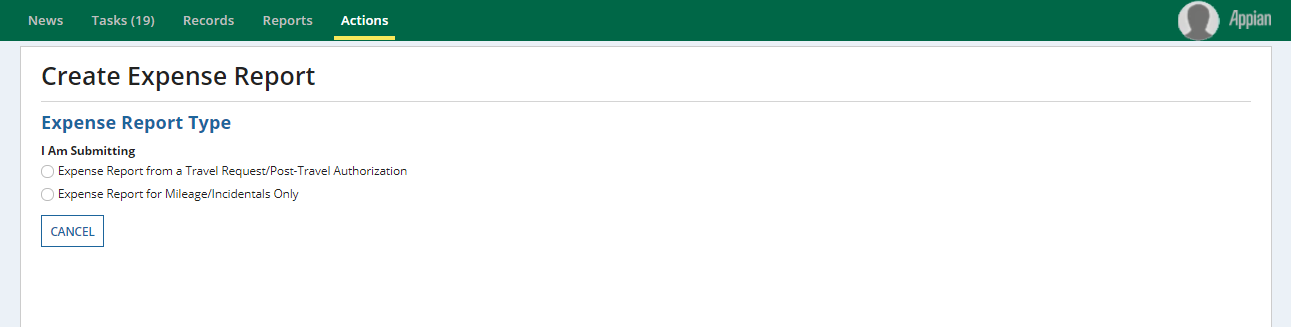
Select the type of Expense Report:
- Expense Report from a Travel Request/Post Travel Authorization
- Expense Report for Mileage/Incidentals Only.
- If you choose Expense Report for Mileage/Incidentals Only, skip Step 2: Expense Report from a Travel Request/Post-Travel Authorization and click to expand Travel Expense Report User Guide#Step 3.
- If you choose Expense Report for Mileage/Incidentals Only, skip Step 2: Expense Report from a Travel Request/Post-Travel Authorization and click to expand Travel Expense Report User Guide#Step 3.
Click image below to enlarge.
Step 2: Expense Report from a Travel Request/Post-Travel Authorization
- Click the radio button next to the option: Expense Report from a Travel Request/Post-Travel Authorization and then click Next.
Click image below to enlarge. 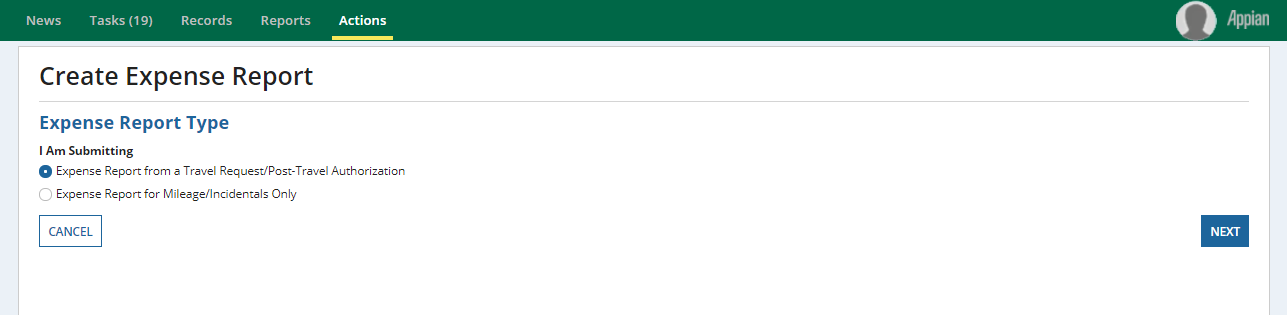
Click My Trips
Click image below to enlarge.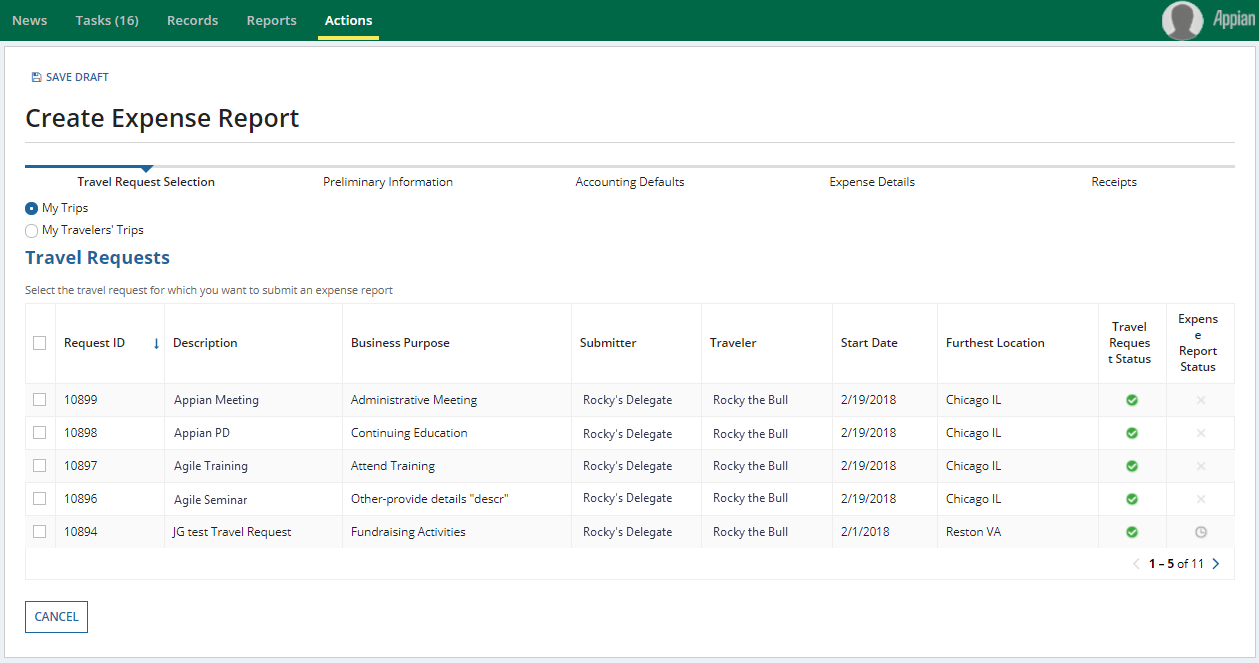
Clicking My Trips brings up a list of approved Travel Requests where the Expense Report Status can be seen. Those with a clock icon
 already have Expense Reports.
 Click the check box next to Request ID to select the travel request you need to make an expense report for and then click the “Enter Preliminary Information” button.
Click image below to enlarge.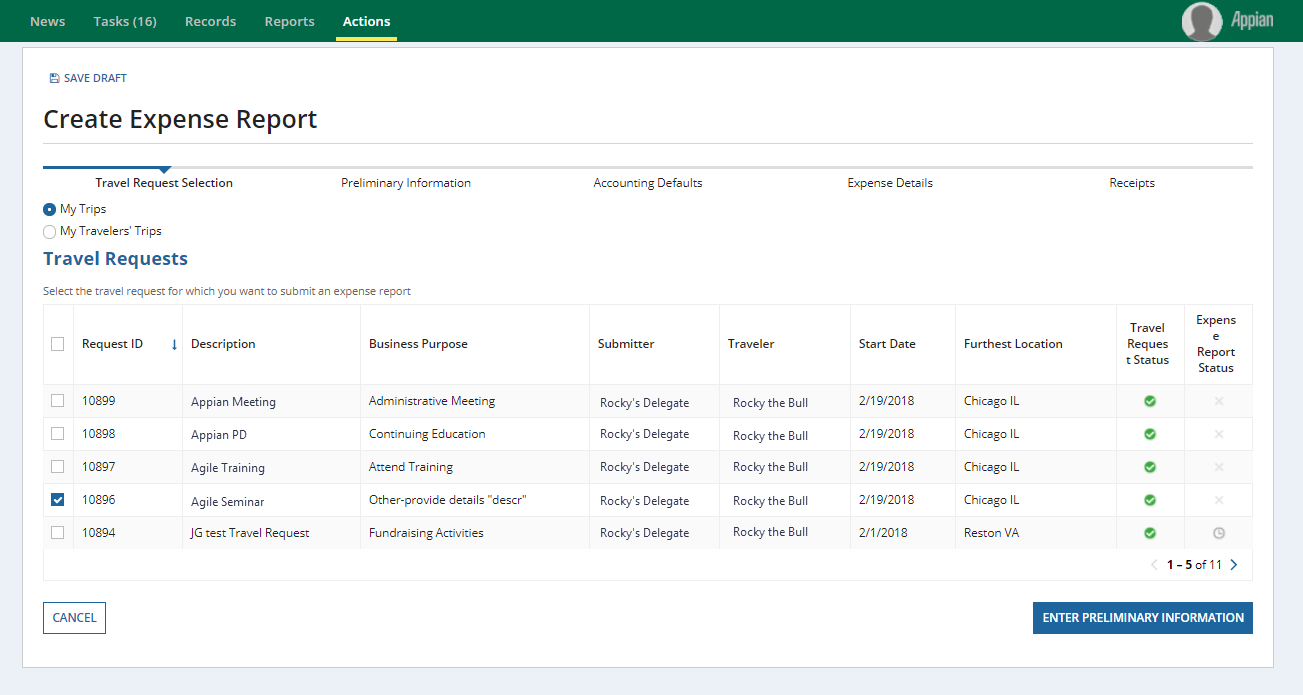
The Preliminary Information screen pulls information in from the Travel Request. The Headquarters, Point of Origin, Start Time, and End Time are required fields. Hover over the question mark icons next to the required fields for additional information.
Click image below to enlarge.
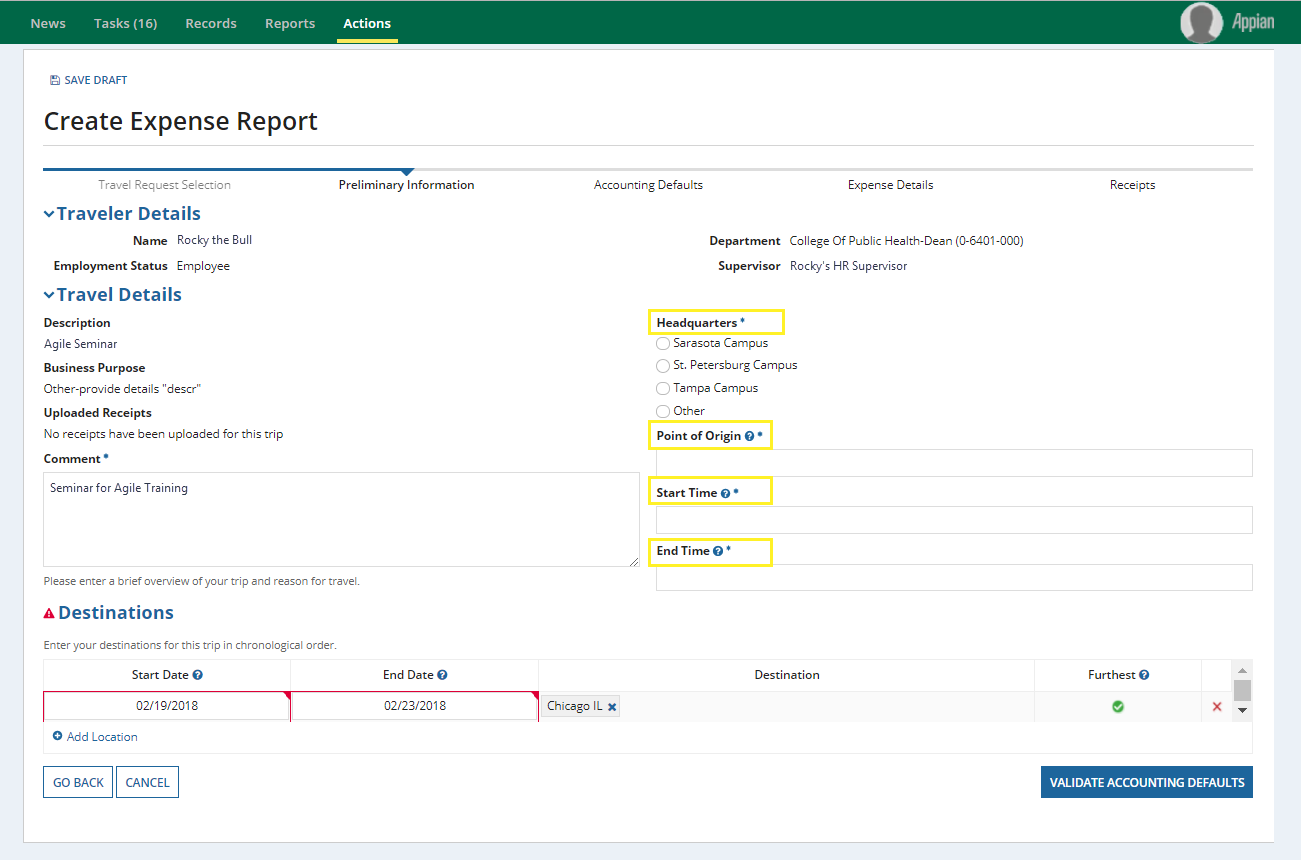
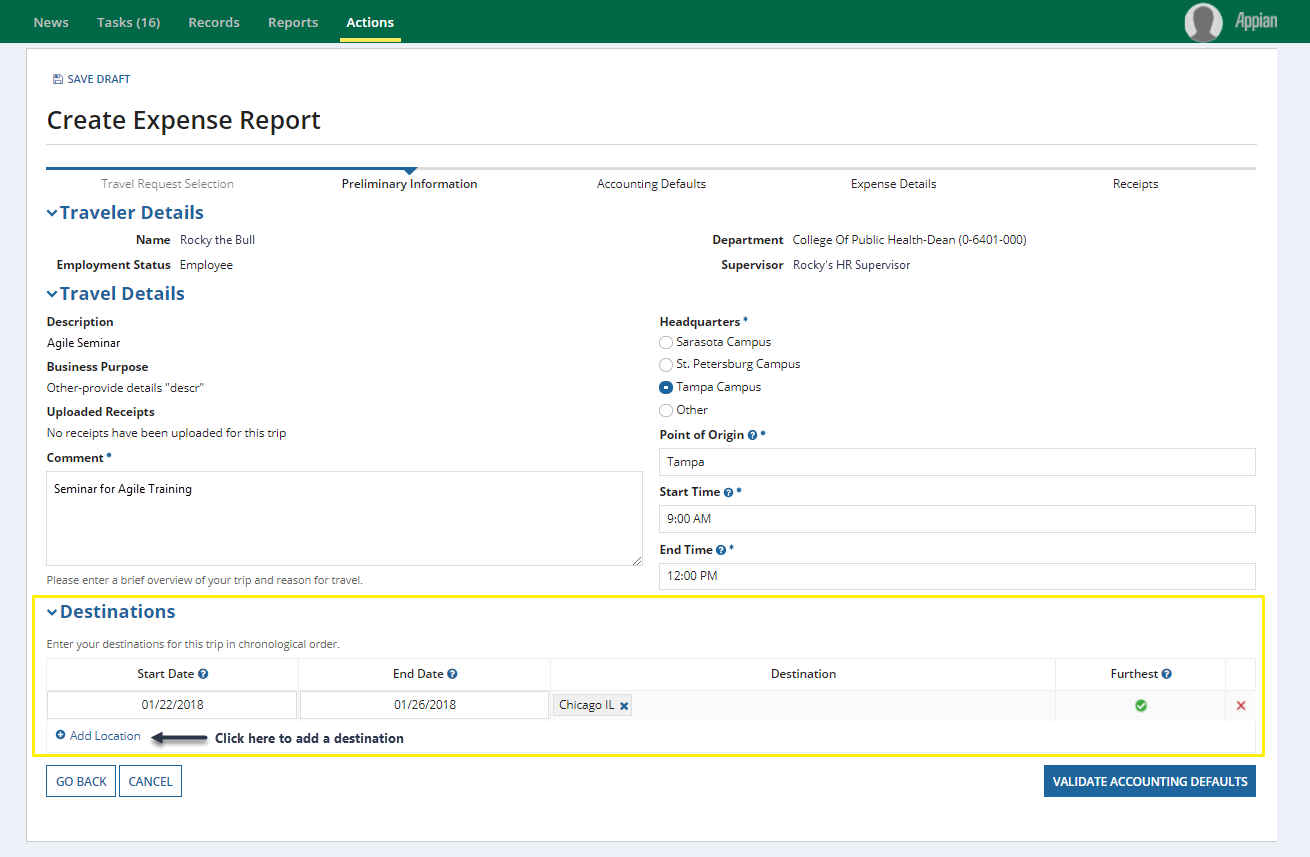
Destinations
In the Destinations section, you can edit existing destinations or add other locations by clicking Add Location.
Click image below to enlarge.
- Click the Validate Accounting Defaults button to continue
Click image to enlarge.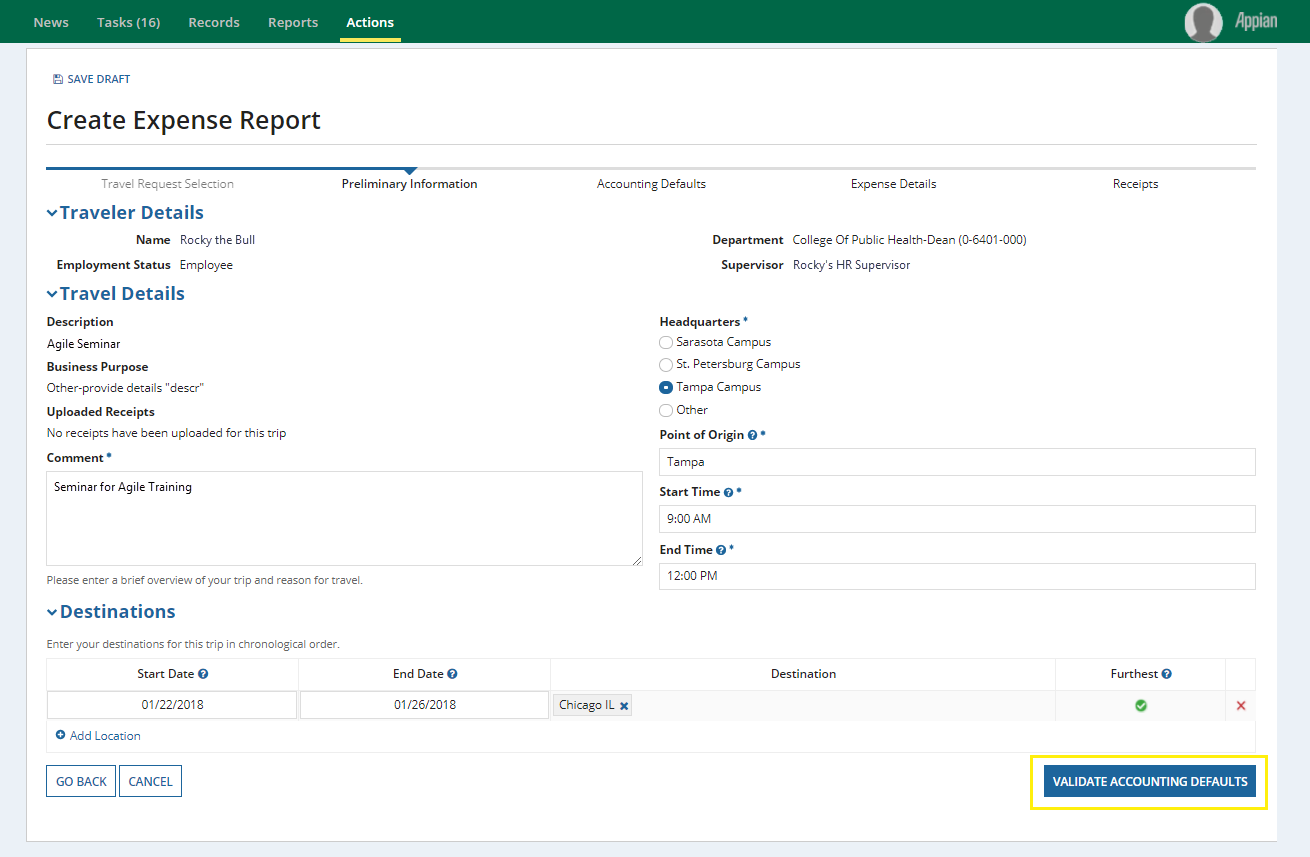
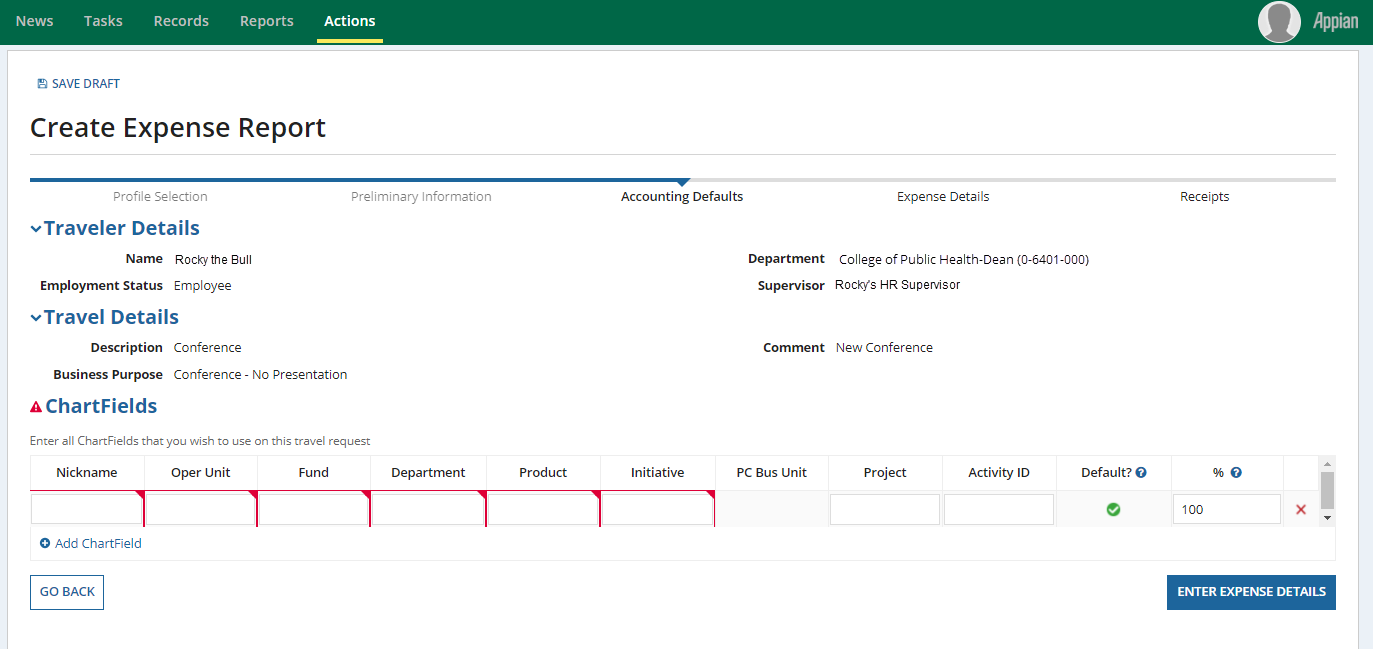
This screen reviews Expense Details being pulled in from the Travel Request. You can make edits to the chartfields or add additional chartfields if necessary. Once all needed chartfields are entered, click the Enter Expense Details button.
Step 3: Expense Report for Mileage/Incidentals Only
- Click the radio button next to the option: Expense Report for Mileage/Incidentals Only and then click Next.
Click image below to enlarge.
Select a Profile
Click image below to enlarge.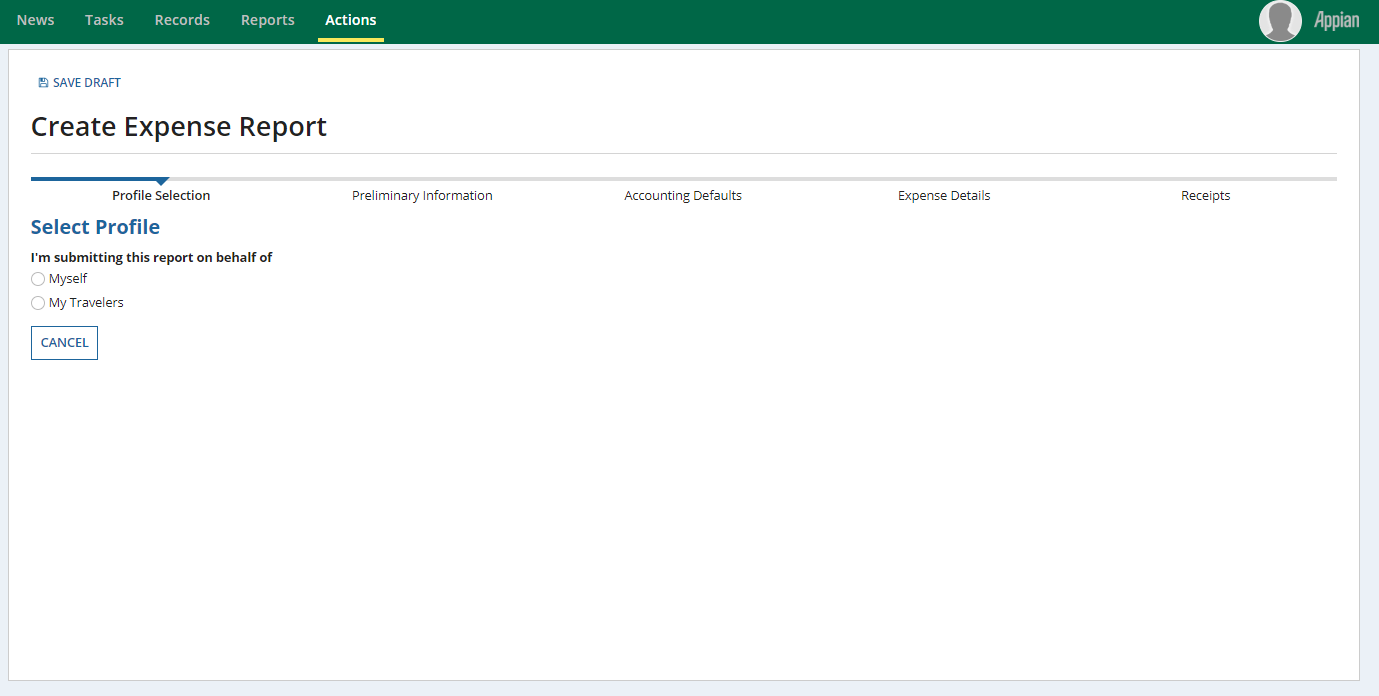
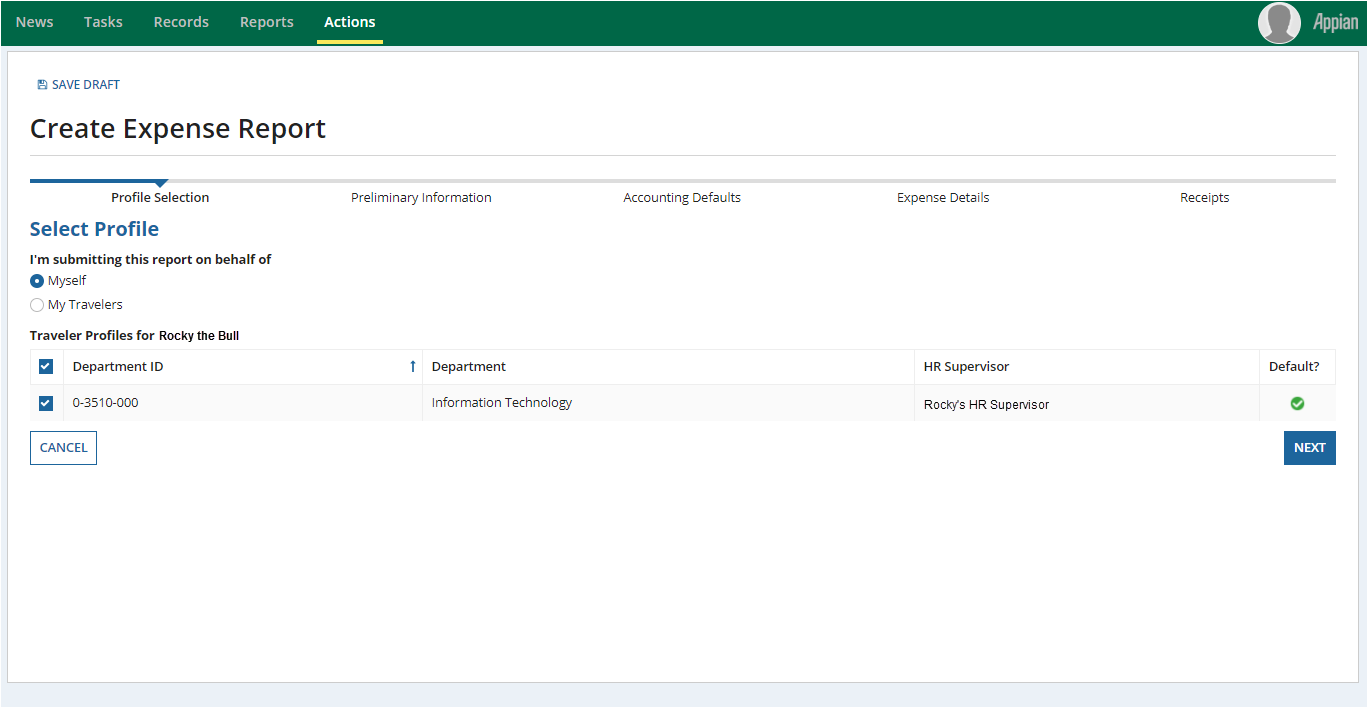
If the check box next to Department ID is not selected or if you have multiple options, click the appropriate check box to select the expense report. Check to make sure the correct supervisor is listed and then click the “Next” button. If the supervisor listed is incorrect, employee travelers should contact HR and non-employee travelers should contact the Travel help desk.
Click image below to enlarge.
Input needed information and click "Enter Accounting Defaults"
Click image below to enlarge.
- Review and make edits to the chartfields or click Add Chartfields if necessary.
Click image to enlarge.
- Once all needed chartfields are entered, click the Enter Expense Details button.
Step 4: Add or Edit Expenses
The expense details will show detailed dollar amounts and the status of the expense.
If creating an Expense Report from a Travel Request, expenses will show here. PCard charges associated with the Travel Request in FAST will also appear first.
To Add an Expense:
- Click the Add New Expense(s) link.
Click image to enlarge.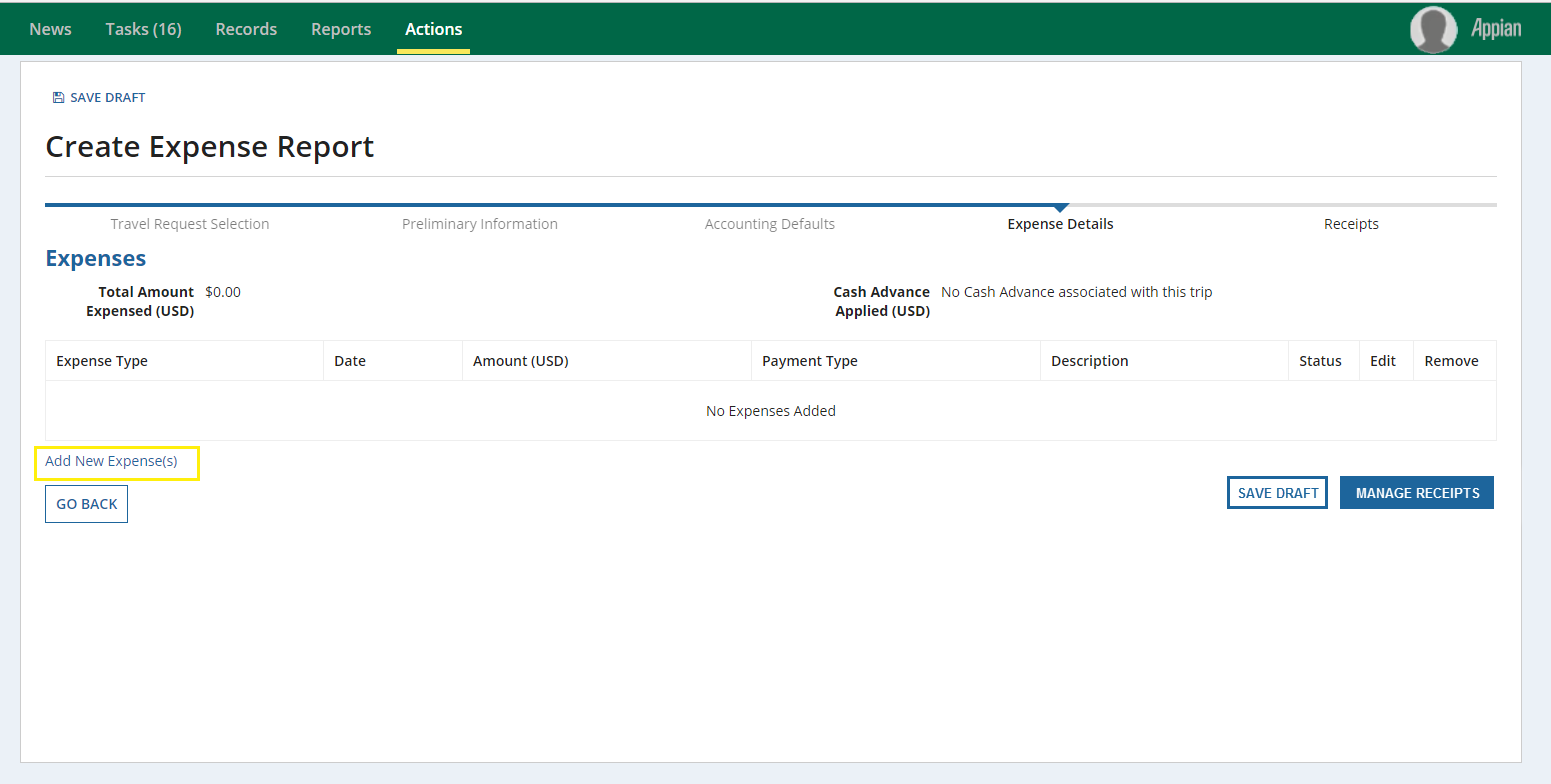
- Select Expense Type
Click image to enlarge.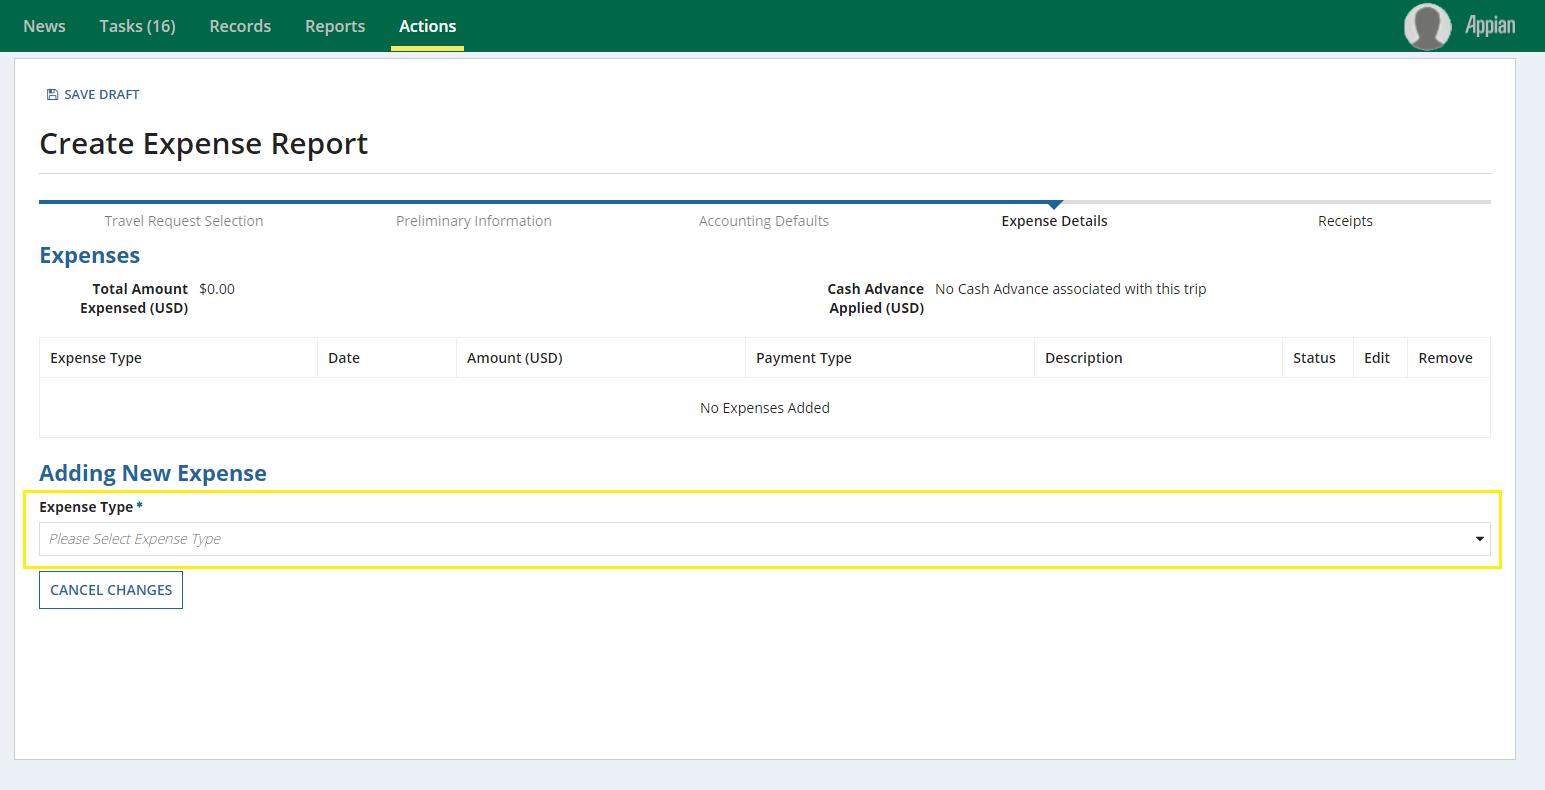
Fill in requested information and click Save Expense
Click image to enlarge.
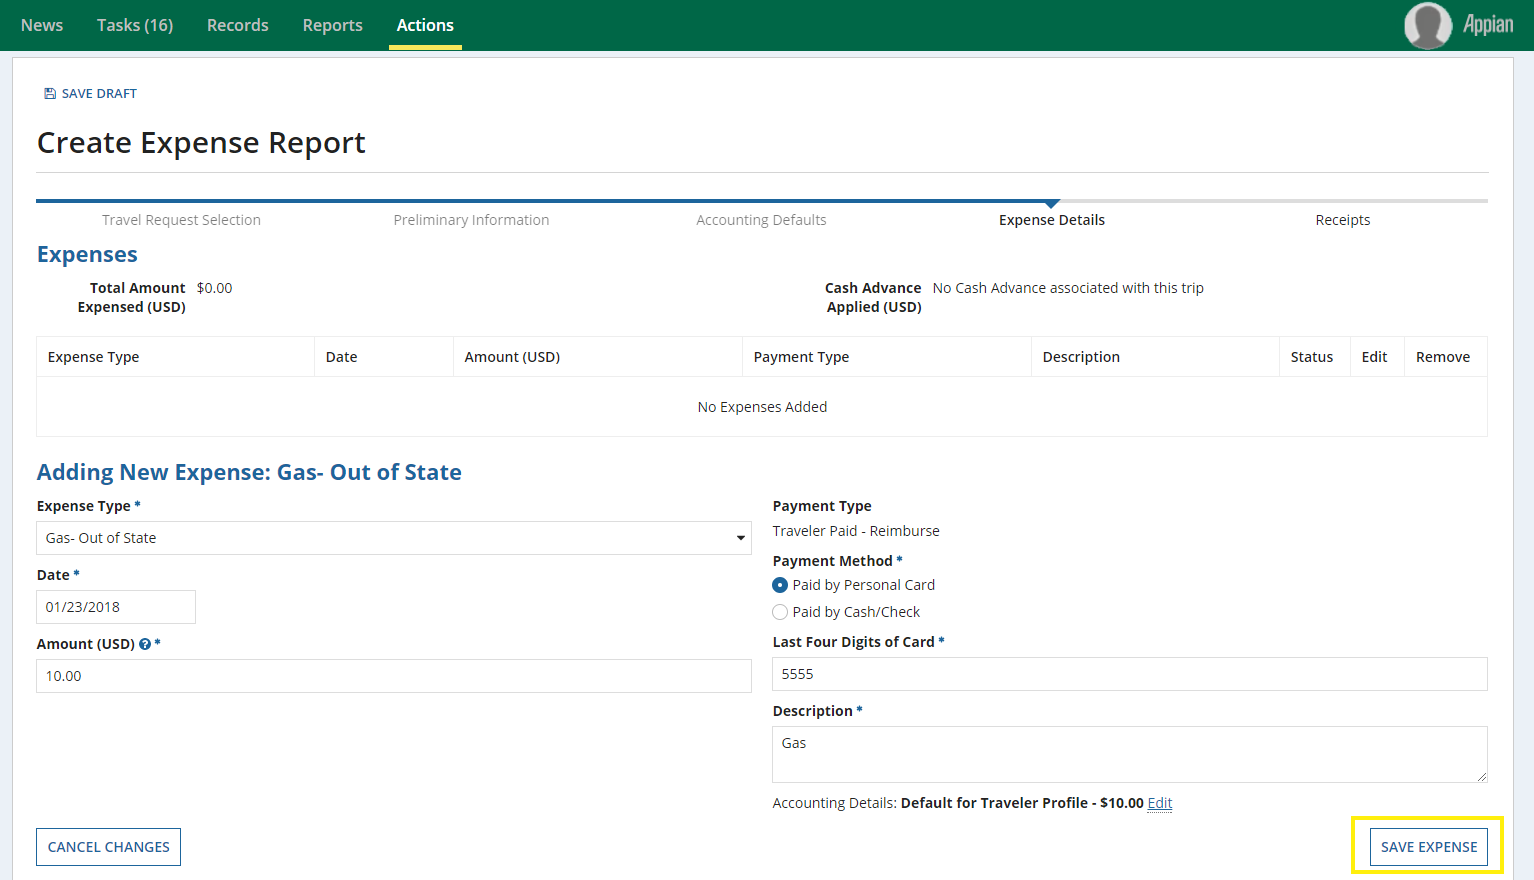
Depending on the Expense type the needed details change. Be prepared to provide the date, amount spent and method used in addition to other inquiries. If this was paid with a personal card, the last 4 digits of the card number will be needed.
To Edit existing expenses:
- Click the edit Pencil next to the status symbol
Click image to enlarge.
Edit the content
Note
To change amounts for existing Accounting Details click 'Edit' next to the amount.
Click image to enlarge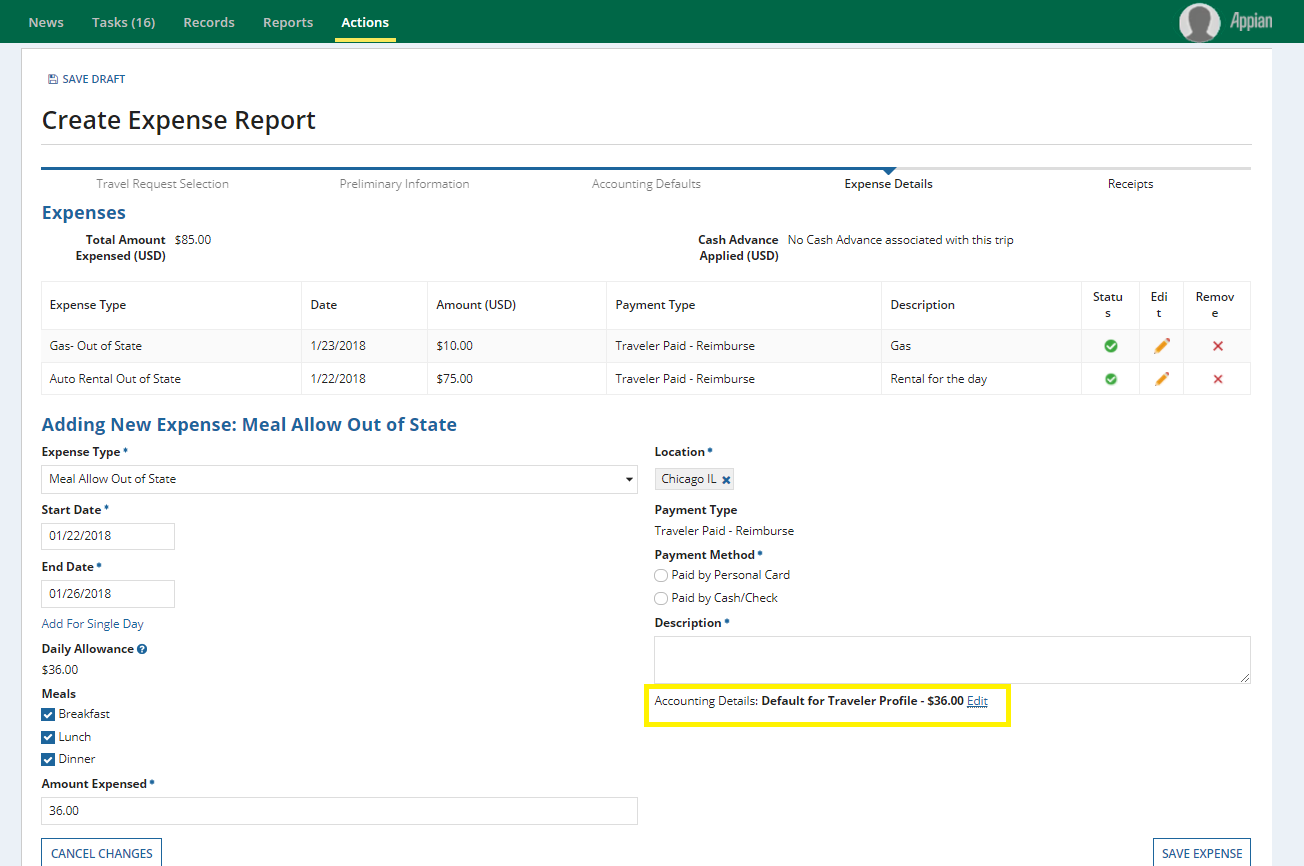
A red status symbol means more information is needed. Each expense type has its own required fields. Please be sure all required fields are filled with green status symbols before continuing.
- Once all expenses have been entered, click Manage Receipts
Click image to enlarge.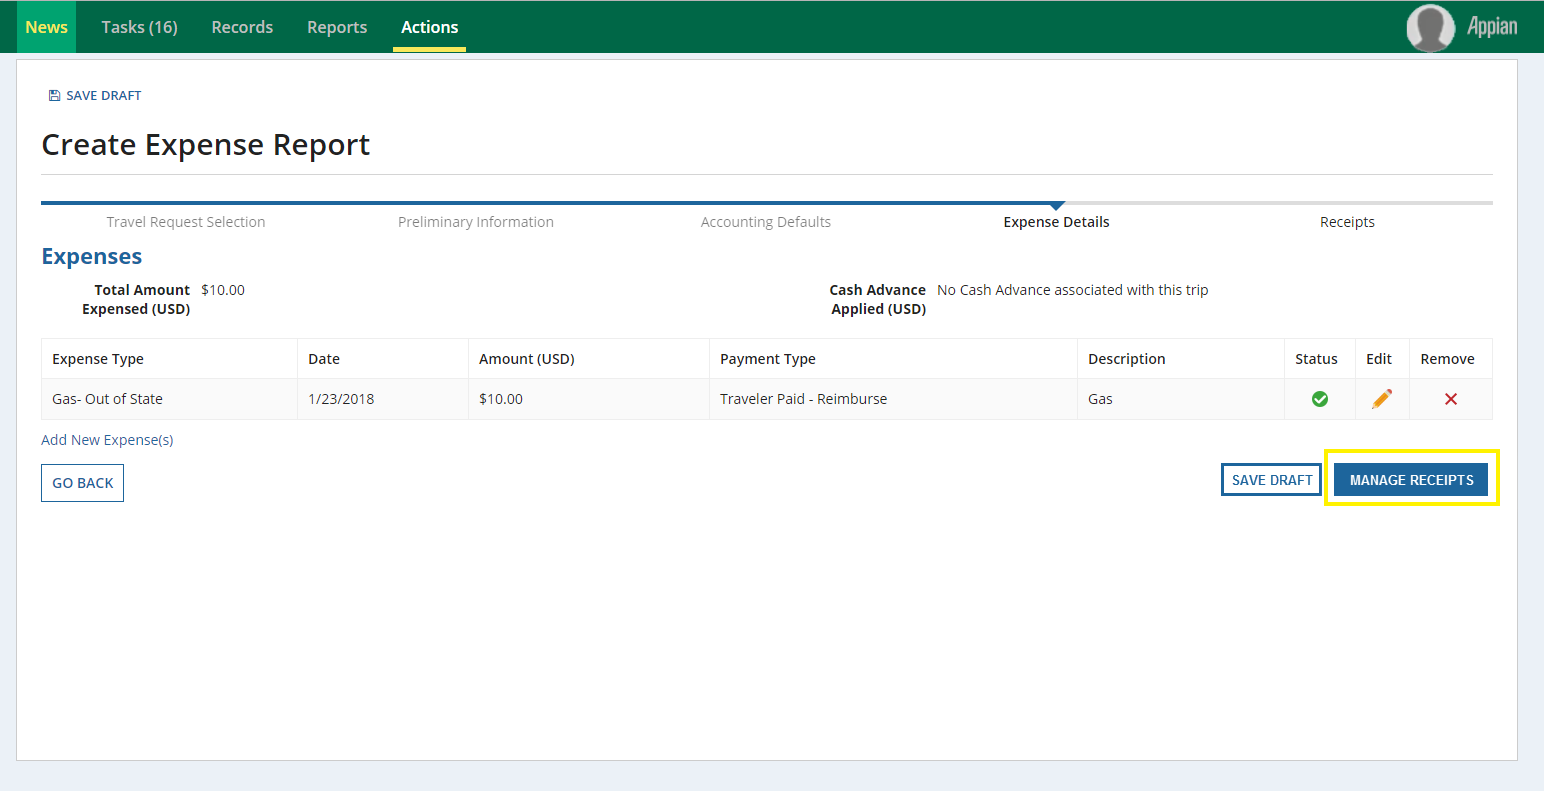
Step 5: Receipts
When all Expenses are marked complete, ensure that all expenses are supported by receipts.
To Manage Receipts:
The system can accept receipts in a PDF. Be sure to compile your receipts in a single PDF for uploading in this section. There needs to be an accompanying receipt for all items claimed as expenses.
- Click on the Upload button
Click image to enlarge.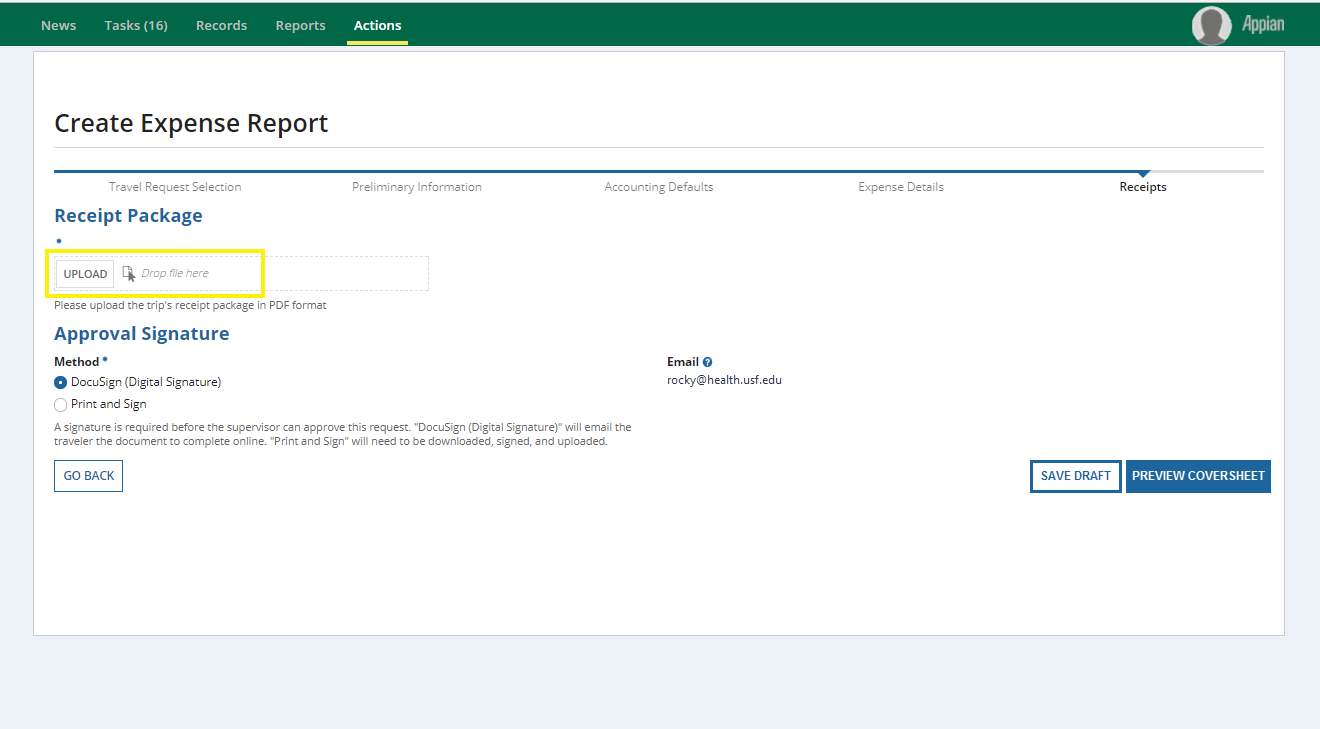
- Find your saved receipt PDF
- Select and accept the PDF
- Confirm it has been uploaded (The system lists the name of the file and file size when complete.)
Click image to enlarge.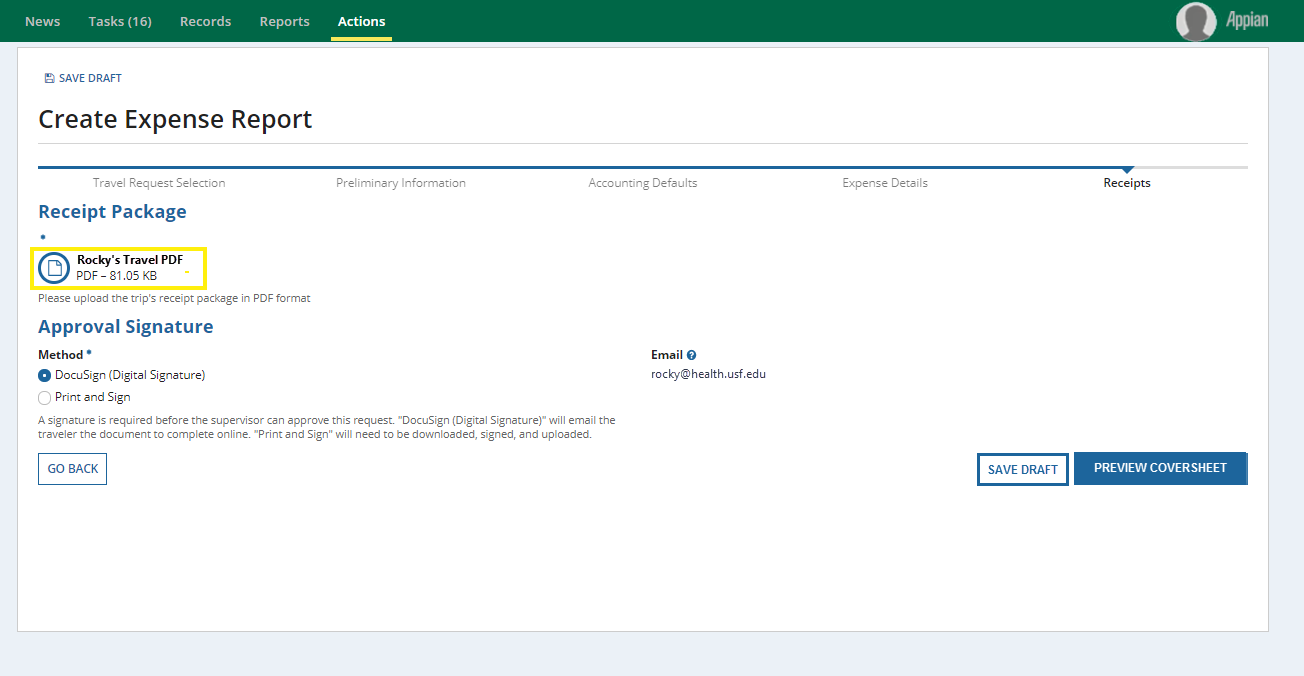
Step 6: Approval Signatures
Select a method of approval signature.
- Print and Sign
- DocuSign
Click image to enlarge.

DocuSign is only for USF employees and students and requires a USF NetID and Password to sign in.
DocuSign
To create a DocuSign Signature Approval:
- Select DocuSign (Digital Signature) by clicking the radio button in front of that option
Click Preview Coversheet
- Download and review the coversheet
Click image to enlarge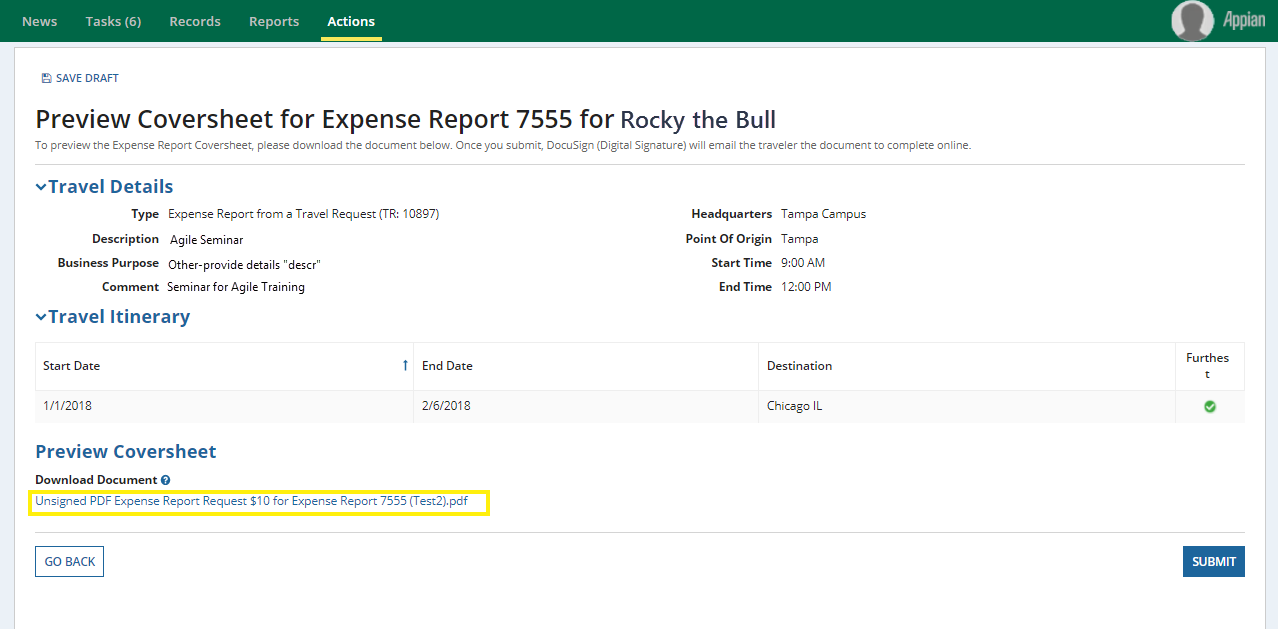
If there are no issues with the required information, you will now be able to click Submit.
- A message appears asking if you are sure you are ready to submit the Expense Report. Click yes.
- Traveler should check email for a DocuSign message; If you do not receive an email, check your spam/junk folder or click here to log in.
- Click Review Document link in the email
- Follow DocuSign instructions
It may take up to 35 minutes after DocuSign signature for the request to show up as signed in Archivum. To check the status of the signature process, or the status of the overall Expense Report, go to the “Request History” section of My Travel Dashboard.
Print and Sign
Print and Sign can be used by anyone but is the only option for non-USF travelers.
To create a Print and Sign Signature Approval:
- Select Print and Sign by clicking the radio button in front of that option
- Download the document
Click image to enlarge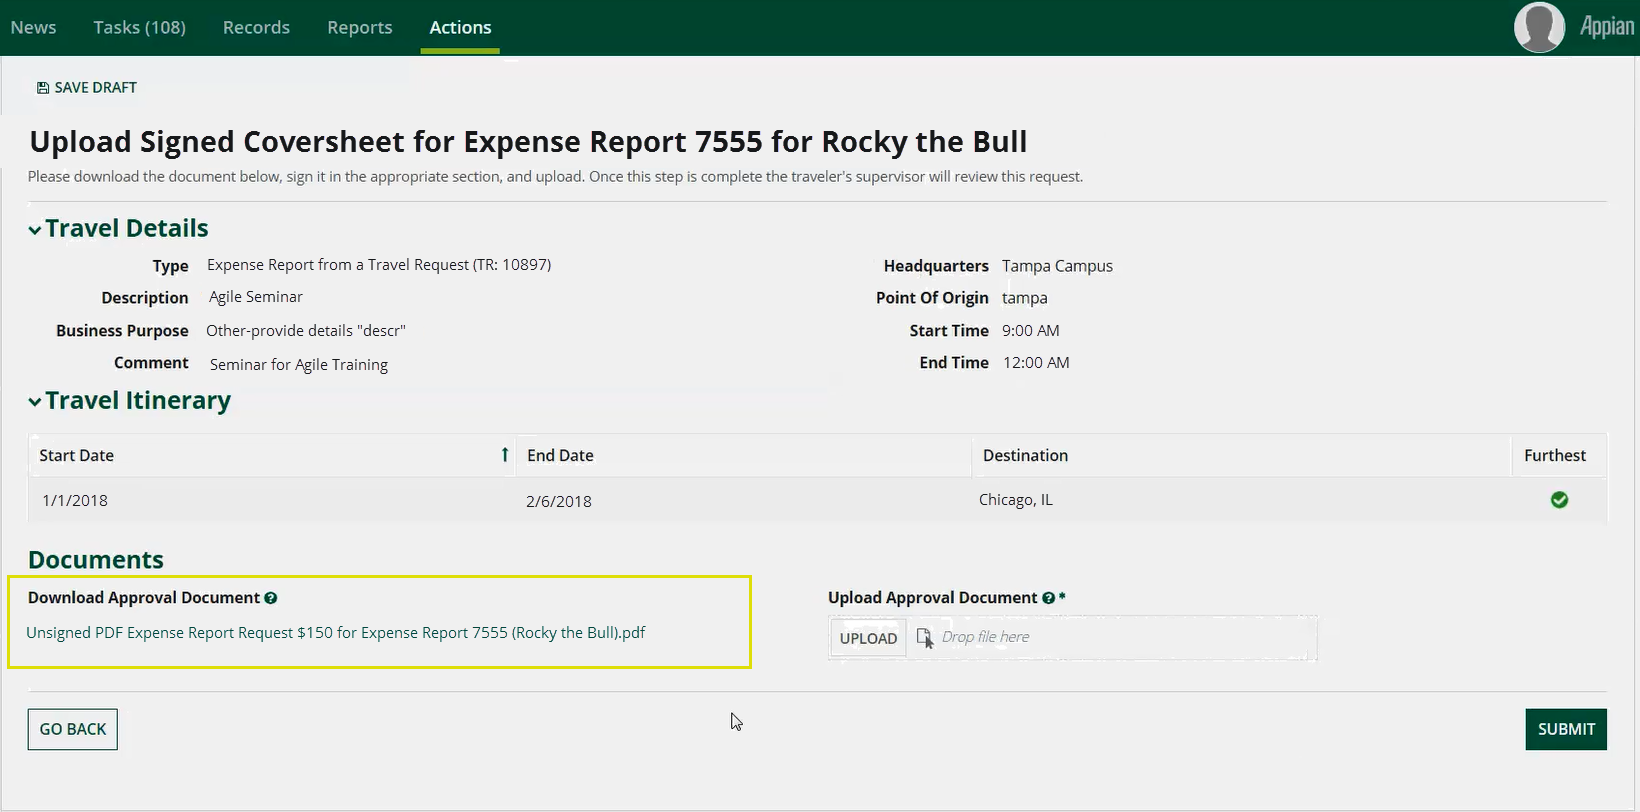
- Print the document
Sign the document
- Scan the document
- Return to Archivum and upload the signed document using the Approval Document button
Want to view the status of your Expense Report? Go to Actions, then click My Travel Dashboard.
Step 7: Completion of Your Travel Expense Report
After selecting Submit on the Preview Coversheet Page, a pop-up window will display notifying you that the Expense Report has been submitted.
To view the status of your Expense Report and other related Travel actions such as Travel Requests and Cash Advances:
- Go to the Reports tab at the top of the screen, then My Travel Dashboard.
- Scroll down to Travel Information to see statuses and updates. Select the link, Expense Reports, to view related information.
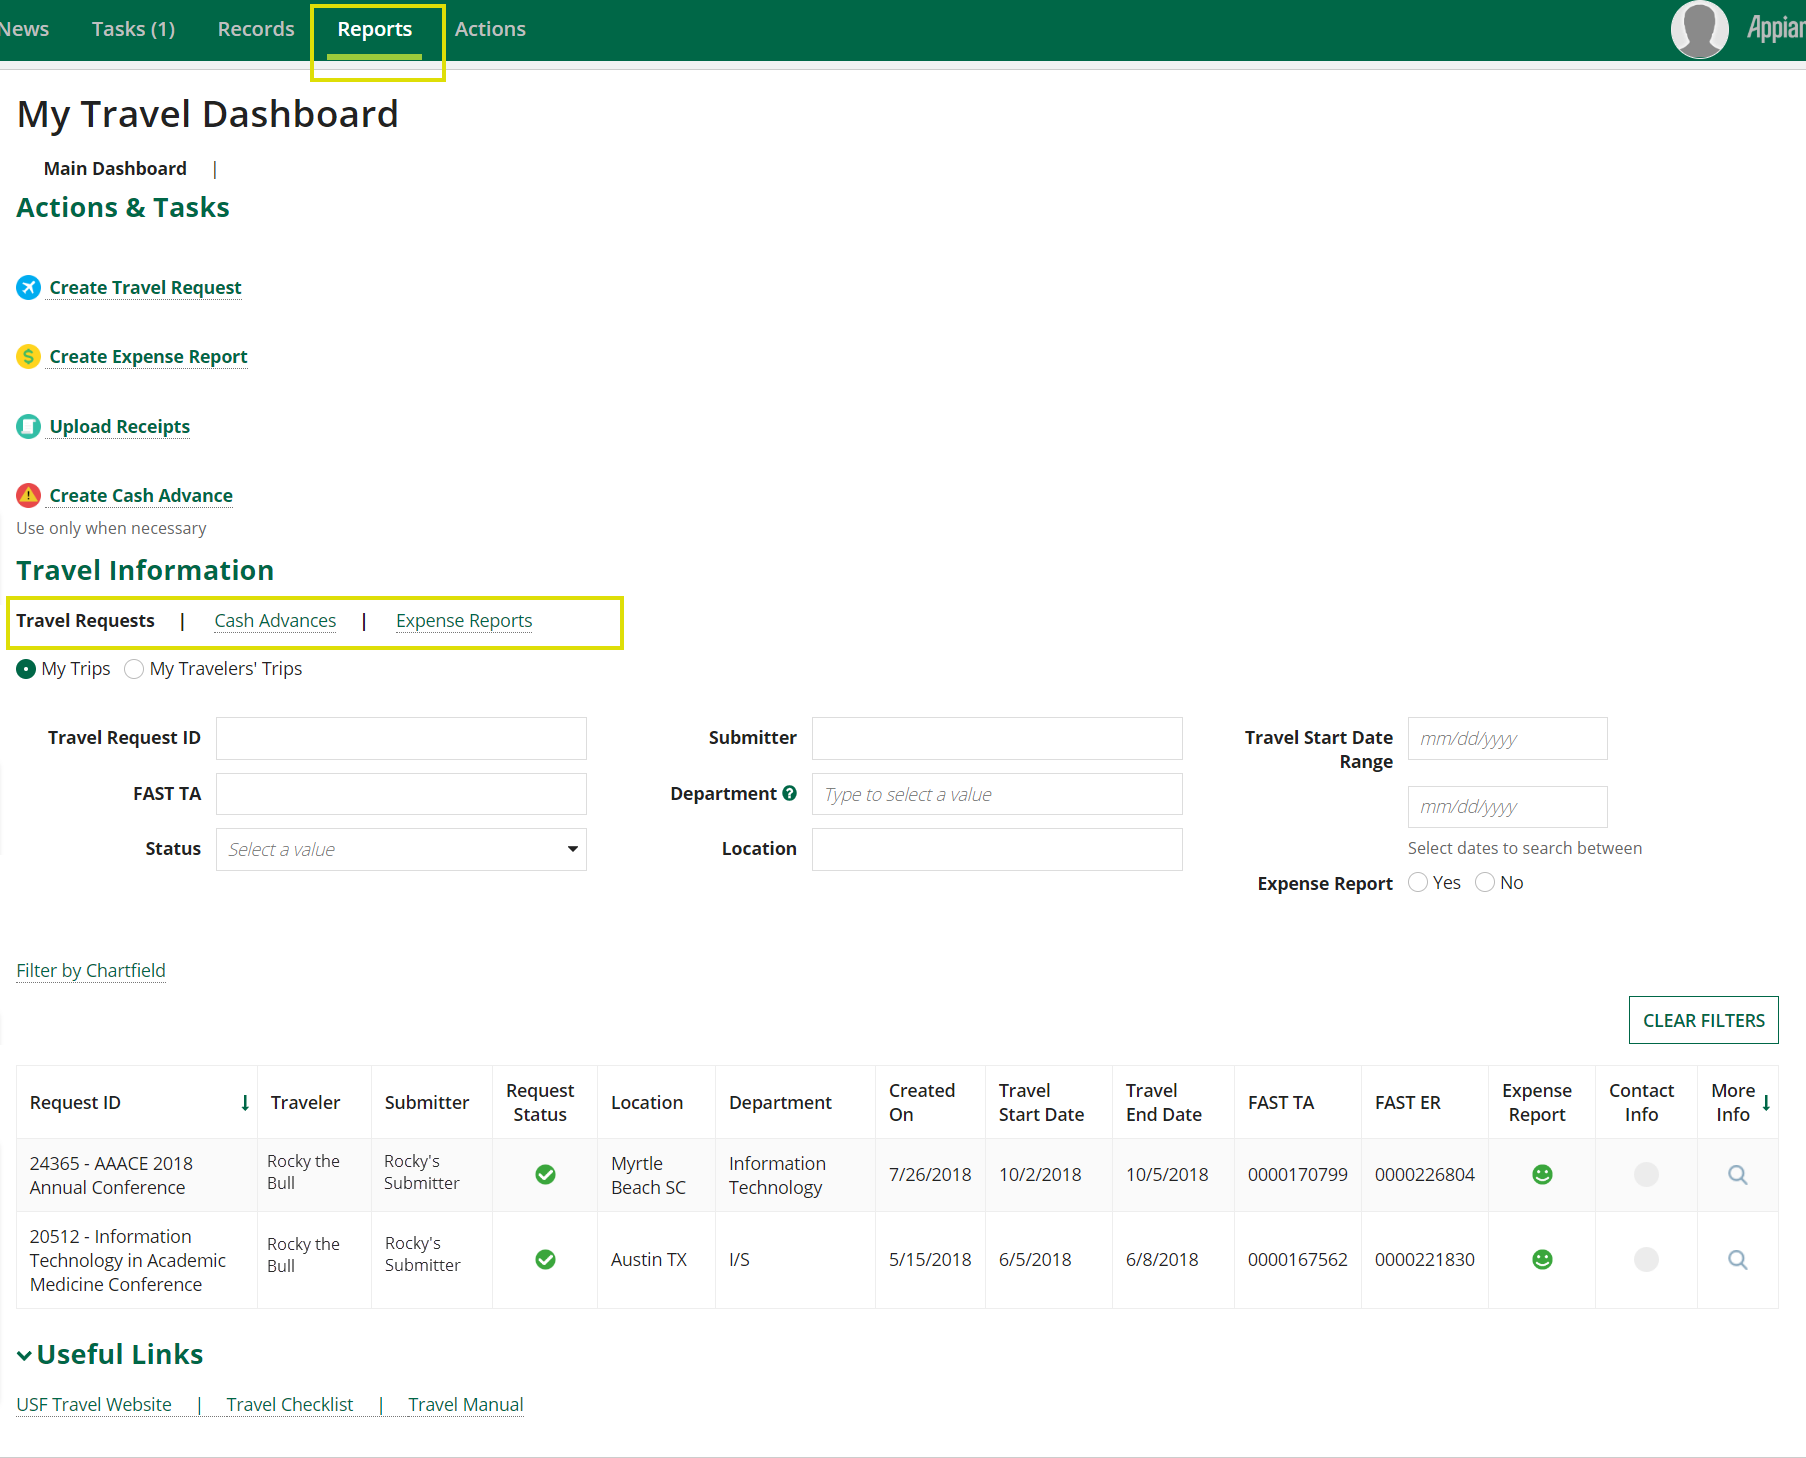
Click image to enlarge.
To log out of Archivum:
- Click the profile icon on the top right hand of the screen

- Click Sign Out
If you have any questions, please contact travelhelp@usf.edu.