Attaching Box Document to DocuSign
Overview
The following are steps to be taken when a document needs to have a signature attached using DocuSign.
This process can only be done within the website https://usf.account.box.com/
For the following instructions to work, the file that is requiring a signature needs to be saved to a location in a Box account.
- From https://usf.account.box.com/, open (or create) the document that needs a DocuSign signature.
- Select the DocuSign icon located on the right.
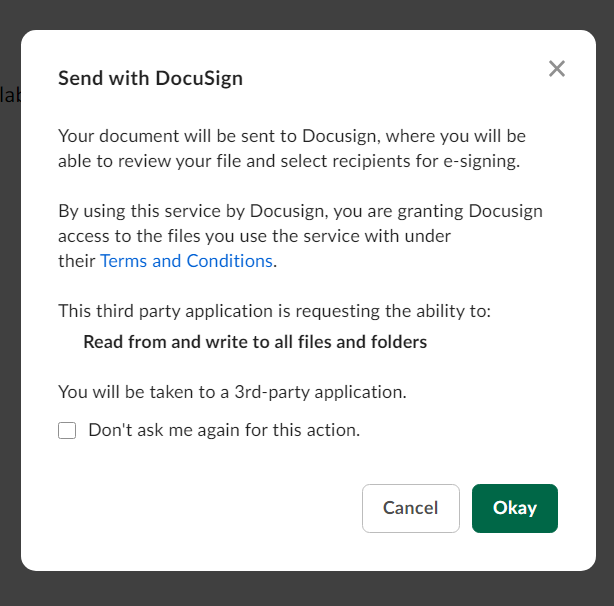
- If presented with the following screen, place a check in the 'Don't ask me...' box if you wish and select Okay.
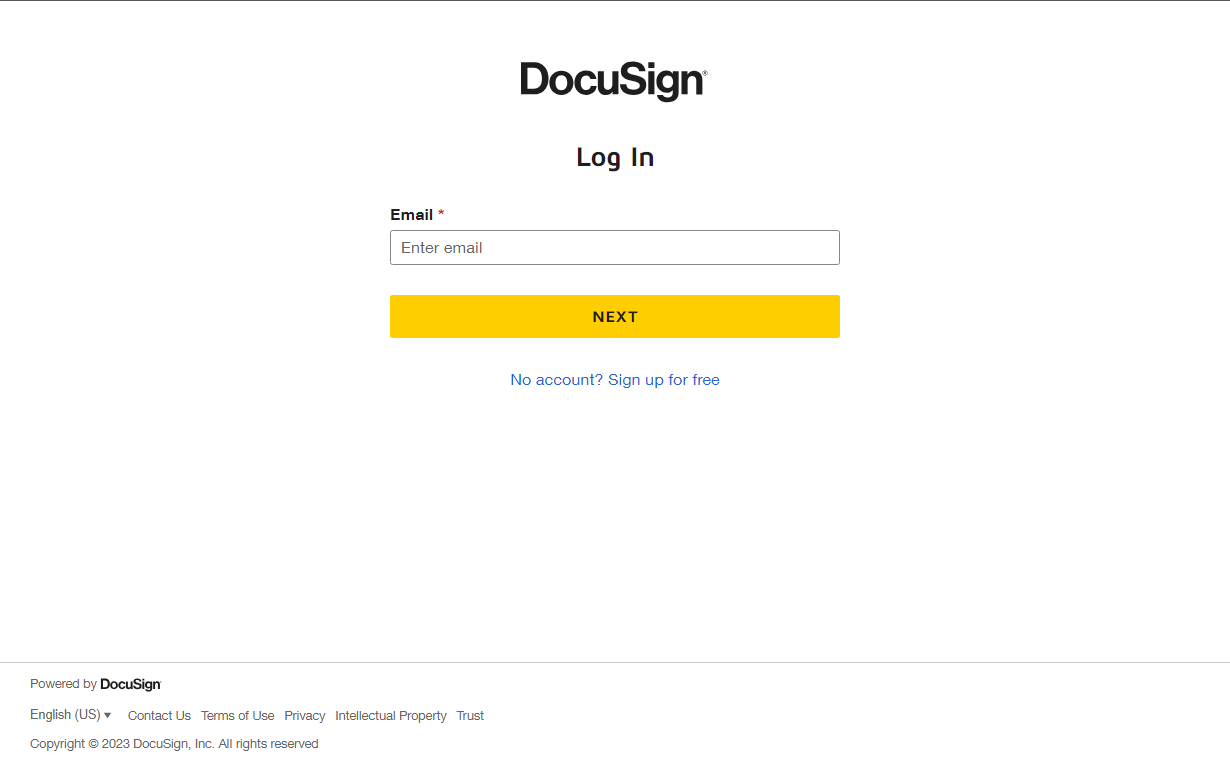
- A new login window will open to sign into DocuSign.
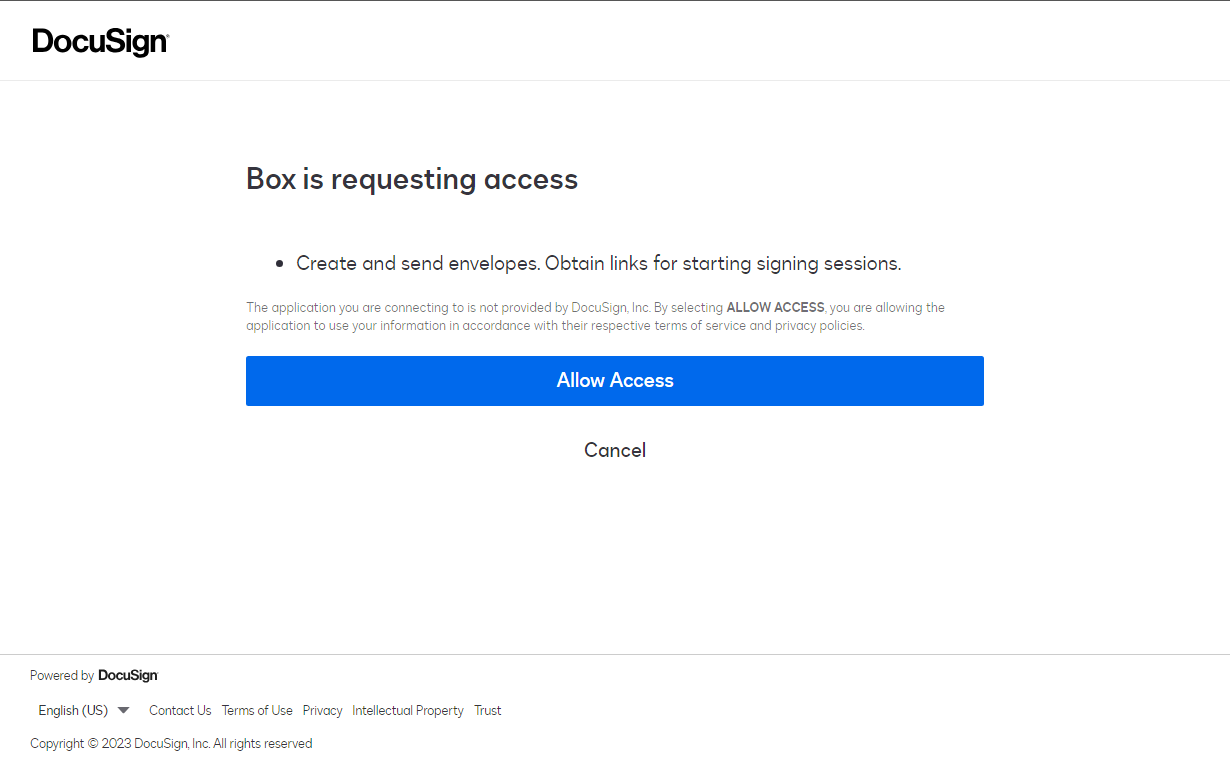
- Log in and select Allow Access.
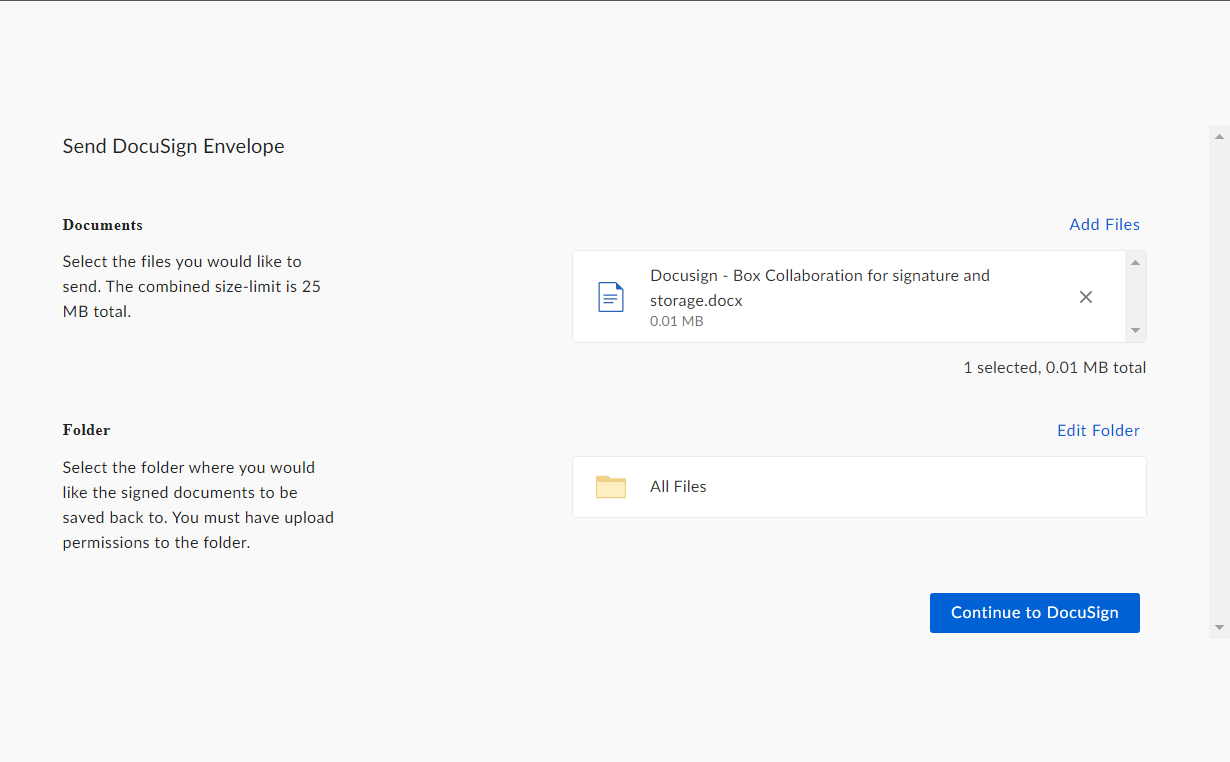
- Verify the file that you wish to send out for signature and if necessary, select 'Add Files' to attach more documents. Once complete, select Continue to DocuSign.
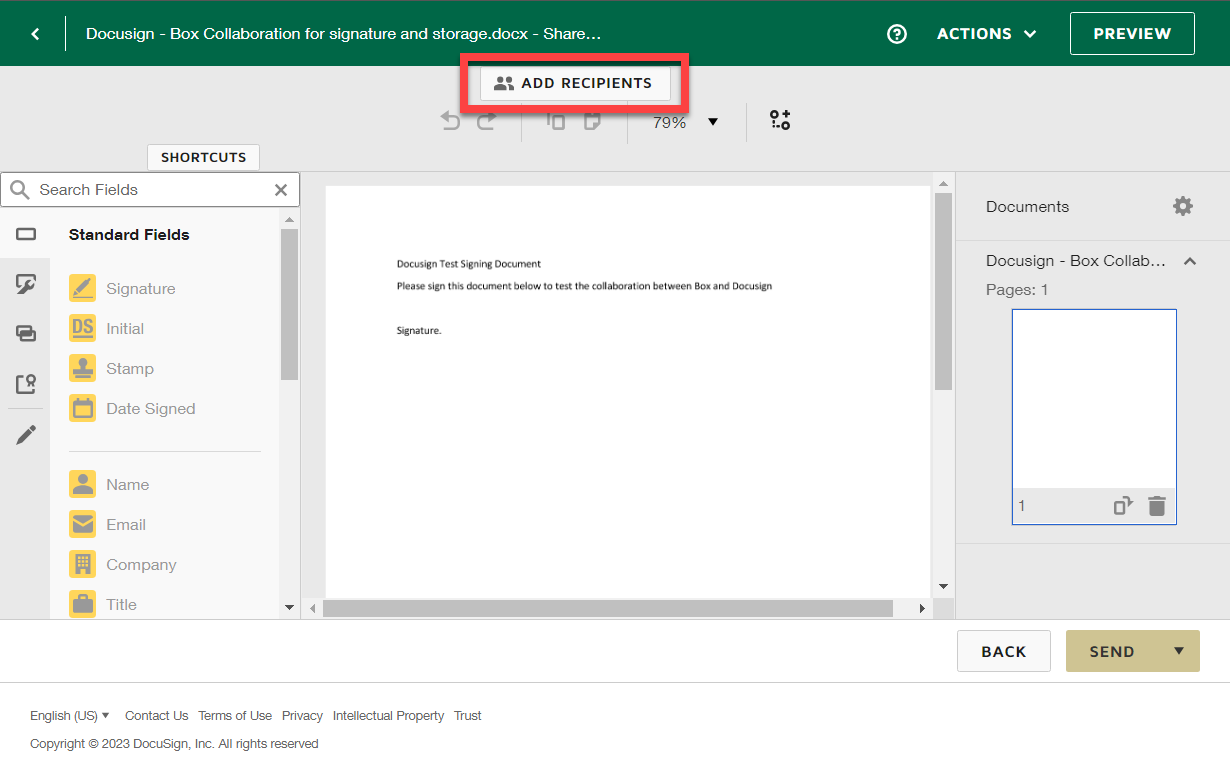
- In the next window, select Add Recipients.
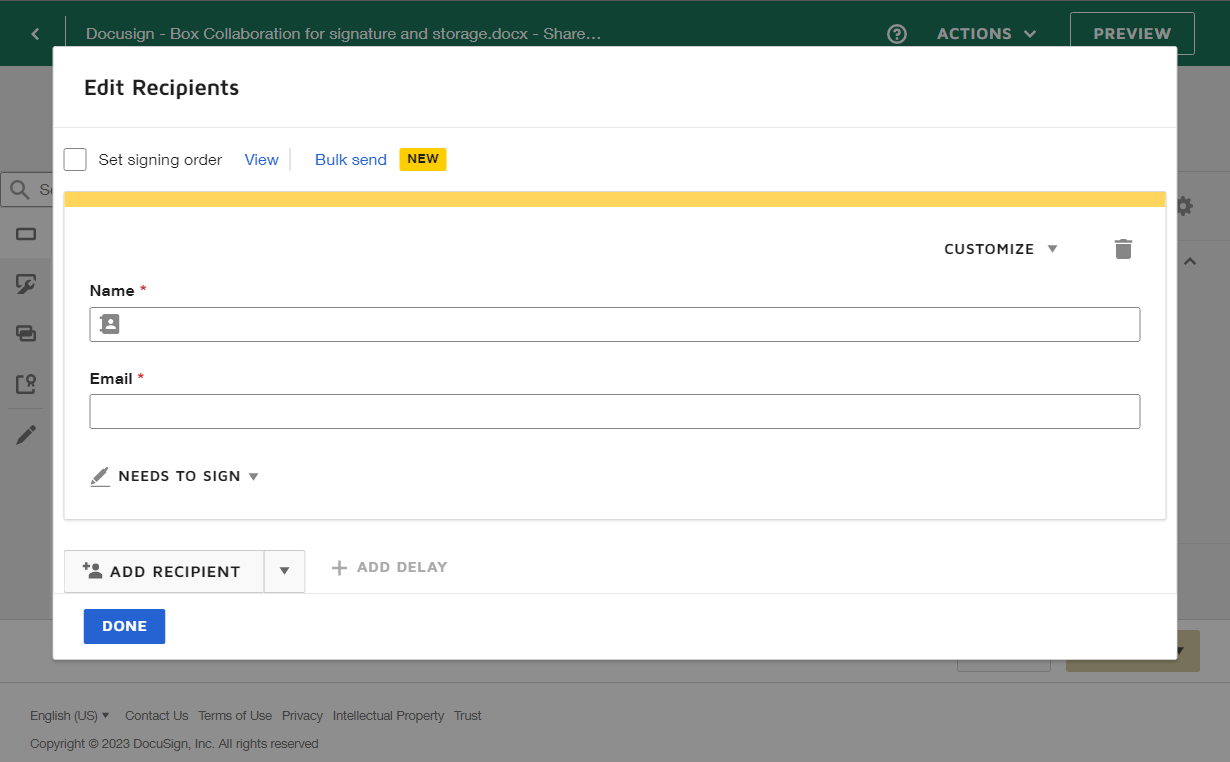
- Enter the information as needed (name, email address, choose if they need to sign or view, etc...). If necessary, select Add Recipient to add additional signers or viewers. When you have added all necessary recipients, select Done.
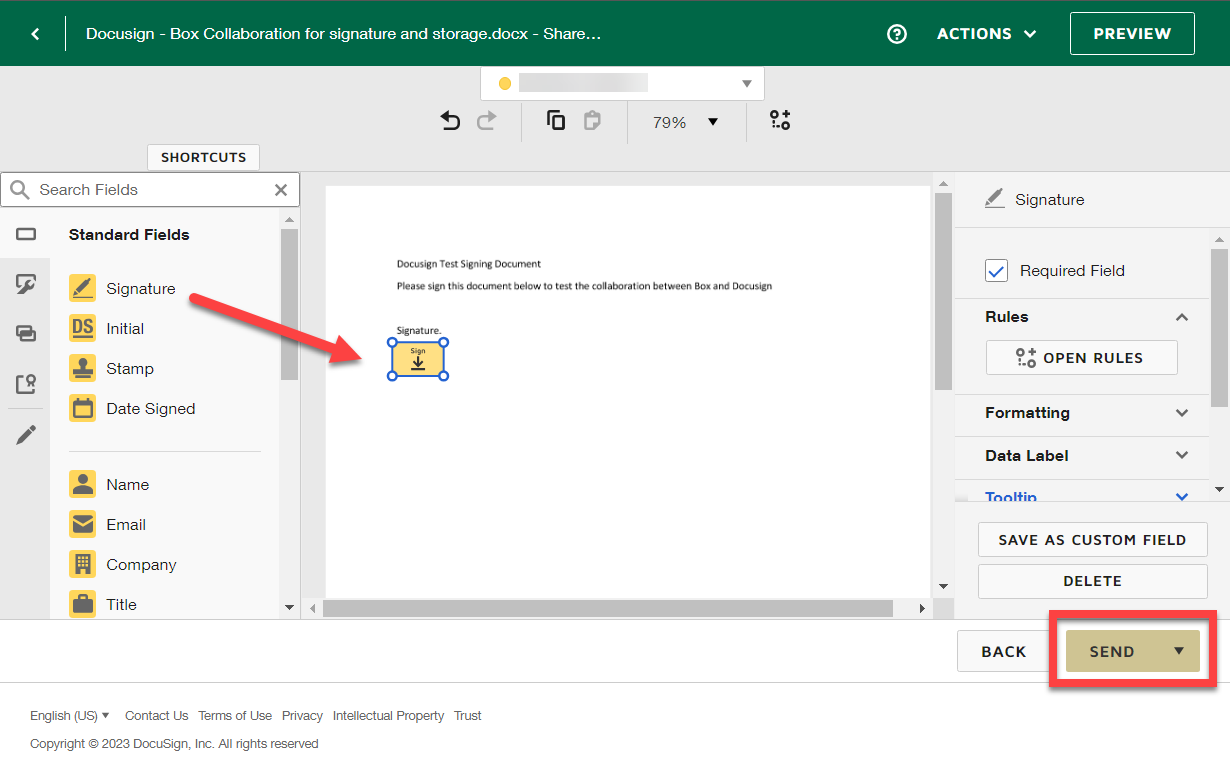
- Next, click and drag the Signature field from the left column and place it where you wish to have the signature appear in the document. If multiple signatures are required, a name and drop-down menu will be present in the upper left. Use the drop-down to switch between names/signatures. When all signatures are in place, select Send.
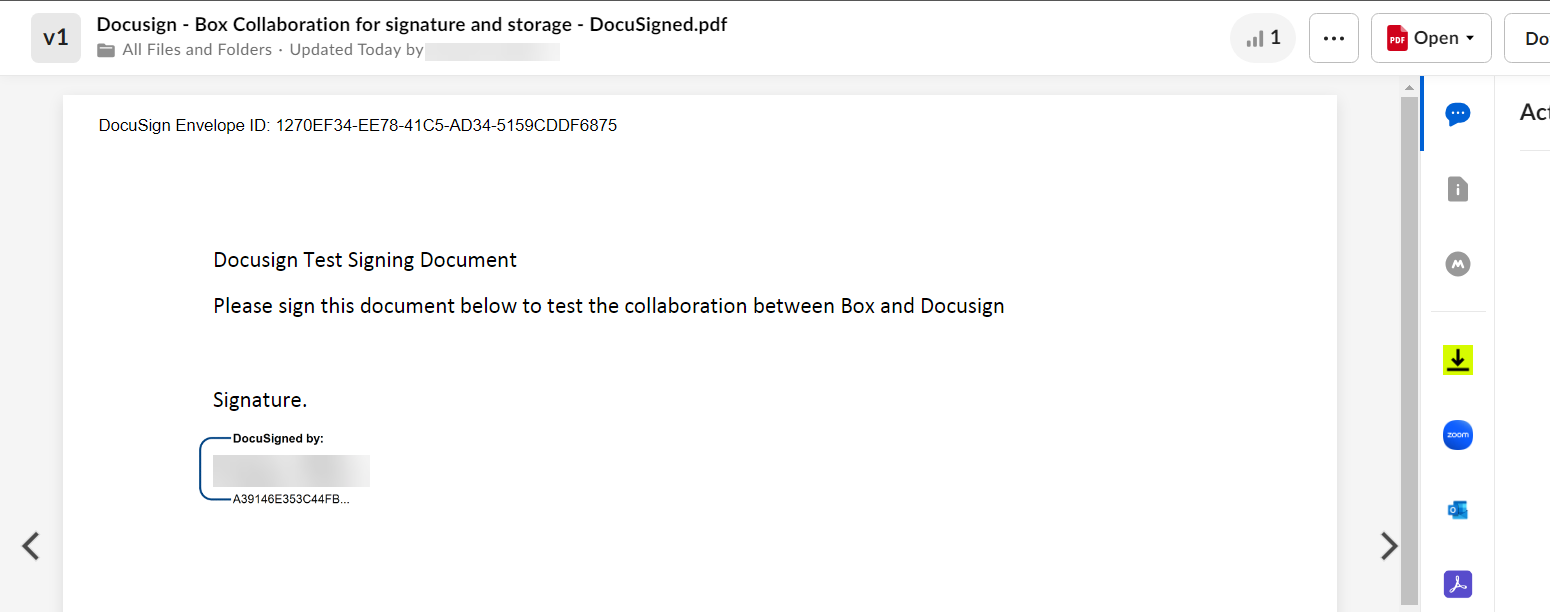
- Once all recipients have signed the DocuSign file, a PDF file with the signature(s) is created and saved in the same location your original Box file was located.
If you are unable to solve your issue with this knowledge base article, please contact the USF IT Service Desk by using Chat at itchat.usf.edu, calling (813) 974-HELP (4357) or emailing help@usf.edu.
If you find any errors or omissions in any knowledge base article, please contact and inform the USF IT Service Desk by calling (813) 974-HELP (4357) or emailing help@usf.edu.

