Adding and Removing Email Accounts in Outlook
- Kimberly Adkins
- Patrick Kluge (Deactivated)
- Jessica Marshall
Overview
This article provides guidance on adding and removing emails from Outlook.
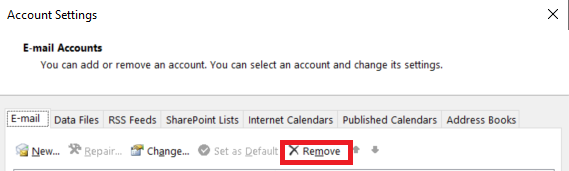
Within Outlook you can remove an email by clicking on File > Account Settings. If this is your first time starting Outlook, you should be prompted to enter an email account to automatically get set up. Otherwise, to add an account, please follow the steps below. You can also add an email through the Mail app located in Control Panel. Please see the steps below. Removing emails in Outlook
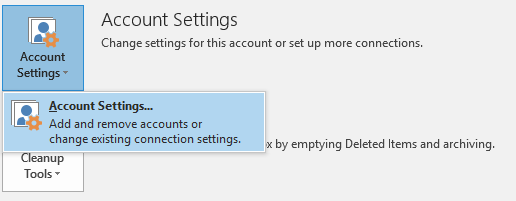
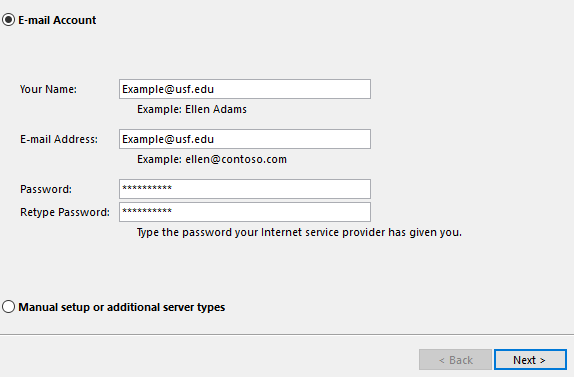
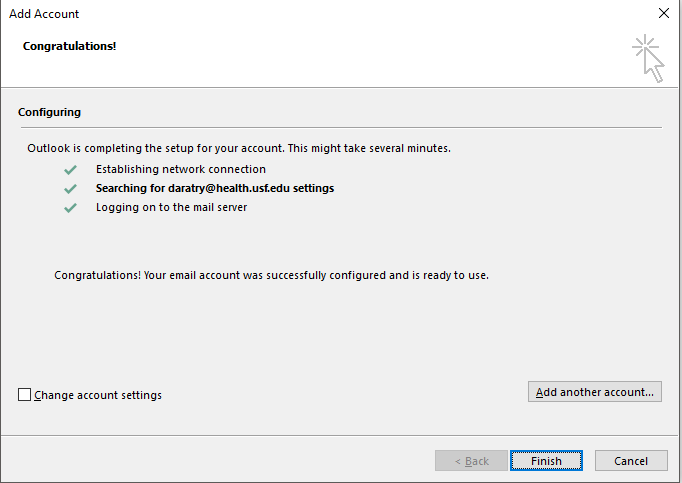
Adding an email within Outlook

Adding email within Mail Setup app in Windows


If you are unable to solve your issue with this knowledge base article, please contact the USF IT Service Desk by using Chat at itchat.usf.edu, calling (813) 974-HELP (4357) or emailing help@usf.edu. If you find any errors or omissions in any knowledge base article, please contact and inform the USF IT Service Desk by calling (813) 974-HELP (4357) or emailing help@usf.edu.